 Skip to content
If you are selling physical goods in your store you need to have an option to send them to your customers. This is associated with some additional options that need to be configured in your WooCommerce store.
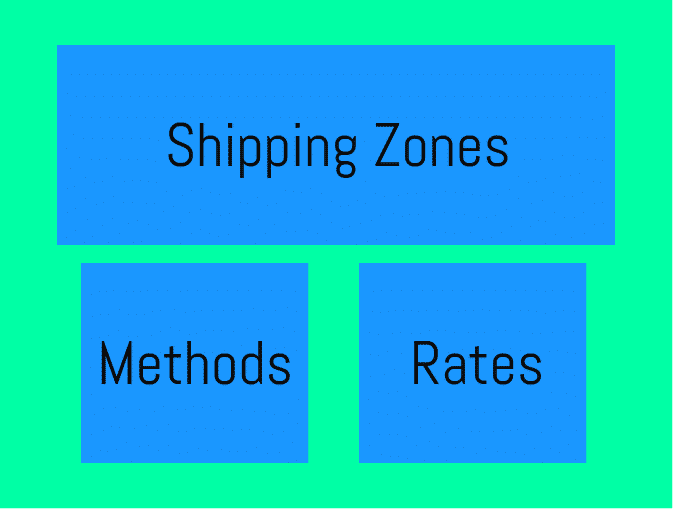
For a better understanding of the shipping zones, we will explain their structure. They represent a plurality in which you can add several shipping methods and rates:
To make it even clearer we will make a sample setting for a Shipping Zone for the United States, including all ZIP codes in the range from 92010 to 99000. Here you can add Specific countries, States, wildcard ZIP codes, ZIP code ranges.
The first subsection is Shipping Zones – here you can add such for the countries which you offer shipping to and assign a shipping method to them. To visualize the process and explain it we will create a new Shipping zone:
– First click on the Add shipping zone button:
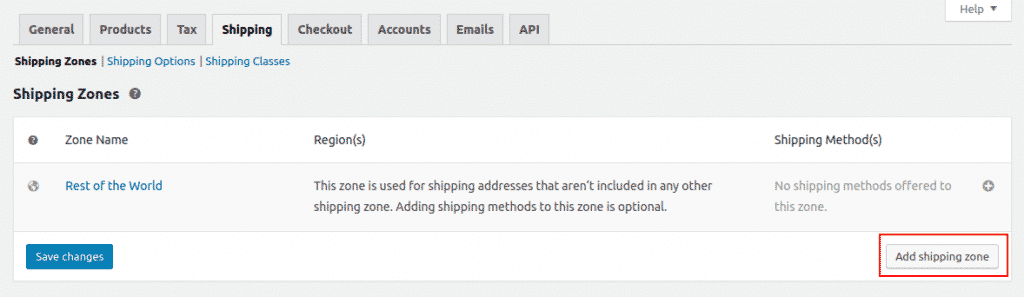
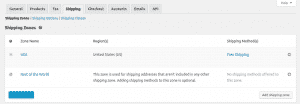
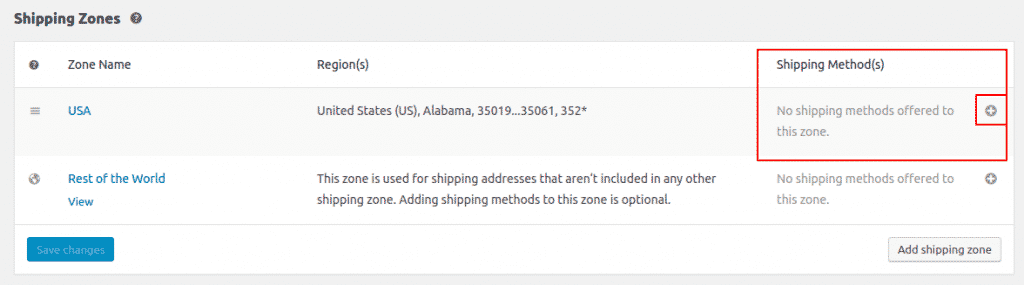
As you can see there is a shipping zone called Rest of the World which is created by default and it covers all the countries that are not included to your custom Shipping Zones.
– Next you need to add the Zone name and specify the region(s):
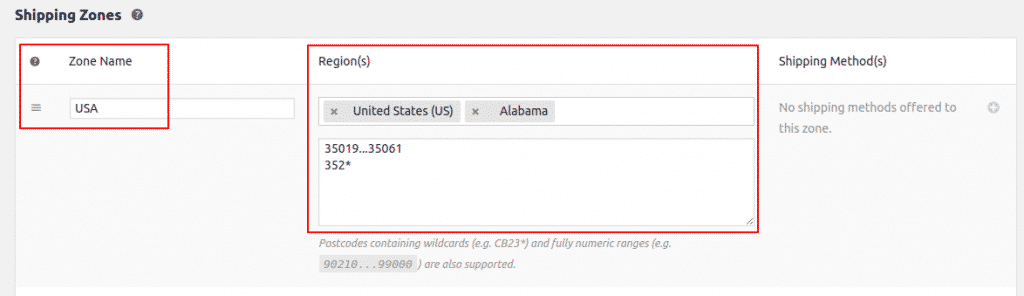
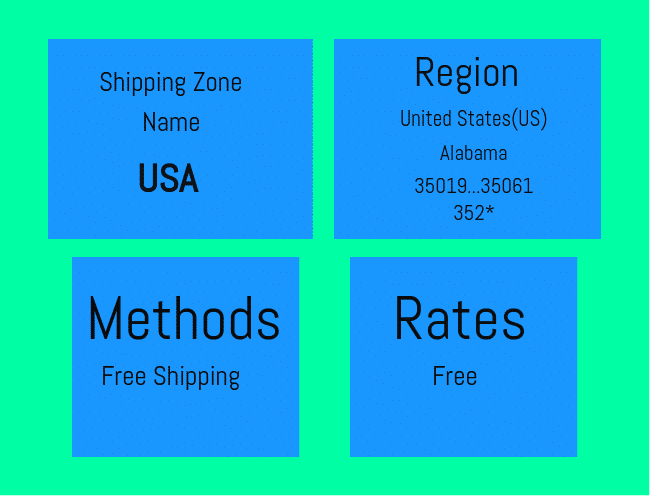
In our case we have called the Shipping Zone USA and added the United States as a region. To specify the exact region for which this Shipping Zone will be applicable we have added the state of Alabama as the only one for it and also we have added the 35019…35061 and 352* ZIP code filtering. In this case this Shipping Zone will be applicable for all cities located in Alabama, United States of America which ZIP codes are in the 35019…35061 range and these which ZIP code starts with 352.
Now save the changes you have made!
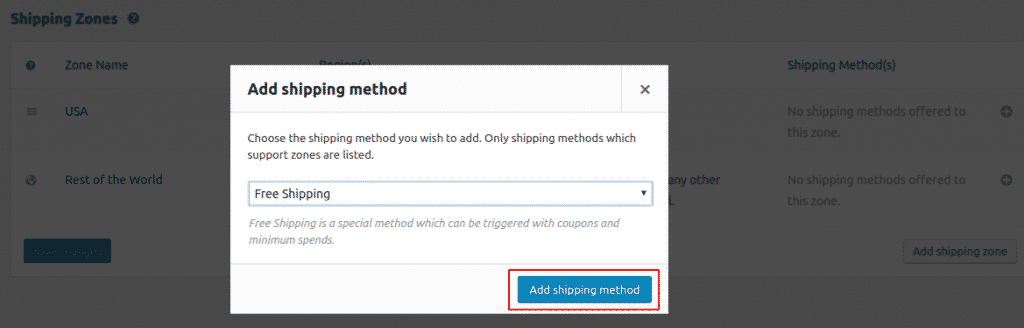
– The next step is to add a Shipping Method. To do that click on the + sign under Shipping Method(s):
In our case we will set Free Shipping for this region:
Here is a diagram representing the shipping zone we have created:
The second subsection of the Shipping settings menu is Shipping Options:
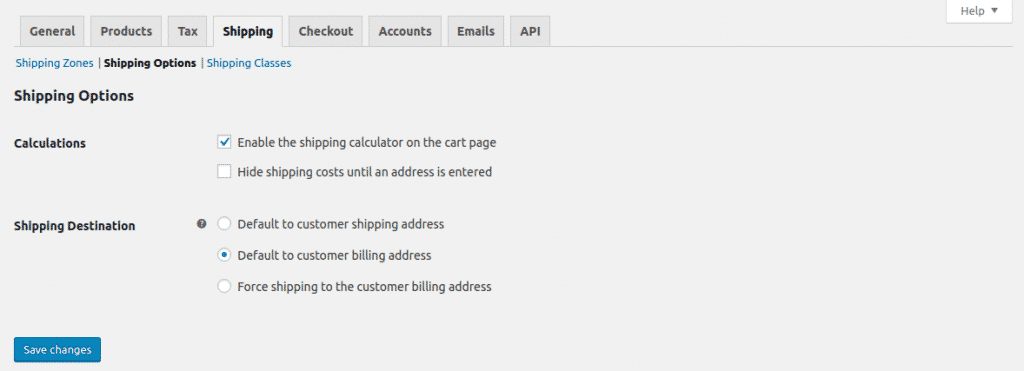
Here you can configure the Calculations and Shipping Destination for your store.
Under Calculations there are two options:.
– Enable the shipping calculator on the cart page – this will display a shipping calculator for your customers on the cart page and they will be able to review it before checkout
– Hide shipping costs until an address is entered – enabling this will ensure that the shipping costs are the correct ones for the exact address entered
Under Shipping Destination you can choose from three available options:
– Default to customer shipping address – this will use both your customers’ Shipping and Billing details.
– Default to customer Billing address – this will use your customers’ Billing details with an option to enter additional shipping address.
– Force shipping to the customer billing address – this will use your customers’ Billing details with no option to add different address.
The last subsection here is Shipping Classes:
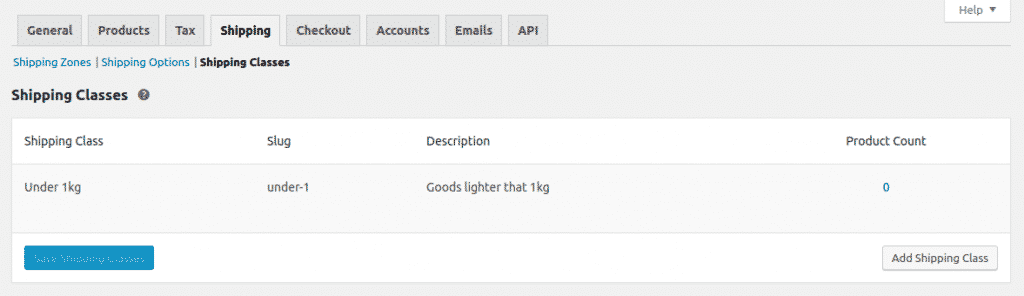
This feature allows you to add a shipping class for your products. Here is an example:
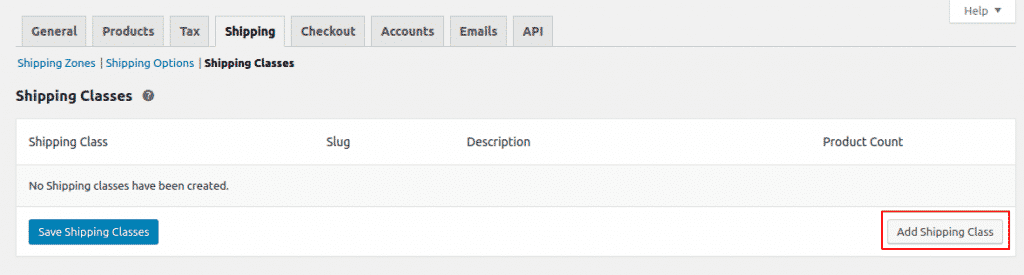
– First click on the Add Shipping Class button:
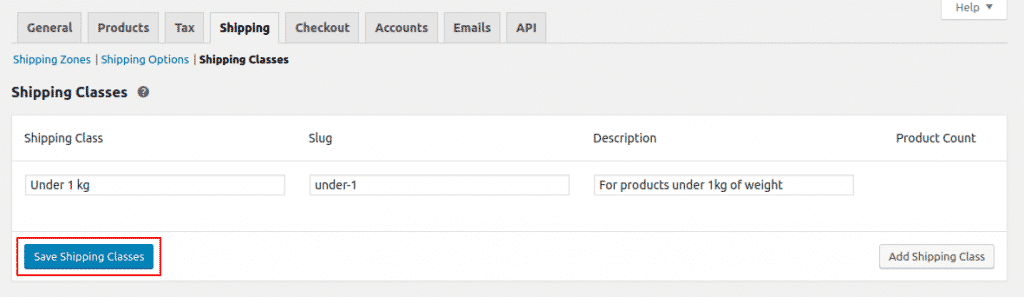
– Next you need to add a Shipping Class Name, Slug and description:
These are all the things you should take care of when configuring the shipping options of your WooCommerce shop.