 Skip to content
We prepared this detailed tutorial so we could explain in details the Settings tab of Woocommerce.
You can access the tab by navigating to the admin area of your website → Woocommerce → Settings: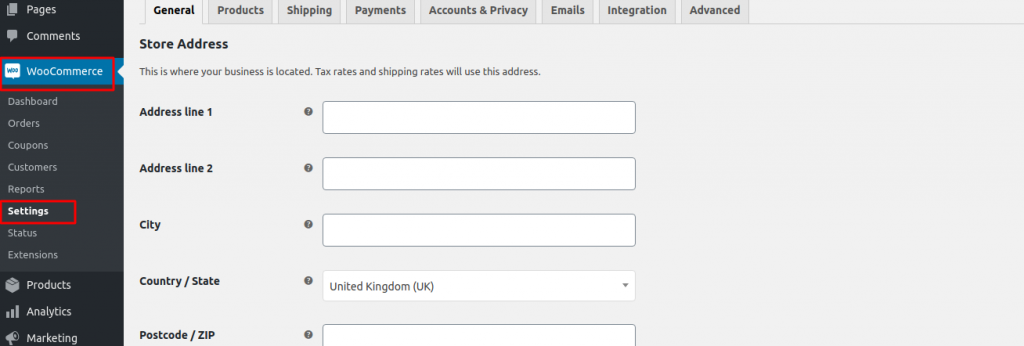
The first page of the settings is the General tab where you will find the following options:
Store Address
If you haven’t filled this at the installation of the plugin, now you have to fill the address of your store, the city and country in which your store resides as well as the postcode. By filling this you will define the tax rates and customers location
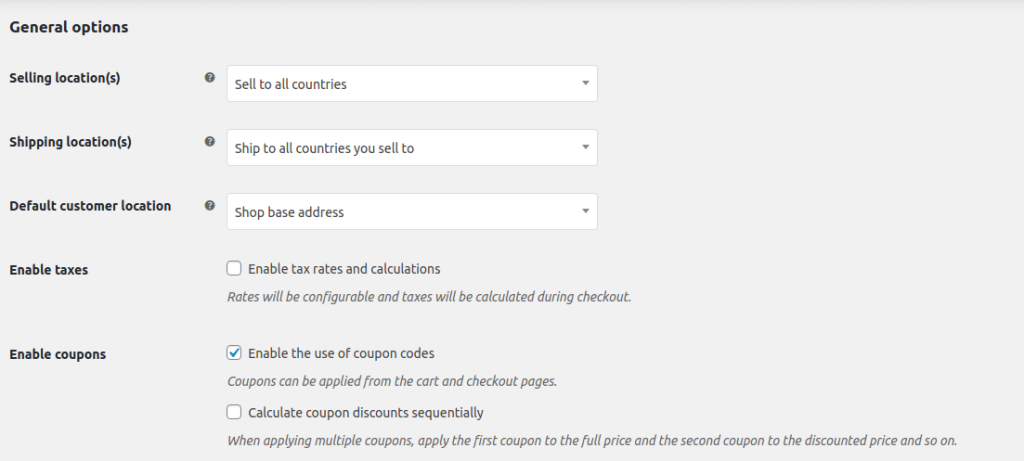
General options
- Selling Location(s): You can choose if you wish to sell in one country or more and in which would it be
- Shipping location(s): In this field you can choose which countries that you are selling you will be shipping. This option can be disabled as well.
- Default Customer address: This option helps you decide how the customer location is determined. It has four options:
No location by default: This option does not set any location and the customers have to type a postcode so the shipping can be calculated
Shop base address: with this option the system would consider the location of the customer is the same as the one of your shop
Geolocate: This is generating their current location and calculates the shipping
Geolocate(with page caching support): THe options works the same way as the previous one, but it is recommended when you have any caching plugins installed on your website
- Enable taxes: You can choose to enable or disable the taxes on you website. However, keep in mind that by disabling them, the tax settings page will be disabled as well.
- Enable coupons: You can choose to enable or disable coupons on your store
Currency option
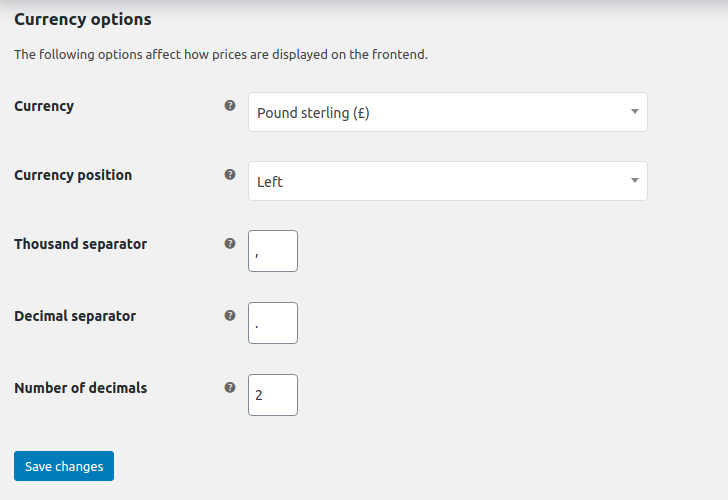
- Currency: you can choose one currency which will be the default on for your store
- Currency position: You have the option to choose the position of the currency from the dropdown menu
- Thousand separator: Choose the symbol that will separate the thousand. For example a dot or a coma: 1.500 or 1,500
- Decimal separator: Choose the symbol that will separate the ecimal. For example a dot or a coma: 150,00 or 150.00
- Number of decimals: You can choose how many symbols to be displayed to the right after the decimal: 150.00 or 150
After all of the above are filles you can click on the “Save changes” button and proceed with the next tab: Products
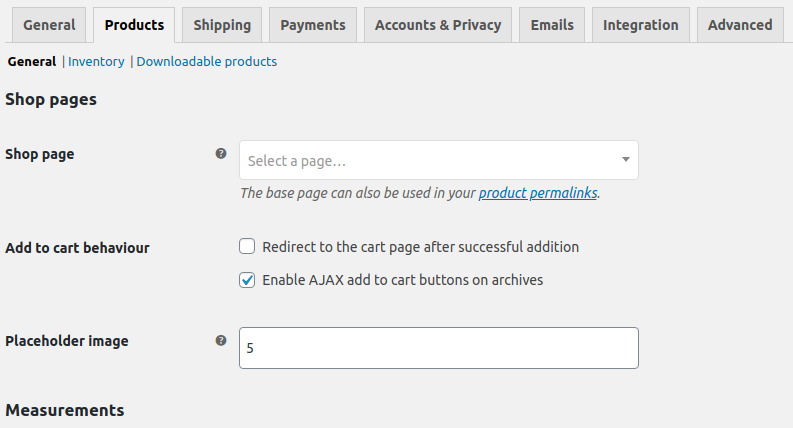
- Shop page: From the drop down menu choose the page which will be the store page
- Add to cart behavior: With the first option the system will redirect the customers to the cart after they decide to purchase something. The second one will leave them on the same page and only add the product to the cart
- Placeholder image: On this option you can set a default image to be shown when no others are available for a product.
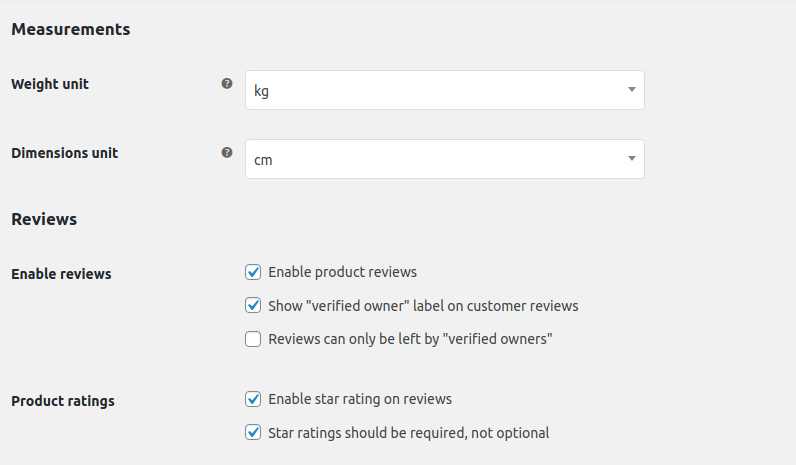
The next step is Measurements. The first thing is to choose the units for weight and dimension. The next two fields you should choose what is the best for your store.
After that you can proceed with the “Inventory” tab on the same page
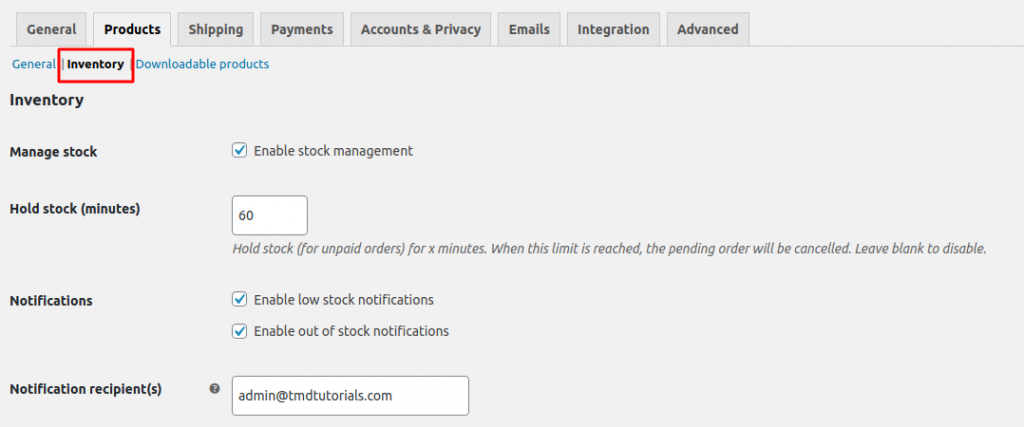
When you enable the Manage stock option, below you can set the following settings on your store:
- Hold Stock: you can set how long would an order stay unpaid before the application cancel it
- Notification recipient: the email address on which you would like to receive notifications
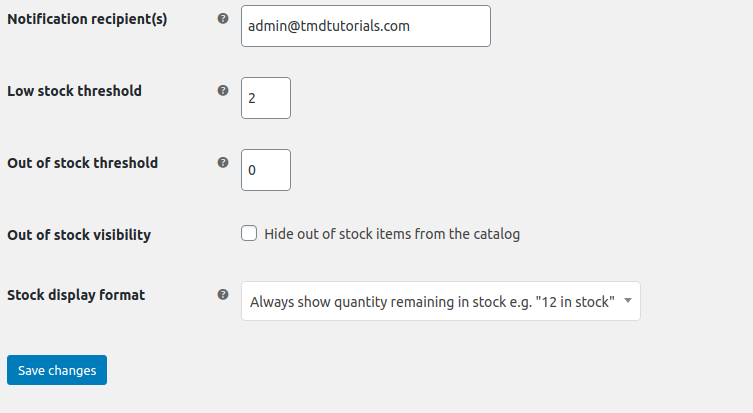
- Low stock threshold: you can enter after what number of products left the application will trigger a low stock notification
- Out of stock threshold: you can enter after what number of products left the application will trigger a out of stock notification
- Out of stock visibility: you can decide if out of stock products will be shown on the store or not
- Stock display format
The next chapter is for downloadable products:
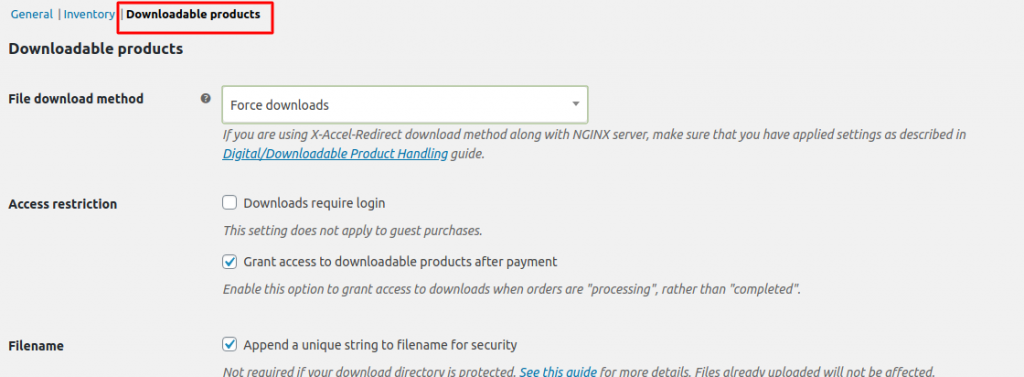
In this tab you can set how the products would be downloaded if you are selling such products.
Shipping
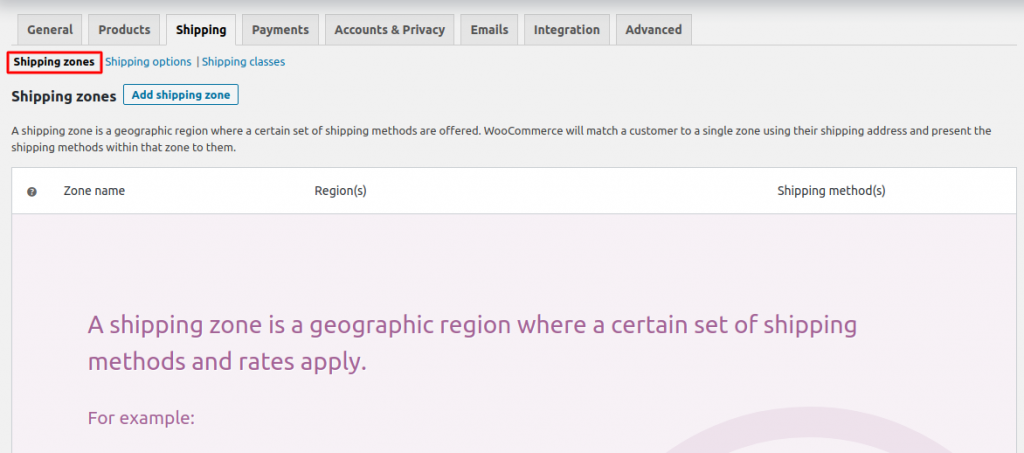
On the first chapter of the Shipping tab you have to choose the shipping of your website. After that, proceed to Shipping options:
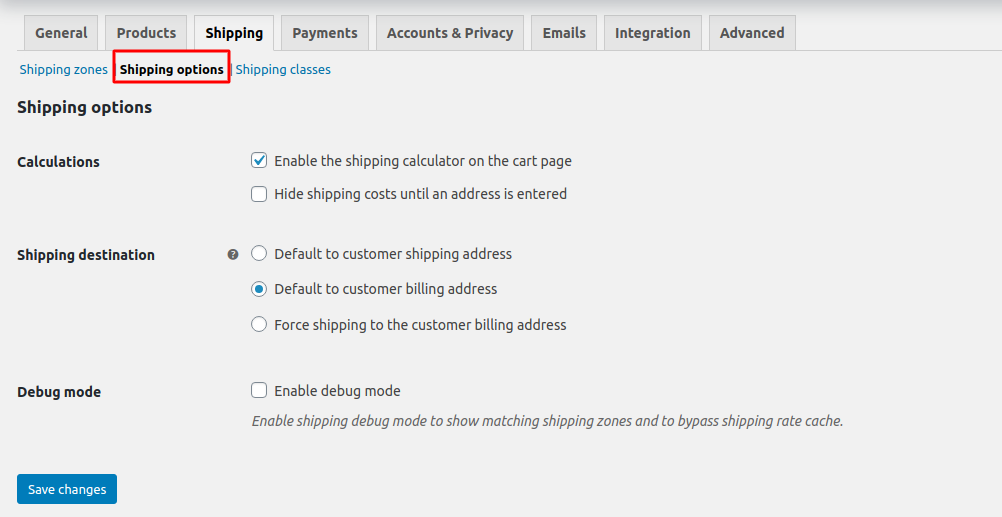
- Calculation: From this option you can choose when would the shipping price appear during an order
- Shipping destination: Choose to where should the shipping be addressed by default
- Debug mode: You can enable this feature for future troubleshooting purposes
After you are ready you can click on the “Save changes” button and proceed to Payments:
Payments
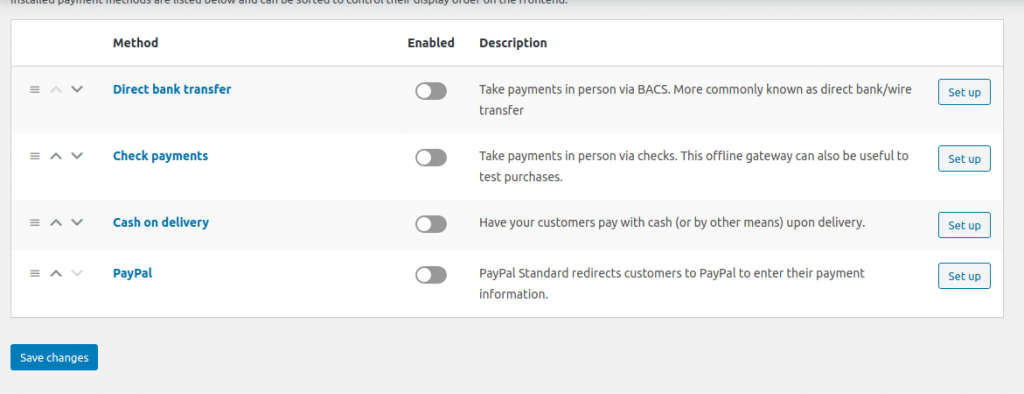
You can enable the methods which you wish to use and you can organazie them by dragging them up or down. If you click on “Set up” for a method you can configure it more by adding a text to the method and changing its name.
Next tab is Account and privacy:
Account and privacy
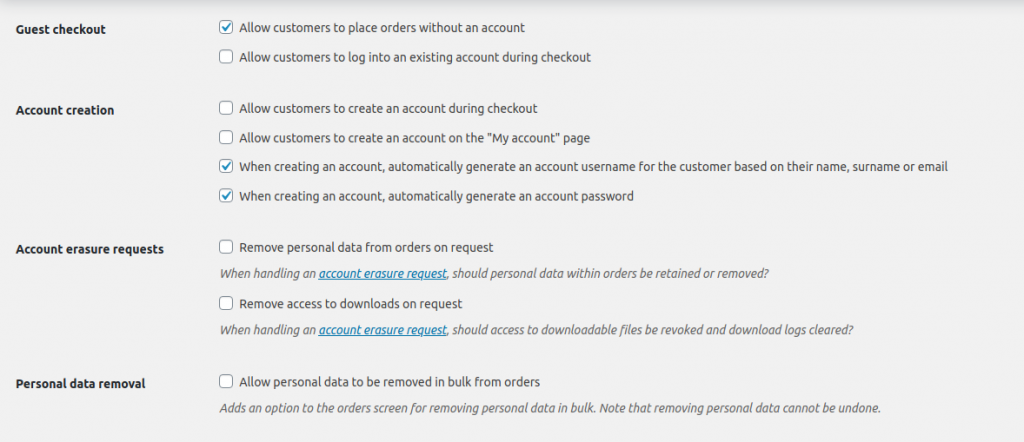
These settings can be configured up to you and your store. If the customers can create orders without an account or if they can later login to the account.
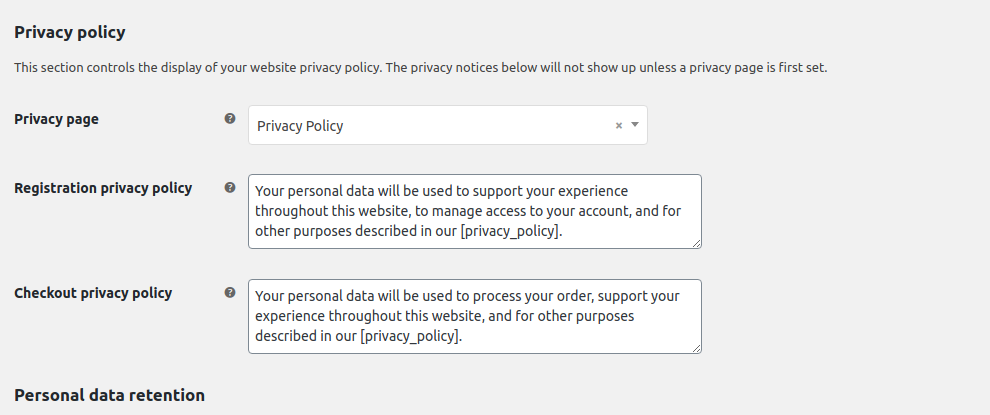
When you scroll down the page you will see the next rolls, in which you can set the text which the customer will see when they access the privacy policy of your website.
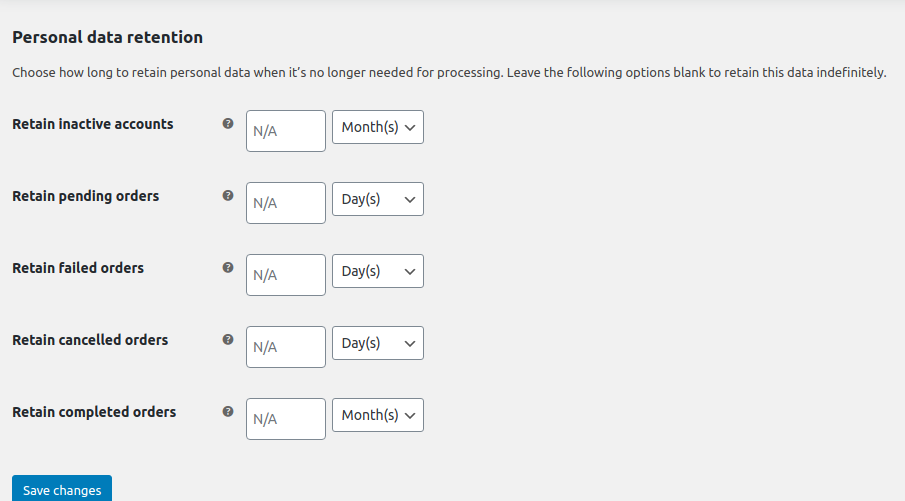
Once you are ready you can proceed with the last fields of this tab in which you should decide how much time should the website keep pending orders or failed orders before it removes them.
Emails
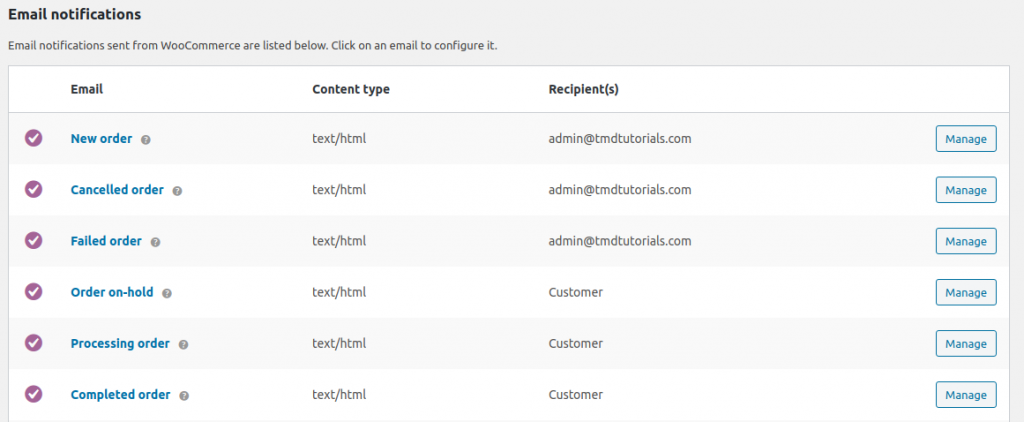
The emails tab can help you configure the notifications which you receive and your customers. On the first field you can set different email accounts on which you should receive notifications. You can enable or disable a certain notification for you or your customers by clicking on “Manage” from there you can also configure the email and text of the email which the recipient will receive.
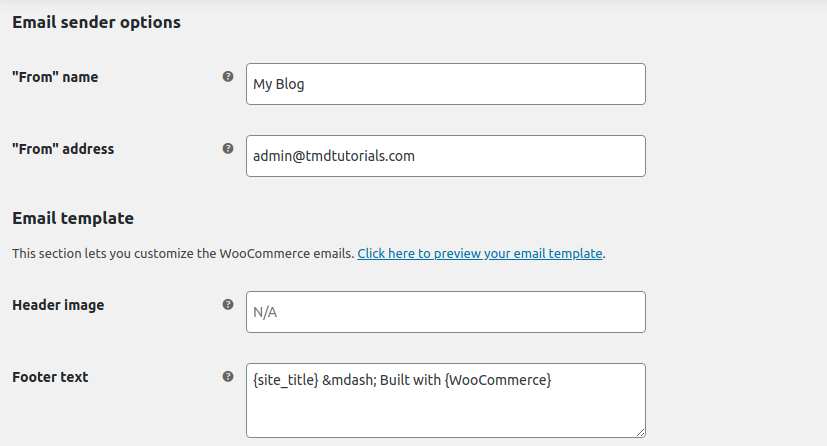
When you scroll down on the page you will find options for the Email sender – or to clarify further here you can configure the email which you will use to send emails to your customers and the text that will be displayed:
Integration
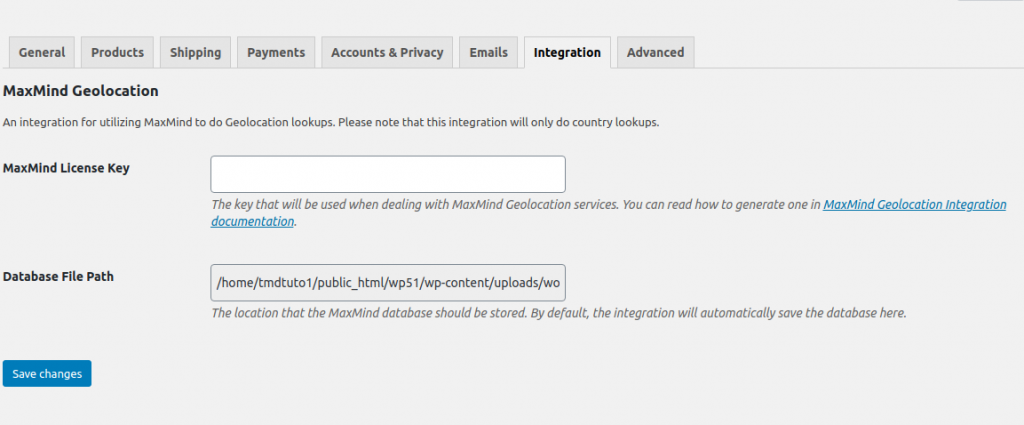
Woocommerce provides you with the option to generate the location of your customer and show the taxes and shipping according to the location. However, to be able to do so Woocommerce is using MaxMind and you should create an account with them as well in order to use this settings.
Advanced
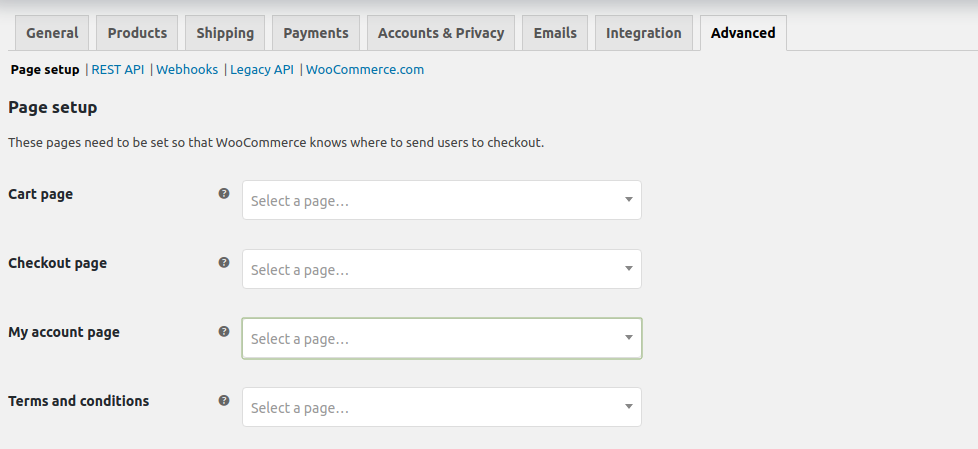
On the last tab you should configure your store with the pages on which the cart will show, the checkout page and so on. THe pages should be builded before that.
After scrolling you will see the Endpoints configuration. Endpoints are appended to the URL of your website and when you configure them, keep in mind that they should be unique according to the action which will represent.
Next page is “Rest API”
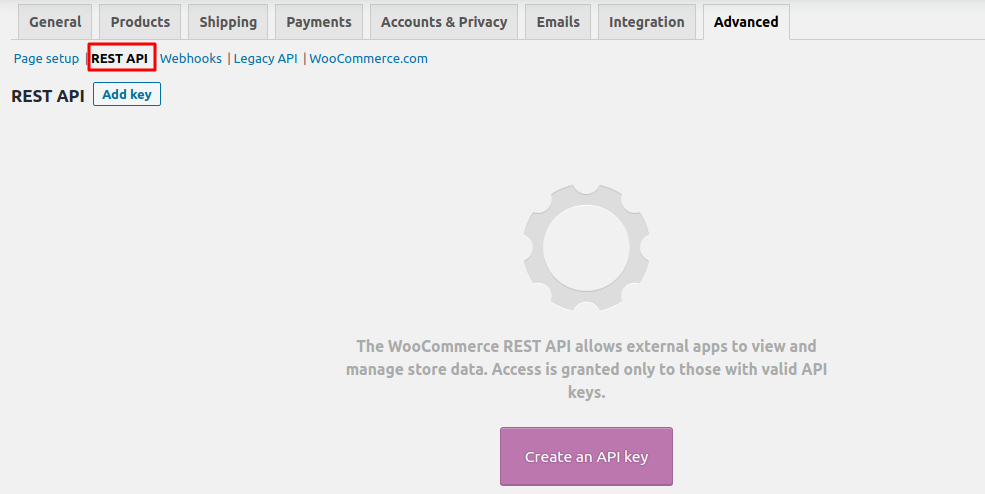
If you are a developer and would like to access the data from your store or another device, this option will allow you to proceed.
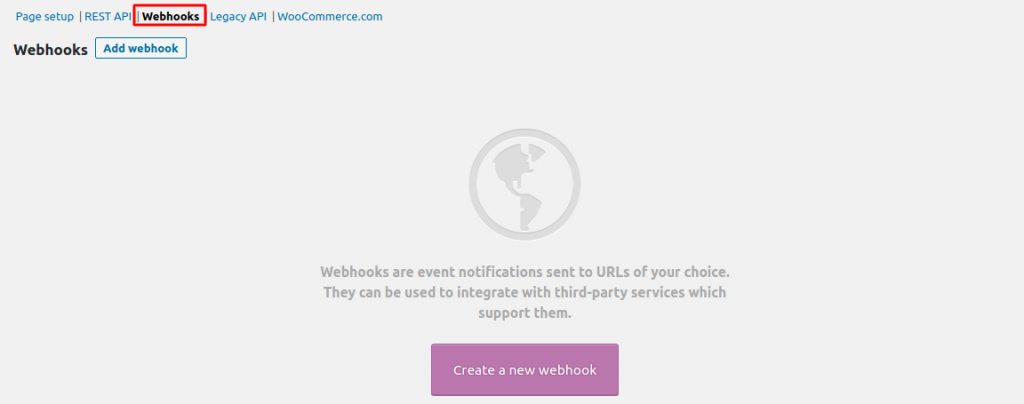
Webhooks can be used to trigger events on your website using a third-party service
The last tab about Woocommerce is optional if you wish to allow woocommerce to track the usage of the plugin for its own research on how the plugin is used and how it can become better.