Having your store managed and with categories for all of your products makes it simple and easy to use for your customers. The more the website is organized the more the customers find it helpful.
That is why we have created this tutorial in which we will provide you with the basic steps on adding a product category to your website.
The first step is to access the admin area of your website. You can do that from your Managed WordPress account → Manage Website → WordPress Admin URL, or you can do it by typing yourdomain.com/wp-admin

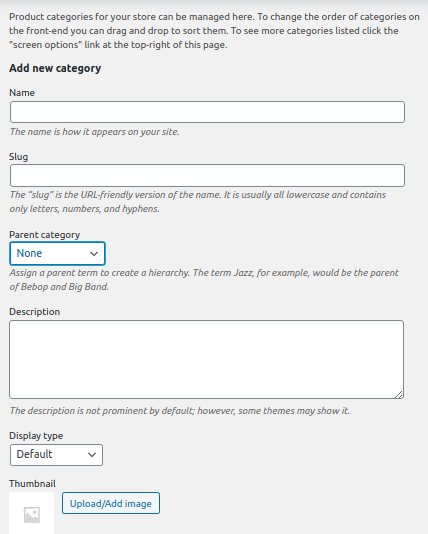
The first thing you should do is to set a name and slug for your new category. After that from the drop down menu “ Parent category” you should choose if the category would be a primary one, or a subcategory of an existing one.
After that you can proceed to the “Display Type” drop down menu where you have to choose one of the following options:
- Products – this will make the the products on your website visible under the category
- Subcategory – this will display only the secondary categories of the current one in the menu.
- Both – This option is the most preferred because it is both from the above in one.
The last step for creating the category is to choose a thumbnail. It can be an image that will best describe the category which you created.