 Skip to content
The main goal of creating an online store is to sell your products. In order to make a good profit from your business it is important to know what the target group looks for. However another important thing you need to think of is how you would be presenting these items.
Imagine an online store with no product images. It would be ignored by almost every customer who access it.
Having this in mind we will provide you with some information on how you can add images and galleries to the items you offer in your WooCommerce store.
You should first access the Dashboard of your WordPress application:
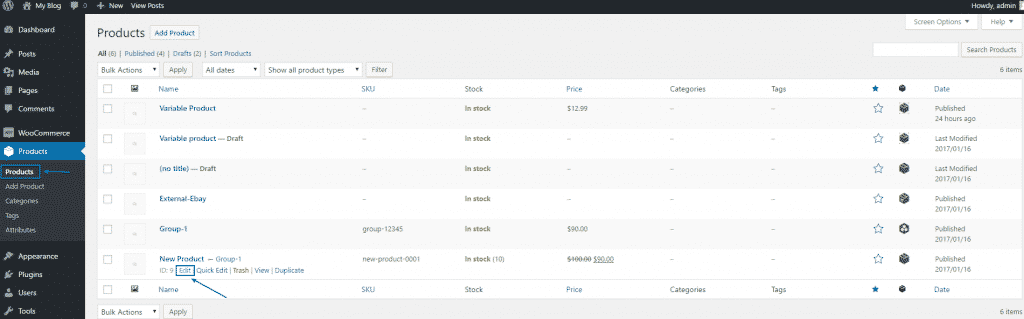
Next navigate to Products > Products, locate the product you want to add images to and click on the Edit button tight under it:
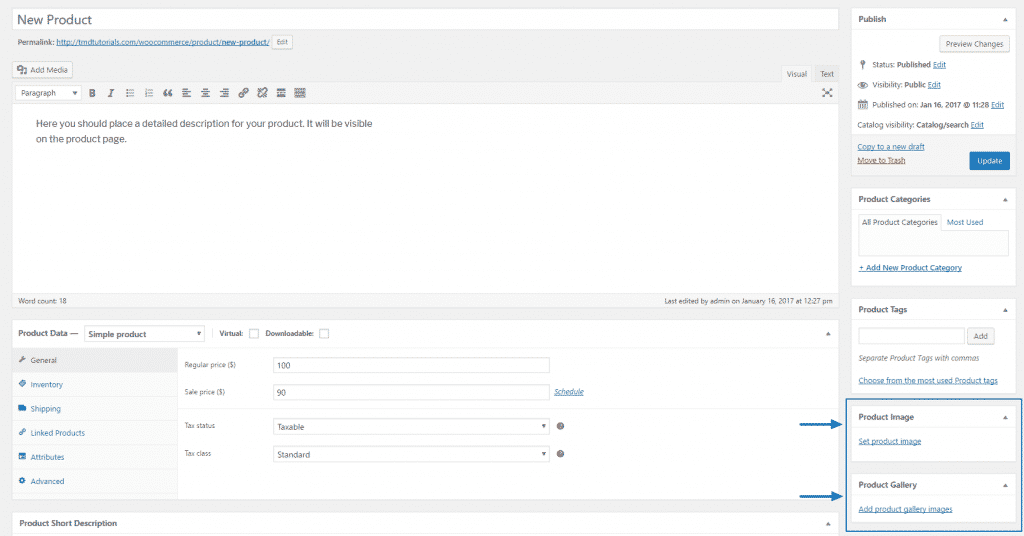
Once you are on the product page look at the right side of the screen.
You should be able to see the Product Image and Product Gallery sections:
Let’s first add a Product image. Clicking on the Set product image link will allow you either to upload an image from your local computer or choose one from your Media Library:

When you choose the image click on the Set product image button.
Back on the Product page you can add a gallery to your product using the Add product gallery images link. You would be once again asked to upload the images from your computer.