 Skip to content
Due to its nature of an open source LMS application the Moodle software has several different ways of installing on your domain. In this page we will provide you with more information on how to install your Moodle Application manually.
First you should access the official website of Moodle and download the latest stable version of the script to your local device. You are provided with two different options for the compressed files of the script. You could download either of them the difference between the two archive files is the method which is used when they were compressed. Once the files are downloaded to your local device you could upload them to your account with TMDHosting.
There are two methods which you could use to upload the files to your cPanel account:
- You could use the File Manager tool which is presented in your cPanel account. First you should access your cPanel account and click on the File Manager icon.
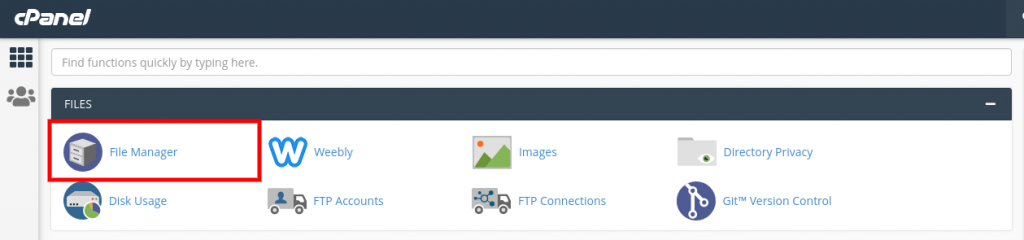
Once you have clicked on the File Manager icon you will be redirected to the home directory of your account. If you wish to install the Moodle application on your primary domain you should click on the public_html directory.
![]()
Please note that if you do not wish to install the Moodle application to your primary domain but you wish to install the application on an Addon domain or a Subdomain you should select the directory with the name of the Addon domain or Subdomain. Also if you wish to install the application in a subdirectory once accessed the directory of the domain you should create a new one with the name which will be displayed.
Once you have accessed the public_html directory you could upload the archived files of the application which you have downloaded earlier by clicking on the Upload button in the File Manager.
![]()
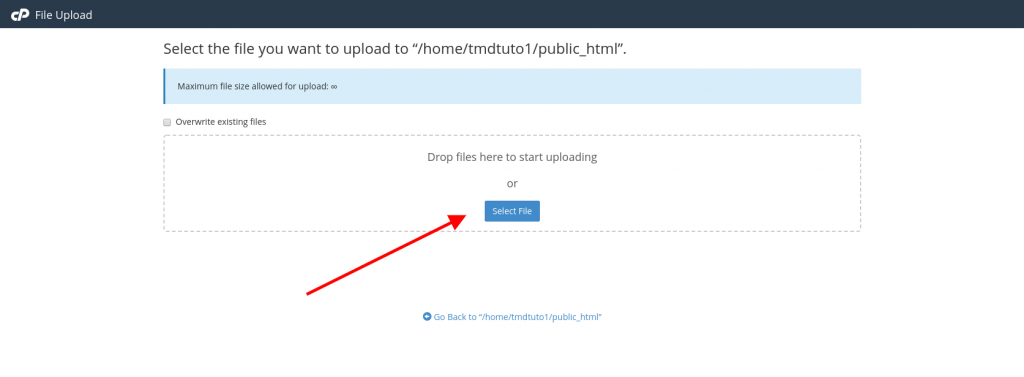
Once you have clicked on the button you will be redirected on a new screen which will request to upload the files from your local device. You should click on the Select file button or you could directly drag and drop the archived file.
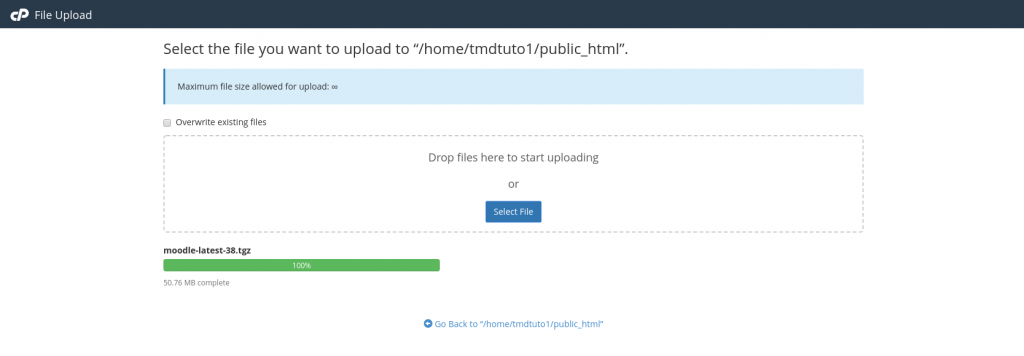
Once you have selected the archived files of the Moodle files the uploading will start and when it is completed you will be displayed with the following screen.
- The second method for uploading the files is via FTP client which is directly connected to your account. If you feel more comfortable using this method the steps are almost identical. You should access your account via FTP connection with the FTP details which were provided when you have signed up with TMDHosting. Once connected access the public_html directory and drag and drop the file to it.
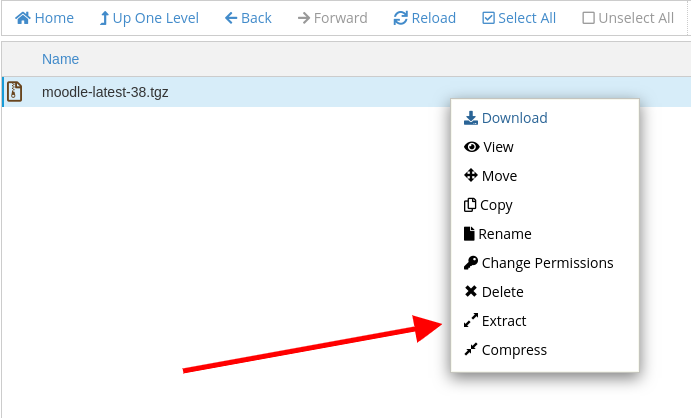
Once the file is being uploaded you should be able to extract the files of the archive to the directory. You could easily accomplish this by right clicking on the file and selecting “Extract”.
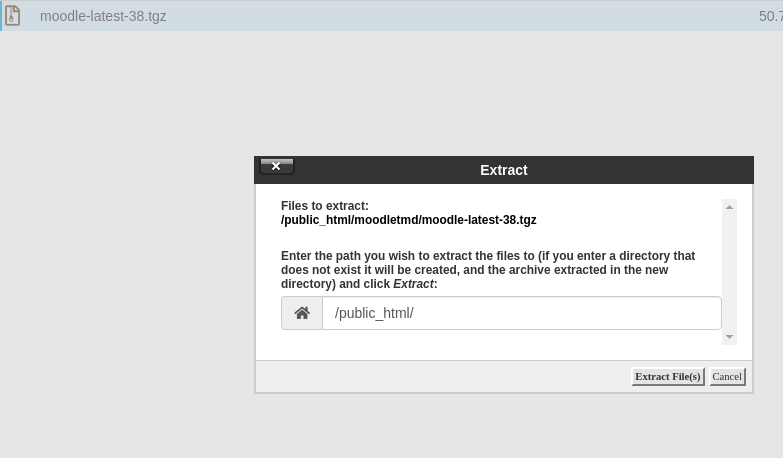
Once you click on the files you will be asked if you wish the files to be directly extracted to the current directory of the archive file or you wish to extract them to a subdirectory. We recommend extracting the files to a subdirectory only if you wish your Moodle application to load from a subdirectory of your domain. If you wish the files to be extracted to your domain you should have the following screen:
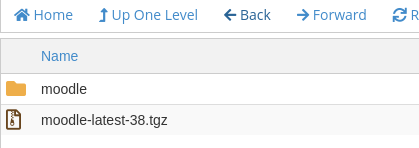
Once the extracting process is complete you will see that the files are located in a moodle directory:
If you do not wish your Moodle application to load from the subdirectory “moodle” you should move the files from it to the public_html directory. You could do that by accessing the moodle directory and selecting all files with your mouse from which the result will be as follow:

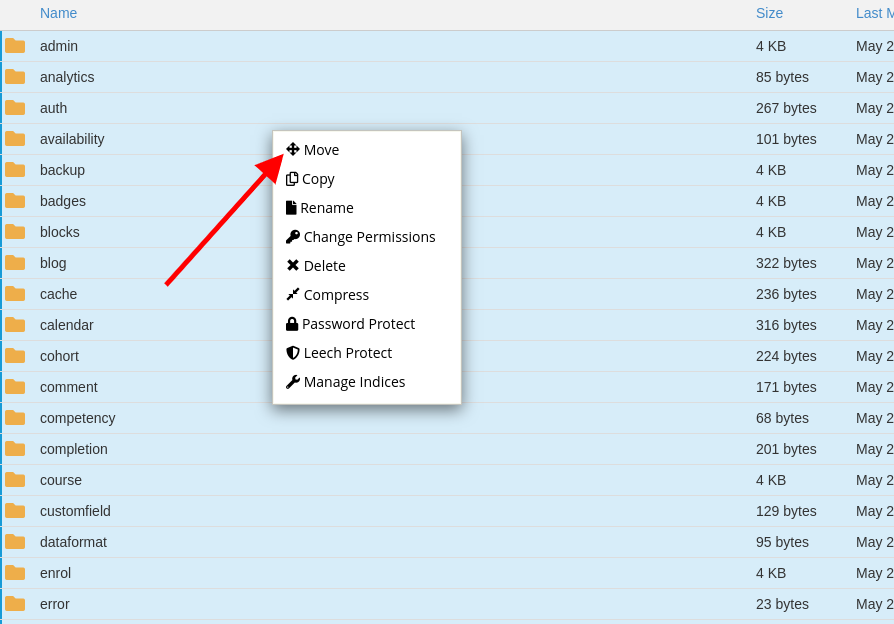
Once all files are selected right click them with your mouse and select to move them to the document root of the domain on which you wish to install the application. In our case that is the public_html directory:
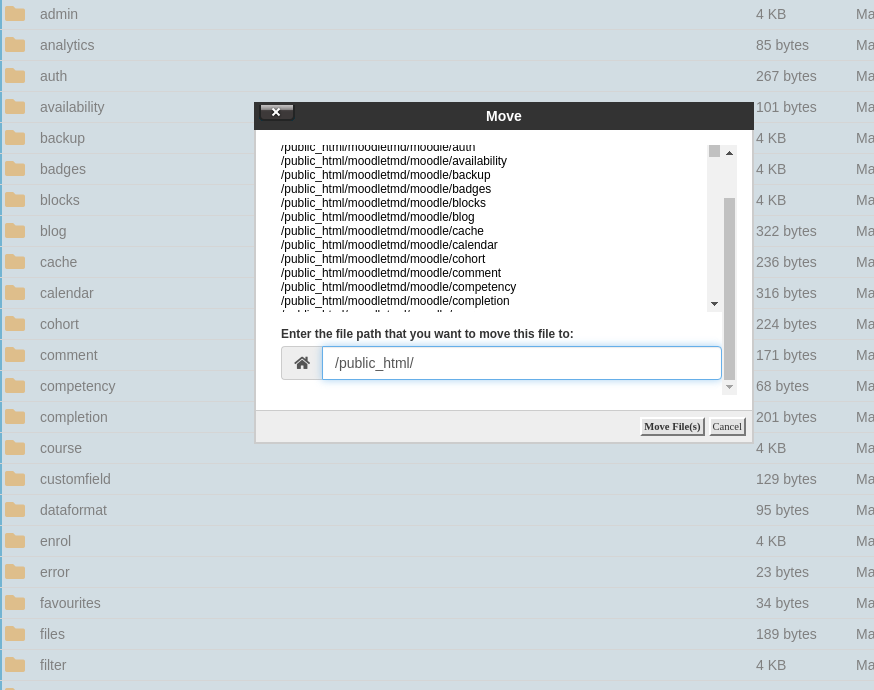
When you click on the “Move” a new window will pop up asking you where to place the files:
Once the files are moved the directory in which you currently reside will be empty and the files will be in the directory to which you have moved them. This is the last step of preparing the files of the application for installation.
While you are logged in the cPanel service you should also create a database which will be used by the Moodle application. To accomplish that you should access the Database Wizard.

Once accessed the tool will provide you with several steps in which you will create the Database for the website, the database user which will have access to the database, the database password for the database user and the privileges which that database user will have on the database.
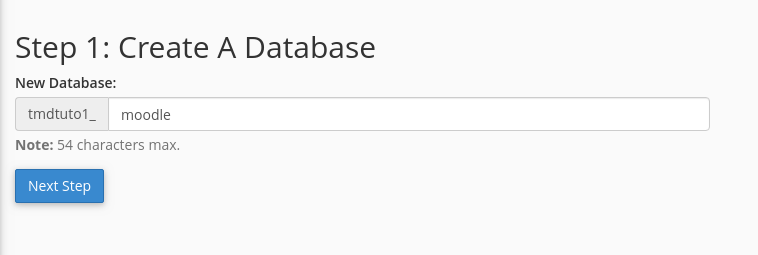
In the first step you are adding the name of the database which your website will use:
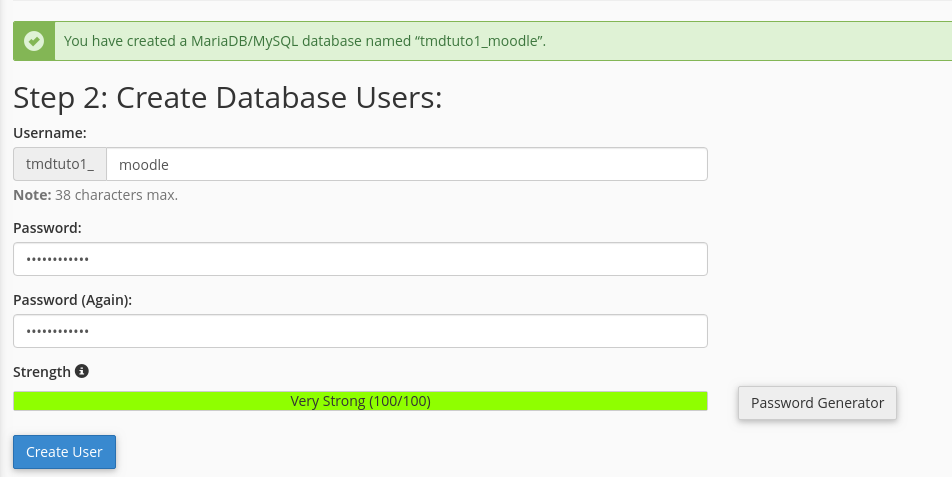
In the second step you will be asked to create the Database user which will be associated with your Moodle application. We recommend the database user to have the same name as the database name so you could easily manage them in the future. Also we would recommend copying the database name and password to a secure file. You will need them later during the installation process:
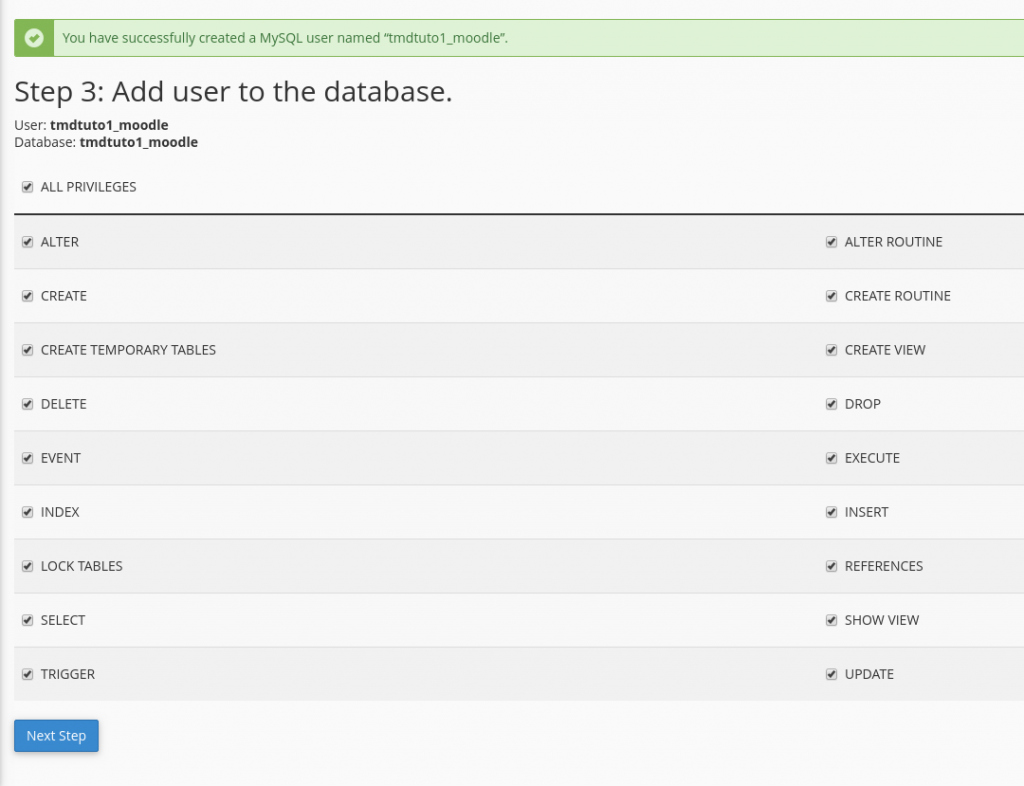
On the 3rd step of the process you will be asked to adjust what actions will the database user will be able to execute on the database. You should select them all so your Moodle application could function properly:
Once you click on the “Next Step” button your database will be successfully created and you could use it during the installation of your Moodle application.
With this we are ready to proceed with the installation of the Moodle application. The next step is to access the domain on which you wish to install the application in your preferred web browser. Once accessed you will be presented with the following Installation wizard designed by Moodle:

On the first step of the Moodle installation wizard you will be asked to choose the language which your Moodle application will use.
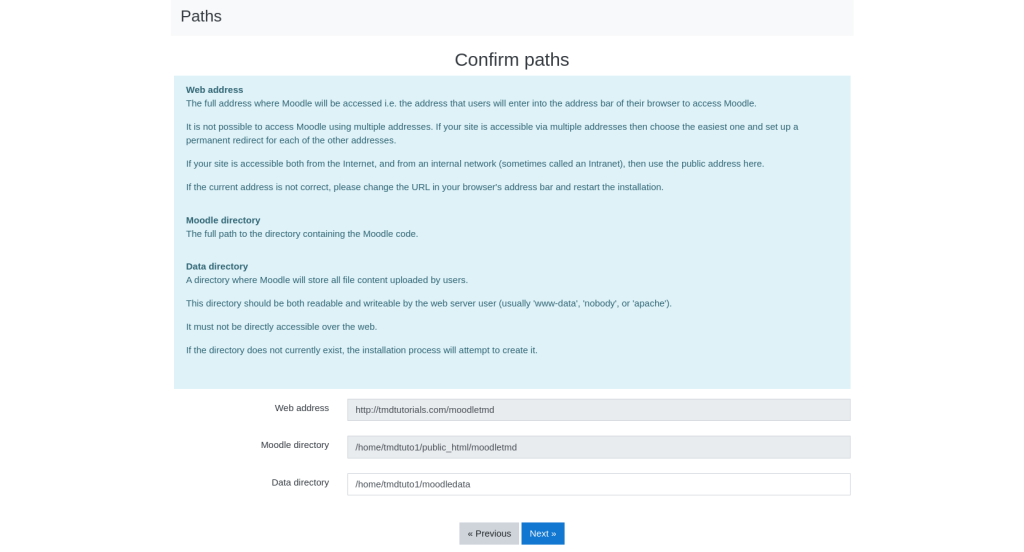
The second step will ask to confirm that the directory to which the moodle application will be installed is correct and the installation wizard will ask you to set the Moodle data directory name. We recommend leaving those details to their default values but if you wish the Moodle data to have a custom name for extra security you could set any name which does not contain special symbols and spaces.
In the next screen you will be asked what MariaDB service is the server on which you are installing the application is using. In most of the cases the Moodle application will choose the MariaDB service which the server is using but if not we recommend using one of the following options:
- MariaDB ( native/mariadb )
- MySQL ( native/mysqli )
During this tutorial we will select the MariaDB ( native/mariadb ) option when installing the application.
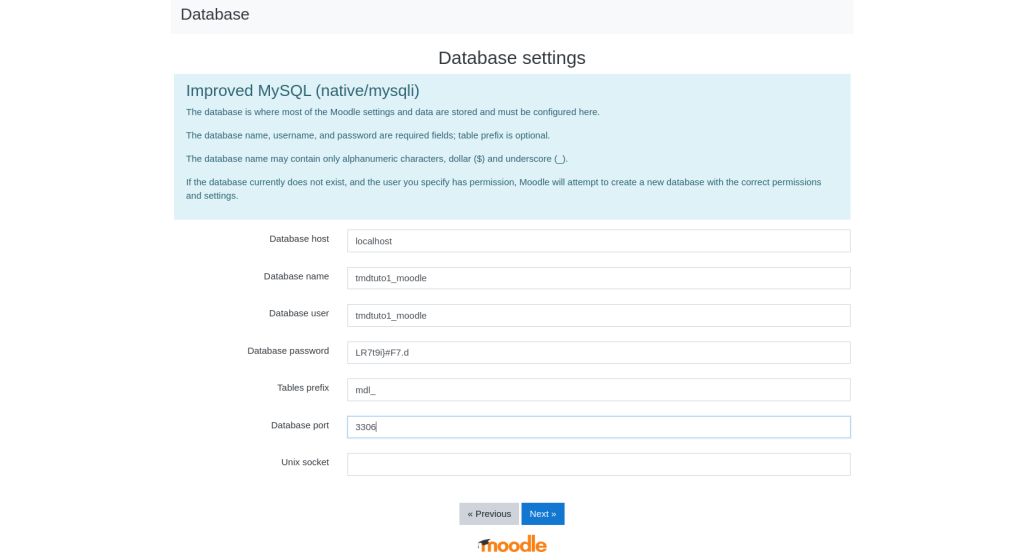
In the next screen of the installation process you will be asked to fill the database details for your Moodle application. You should set the details of the database which was created earlier using the Database Wizard.
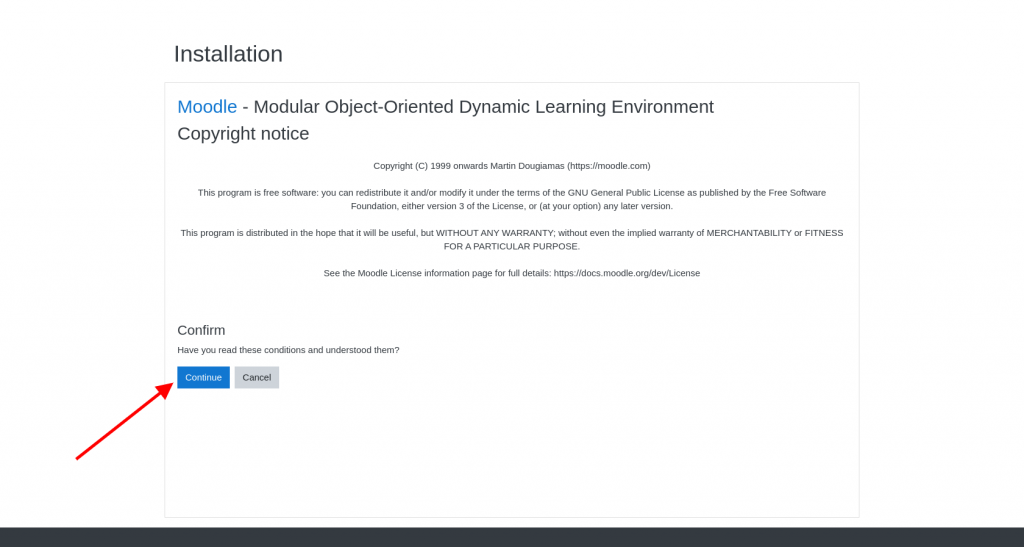
The application will review the details and if they are correct you will be forwarded to the next step which is related to the Terms of Service of the Moodle Software and if you agree with them you should click on the “Continue” button:
In the next section the Moodle application will review the server on which you are installing it if its meeting the server requirements of the Moodle application. We would like to assure you that all of the hosting packages at TMDHosting are fully compatible with the Moodle Software.
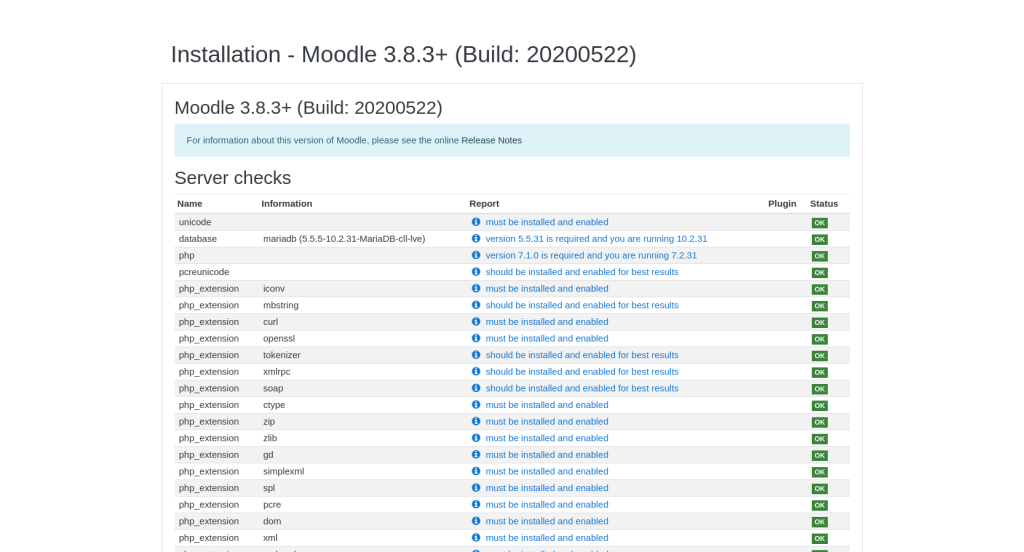
If the server is meeting the requirements of the Moodle application you will be able to click on the Continue button and proceed with the installation. If the server is not meeting the requirements Moodle will provide you with suggestions on how to adjust the server environment so it could be compatible with the Moodle application.
In the next step of the installation wizard you will be provided with information of the installation process of all Moodle related services and if the services are deployed properly you could proceed to the next screen by clicking on the continue button:
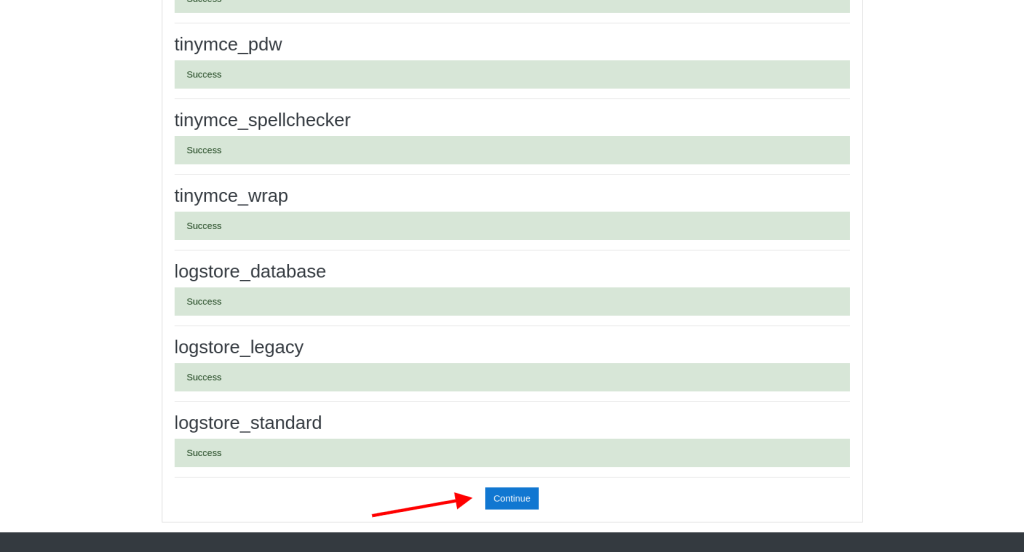
If there is an issue during the installation of the service the Moodle application will provide you with information on how the issue could be resolved.
Next you will be asked to set the Administrative login details for your Moodle application:
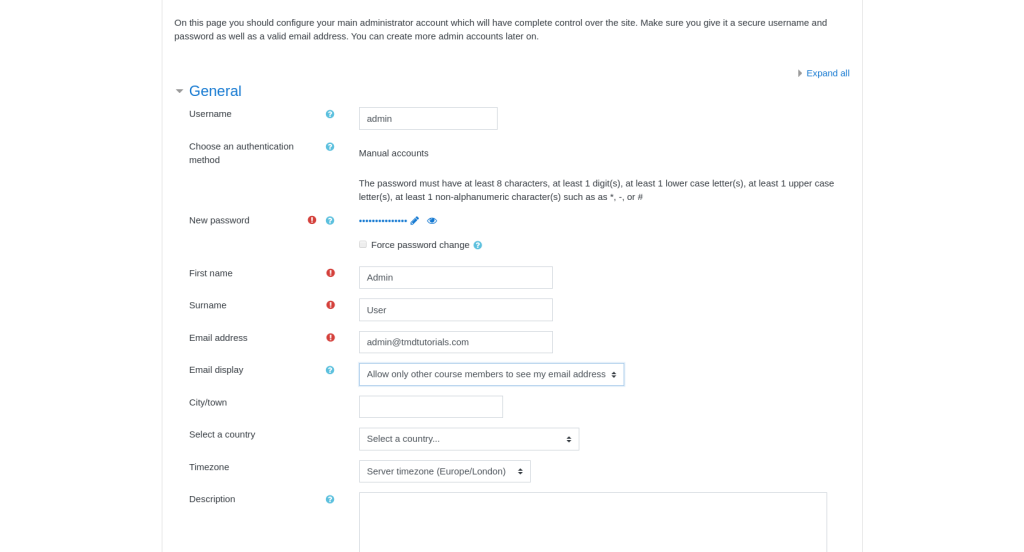
- Username: The username which you will use to access the administrative page of your Moodle application
- New Password: The password which you will use when accessing your administrative account. We recommend setting a secure password which contains letters, symbols and numbers.
- First Name: Your first Name if you do not wish to provide it you could set an alias or leave it with the defaults values as we have done.
- Surname: Once more if you do not wish to provide you actual details you could set an alias or leave the default values as we have done.
- Email Address: The email account which will be used to recover your password if you have lost it. Also this email will be used to contact the Administrative user of the website.
- Email Display: Here we recommend choosing the option where it is allowed to see the administrative email account only by users which have accounts on your Moodle application.
Once you are ready with filling the information requested by the Moodle application you could click on the Update profile button to proceed with the installation.
On the next page you will be asked to adjust the SEO details for your application. If you are not entirely sure regarding the SEO of your website you could skip this step now and adjust the details in the future.
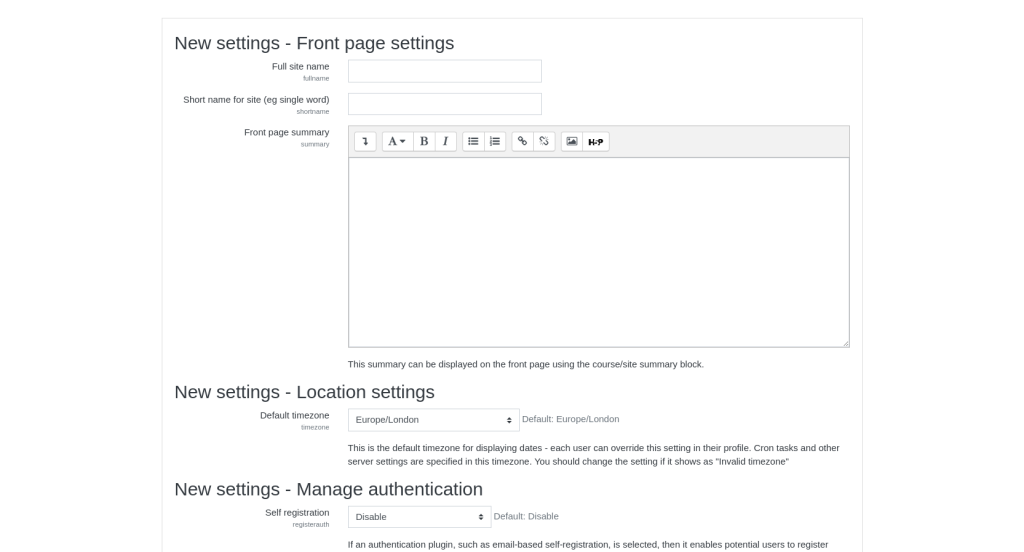
The mandatory fields for this page are Full Site Name and Short name for site (eg single word). You could choose anything those details could be changed later.
Once you have saved the changes you will be logged in your newly installed Moodle application and you could proceed with using it as you see fit.