 Skip to content
How to manage Moodle roles and permissions
In this article we will be discussing the fundamentals of Moodle roles and permissions and how to manage them.
Now, before we delve into how to manage them, let us first define what roles and permissions are:
A role is a collection of permissions set for the entire system that you can assign to specific users in specific contexts. The combination of roles and context give a specific user's ability to do something on any(or some) page(s). One such example of roles are that of a student and a teacher.
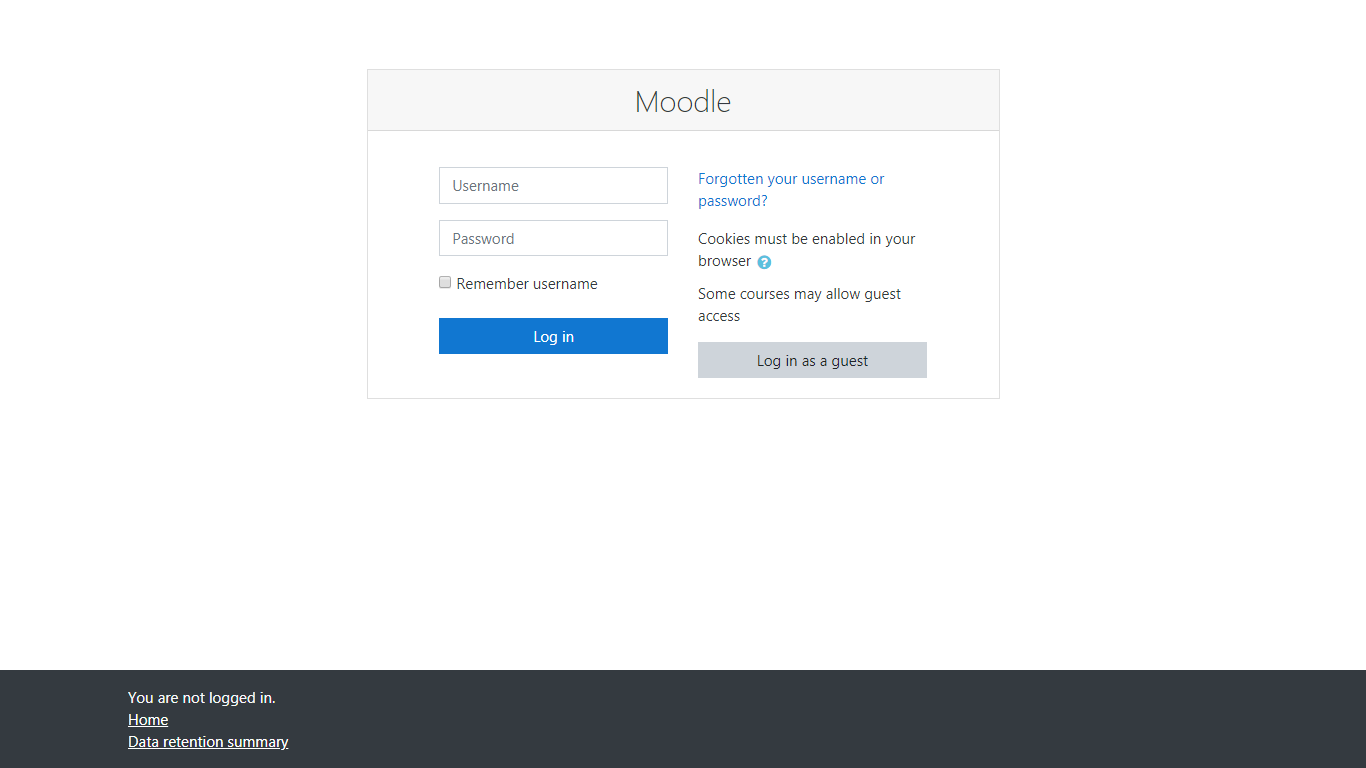
Now, after getting a better understanding of what a role and permissions are, let us go right into how we can manage them. First off, log into your Moodle account:
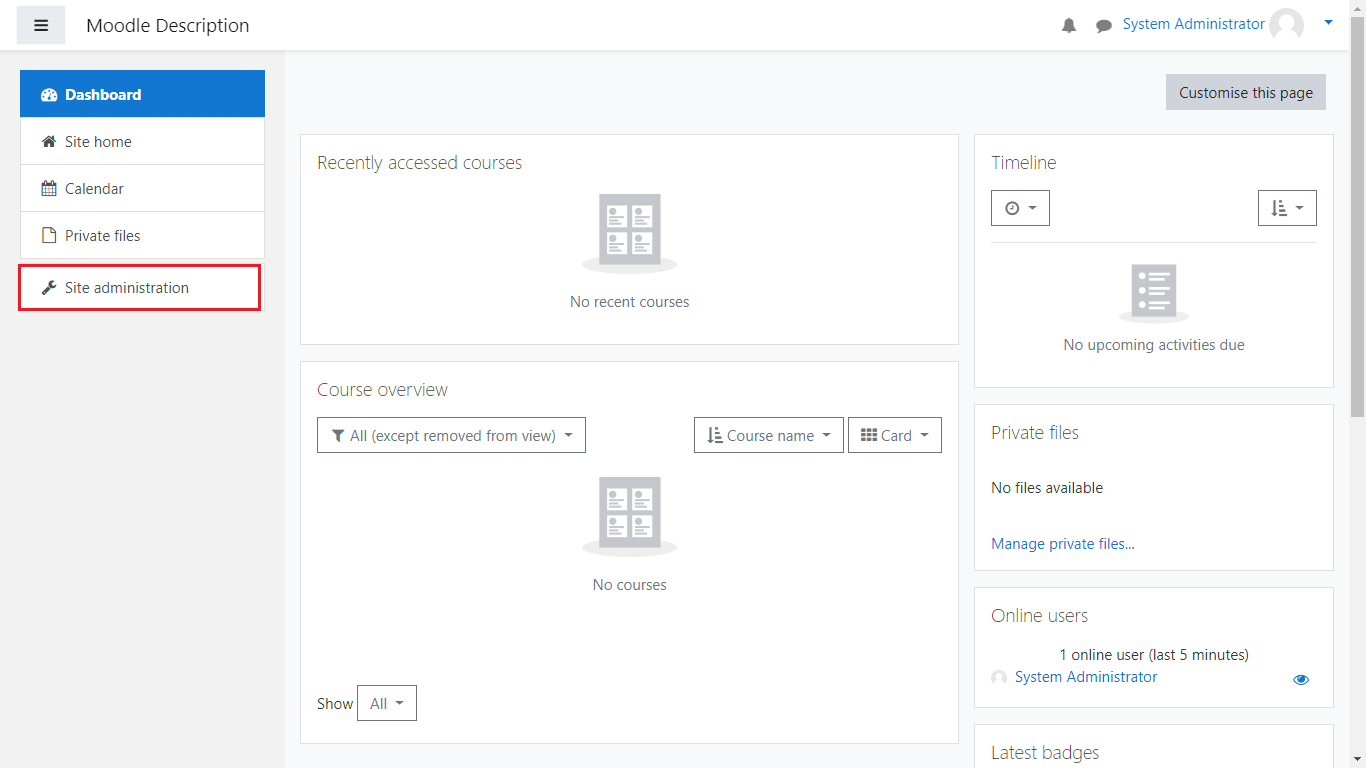
Next, click on the Site Administration button from the sidebar to your left:
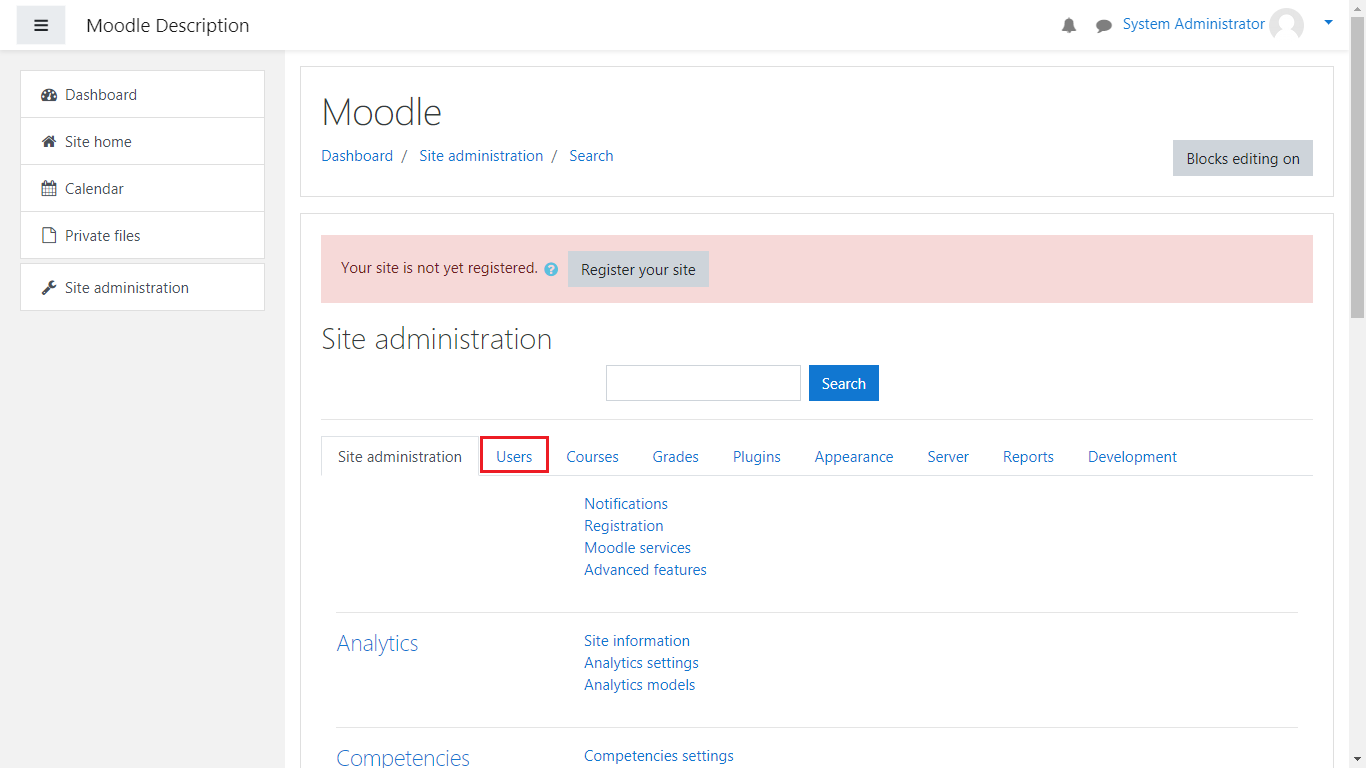
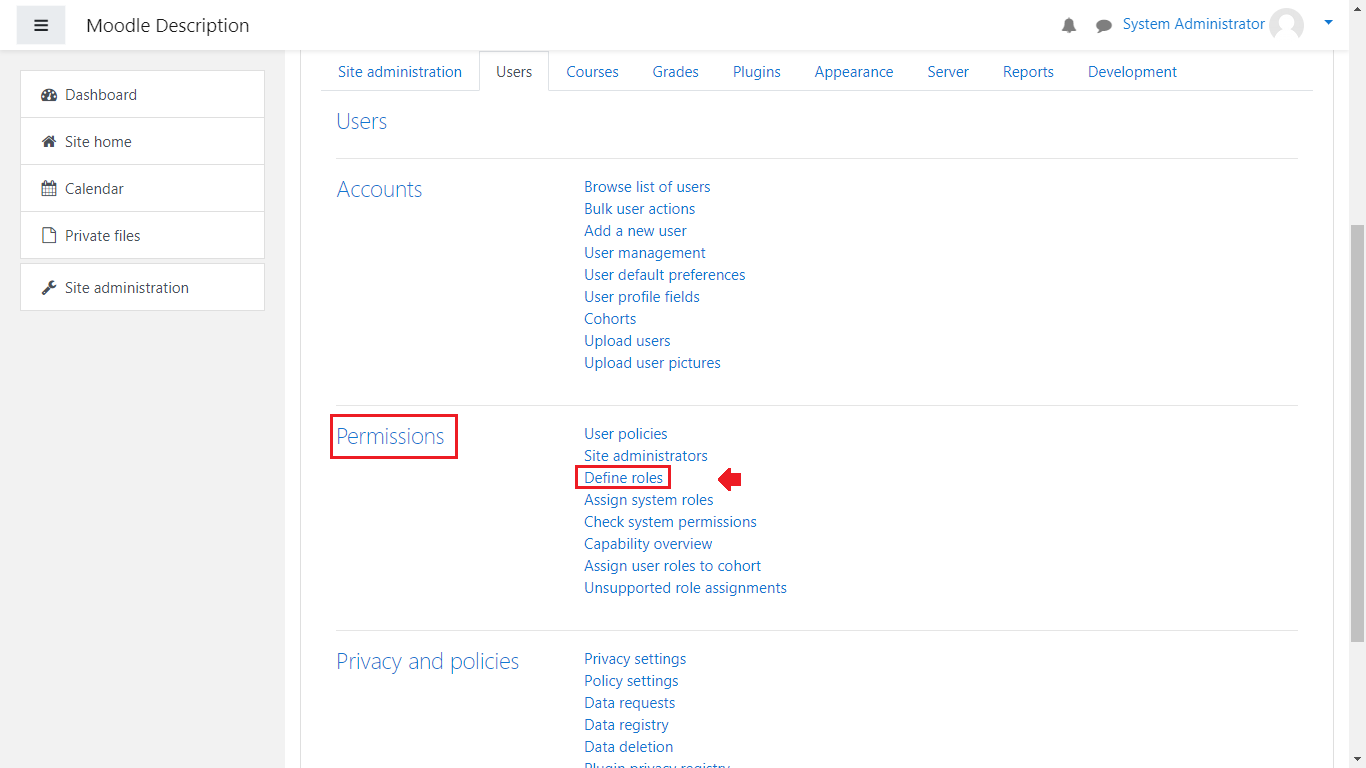
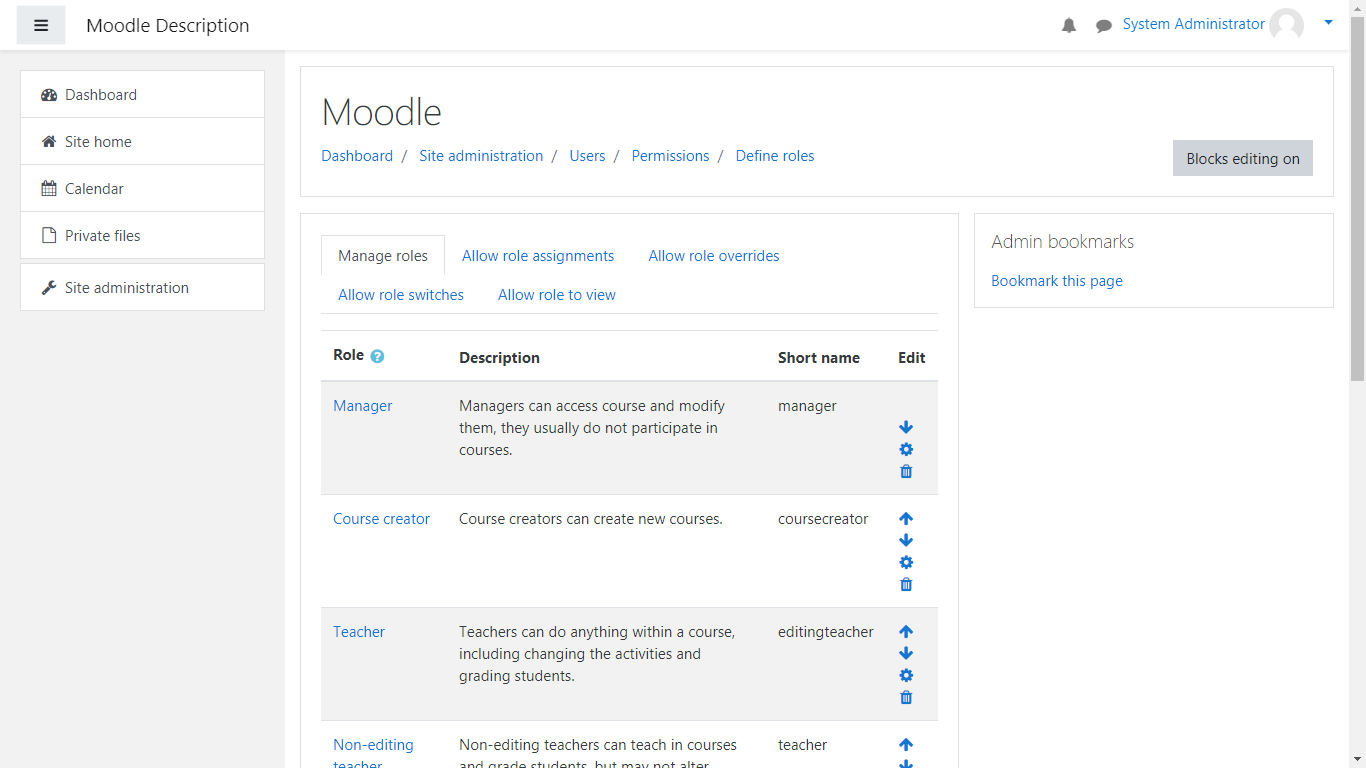
Once you’re in the Administration area, select the Users section, scroll down to the Permissions subsection and click on “Define roles”:
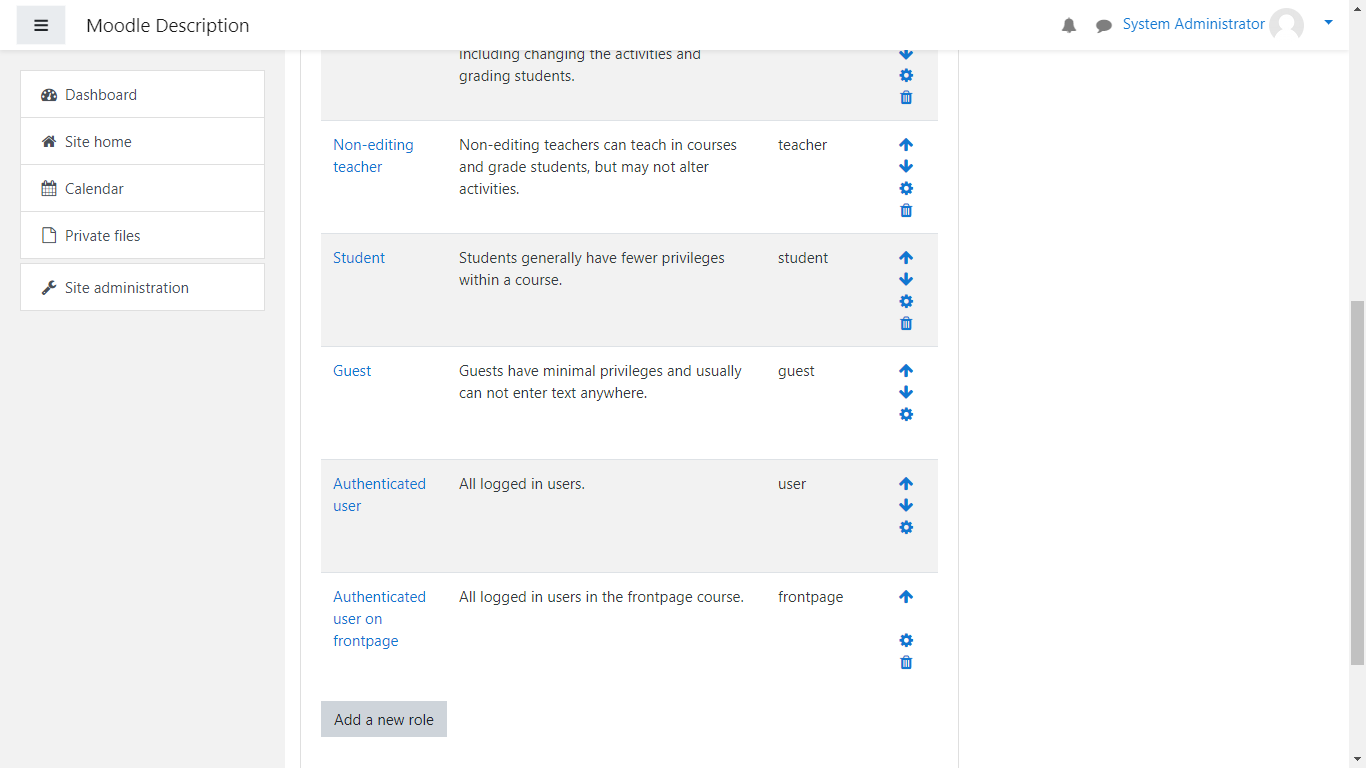
From here, you’ll be met with a variety of default roles – Manager, Course Creator, Teacher, Non-editing Teacher, Student, Guest, Authenticated user and Authenticated user on front page. There are more than 350 different variables on how you as an administrator can edit roles, their permissions as well as add new ones or remove them.
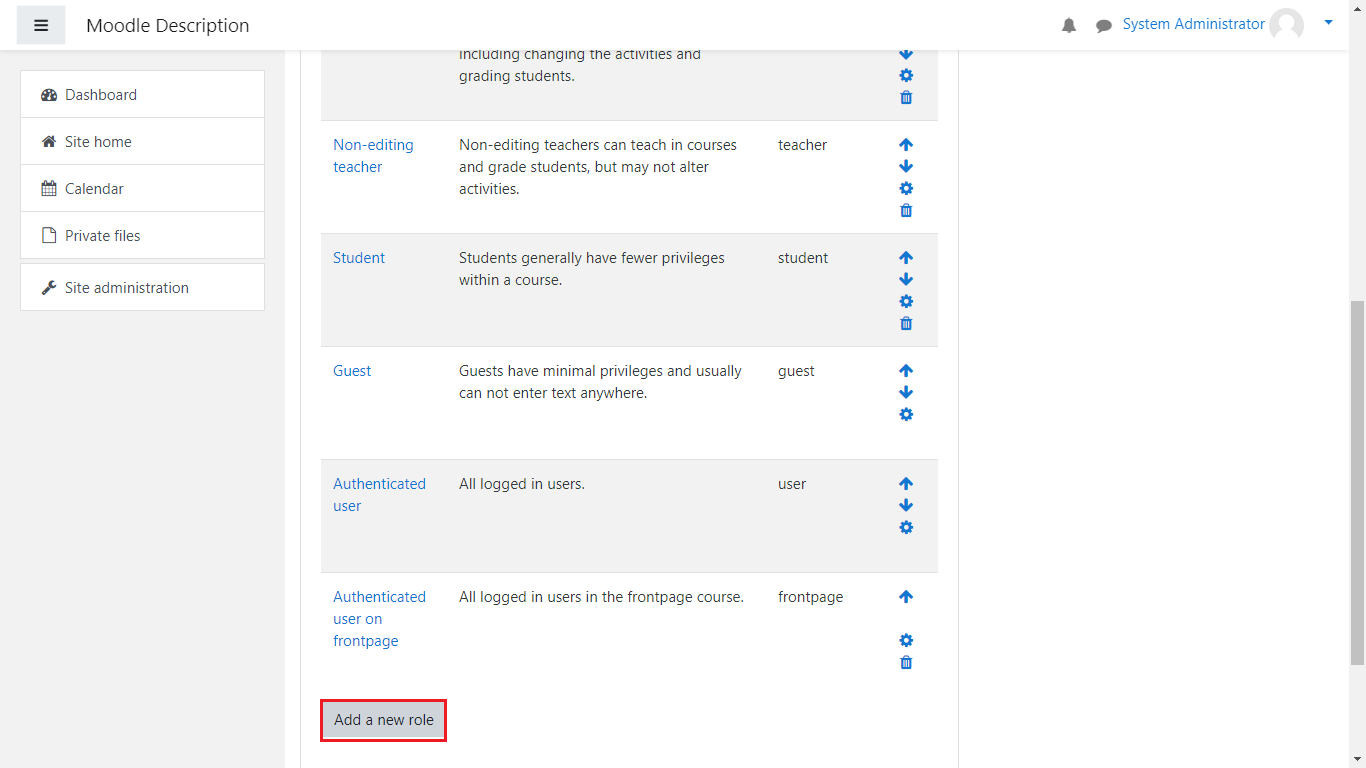
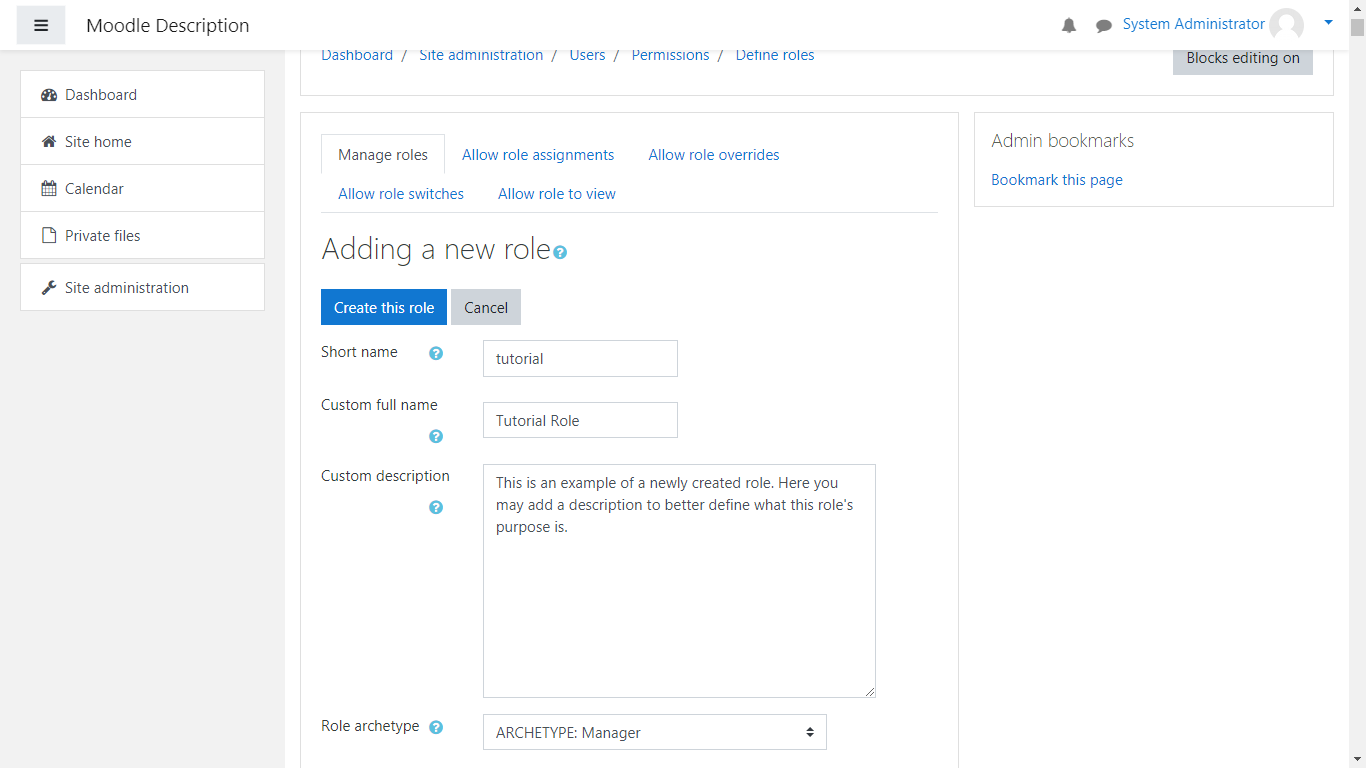
Let us start with creating a new role, naming it Tutorial Role(for example). Click on “Add a new role” to begin:
From here, you can select an already existing role, or use its archetype(a copy of that role, using identical permissions). Let us select the Manager Archetype for this example:
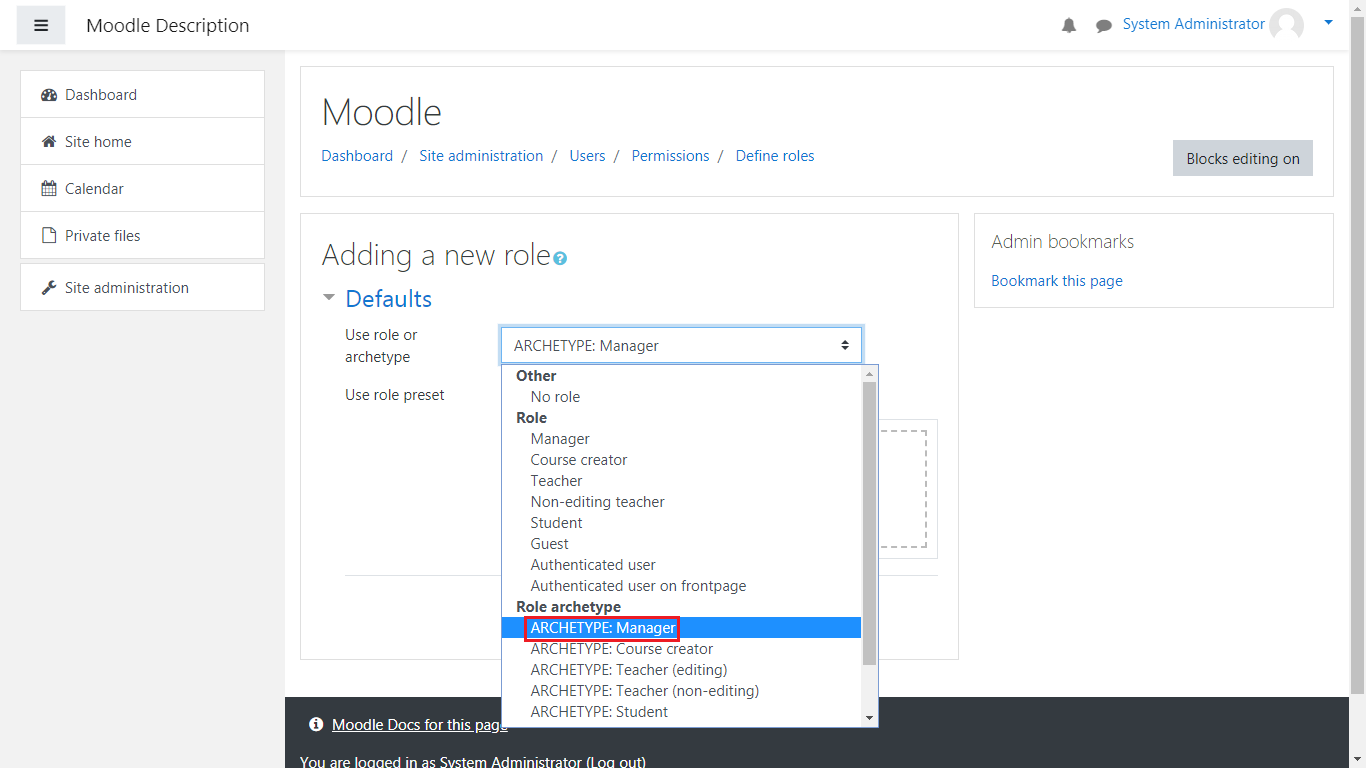
Select it from the dropdown menu and click on “Continue”.
From here, you’ll be taken to the next page where you can make details to the role, which includes:
- Short Name – this will be the nickname for the Role
- Custom full name – this will be the full name of the role you’re creating
- Custom description – this will be the description of the role and what its purpose is.
- Role Archetype – this will be the archetype from which the role will inherit its permissions(for example adding/removing other roles, overriding their permissions as well as viewing and switching their roles from one to another)
The next variables which you can change are as follows:
- Context types where this role may be assigned – This shows where this role can be assigned to.
- Allow role assignments – This gives the current role we’re creating the permission to assign roles to already existing roles.
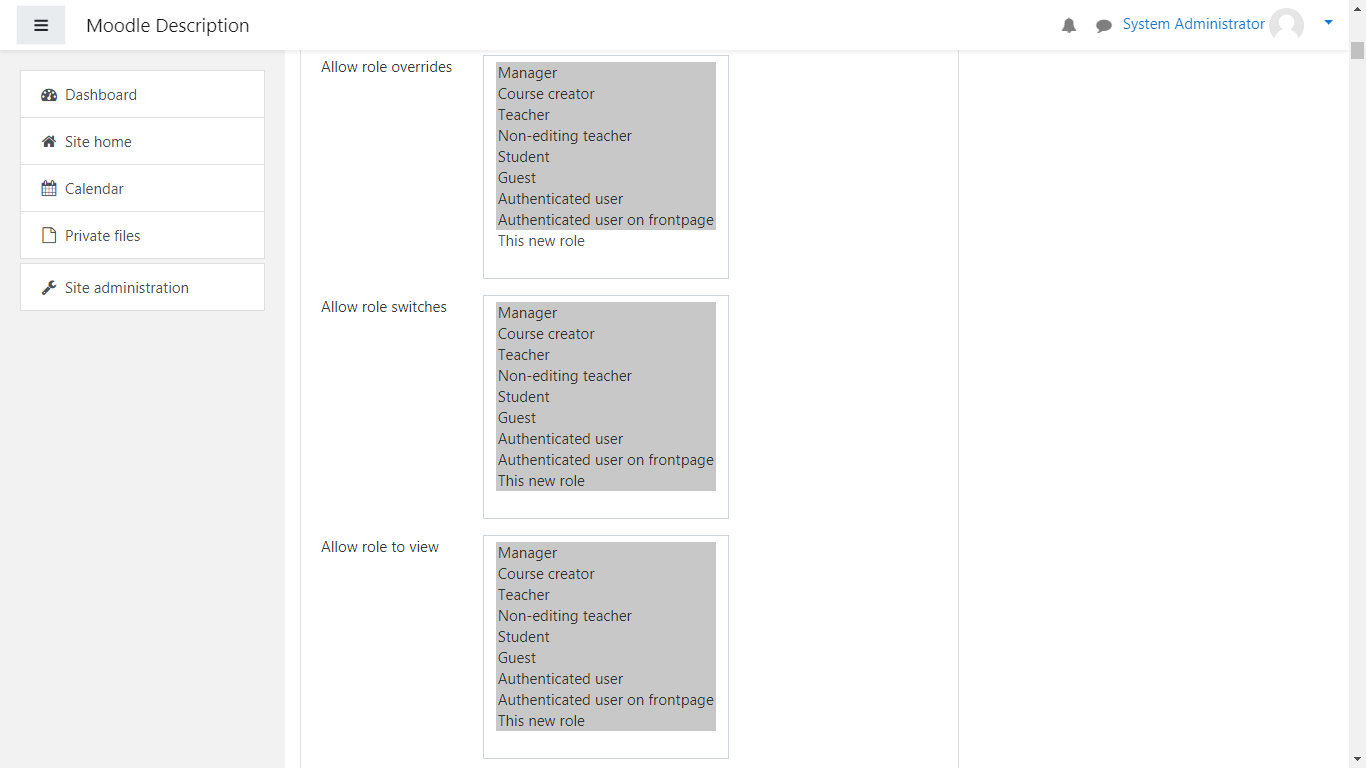
- Allow role overrides – This allows the role to make overrides to permissions for the roles selected.
- Allow role switches – This allows the role we’re creating to switch specific roles(for example from a Student to a Non-Editing Teacher switch)
- Allow role to view – This allows the role we’re making to view these roles already present.
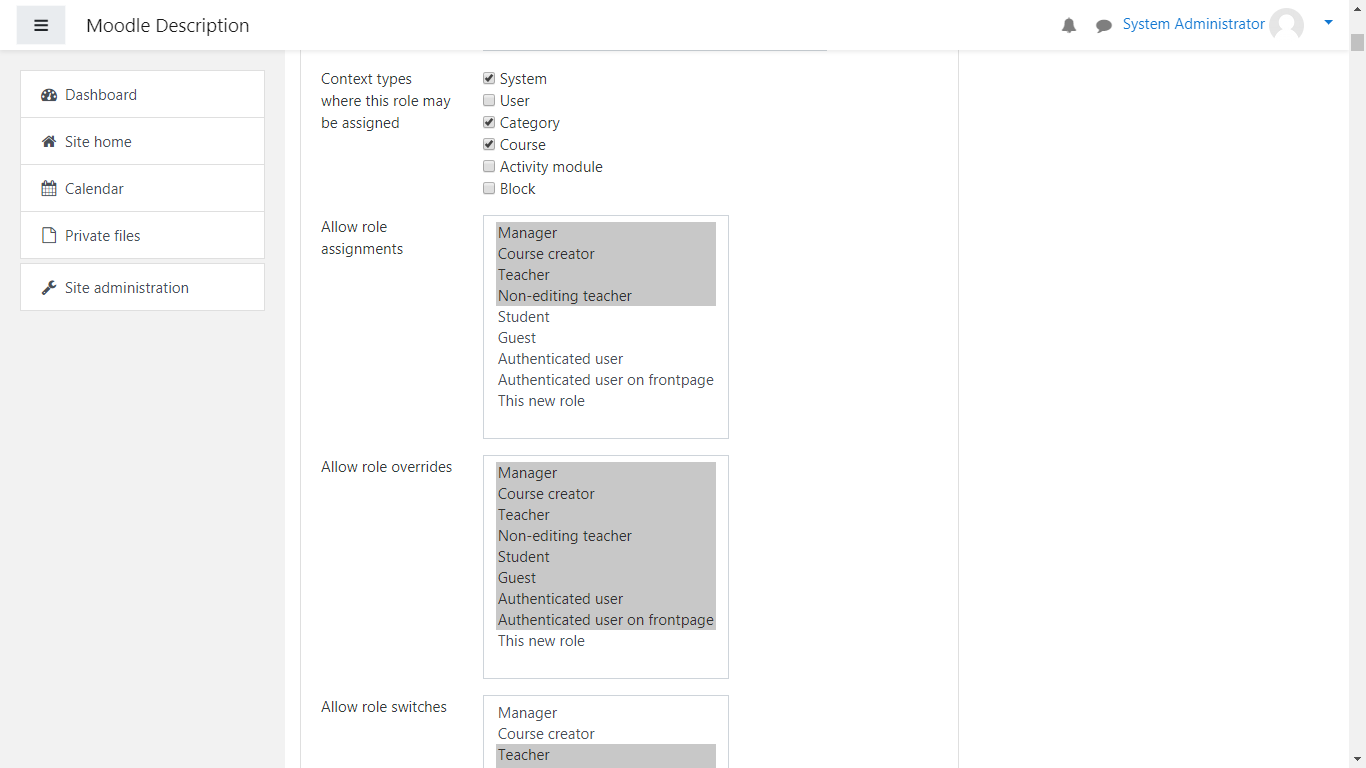
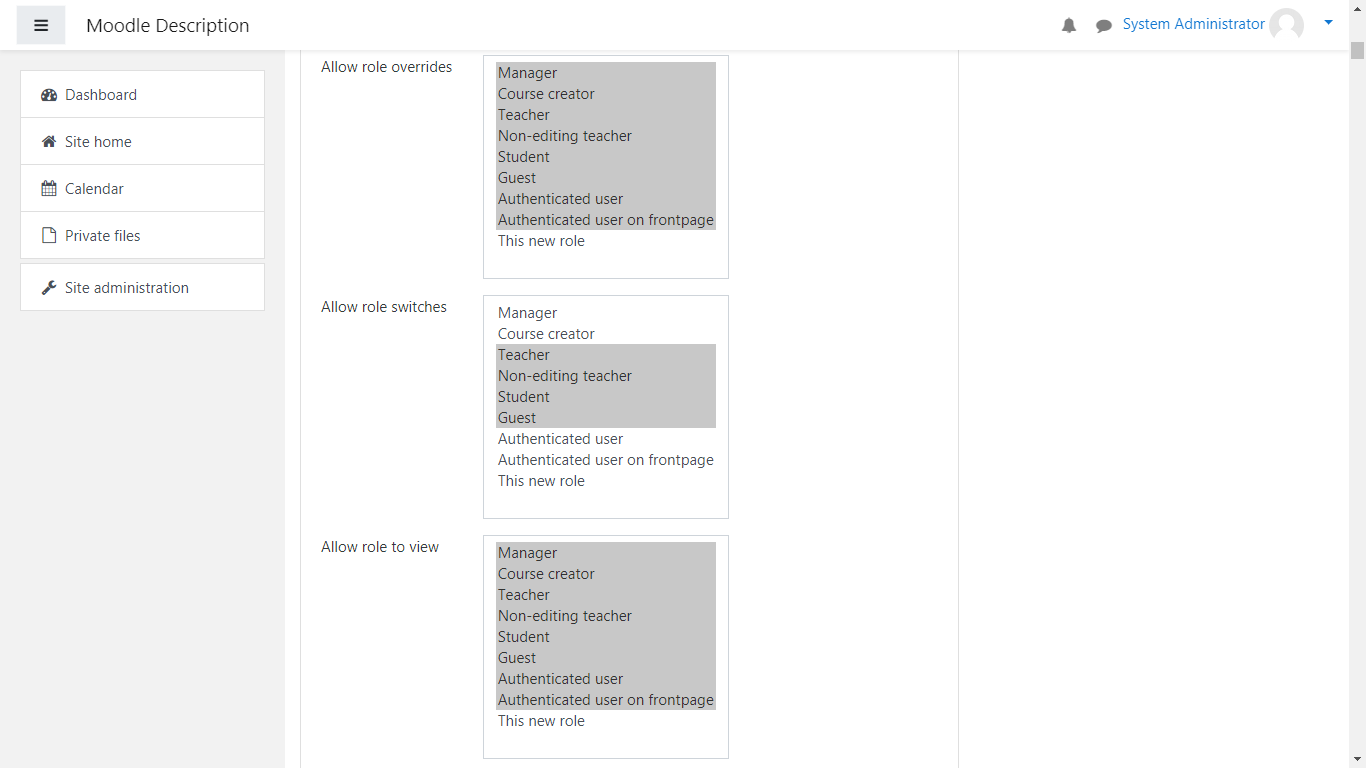
You can make changes to these variables by selecting these roles one by one(with a left mouse button click) or alternatively if you would like to select multiple roles by holding the Control(Ctrl) button and left clicking on the roles:
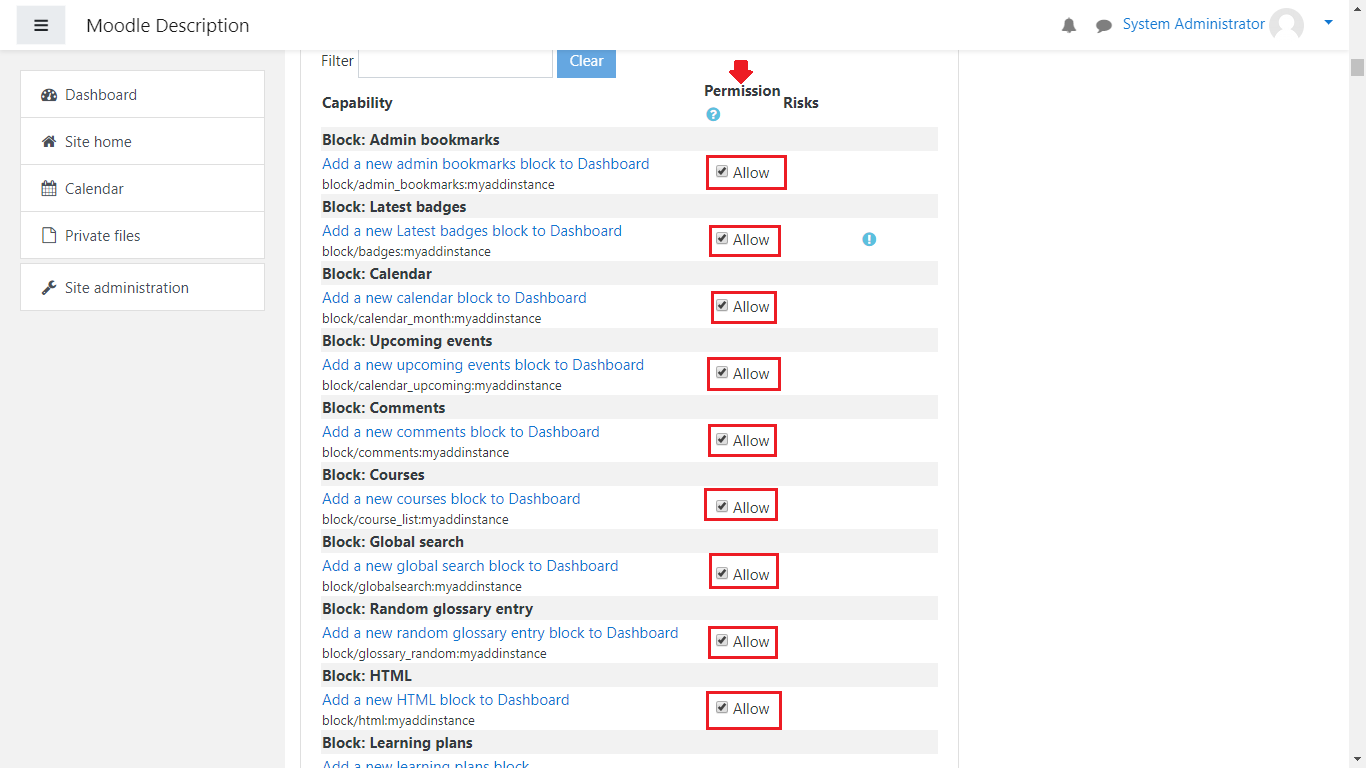
Next is the Capabilities section(which allows this role to access specific parts of the Moodle website – from adding Calendar blocks to adding courses, uploading files, downloading files and so on). As there are multiple options, you can select which permissions you would allow for this given role by clicking on the checkbox near “Allow” under the Permission column, and a checkbar will appear meaning that you’re allowing this permission to this role:
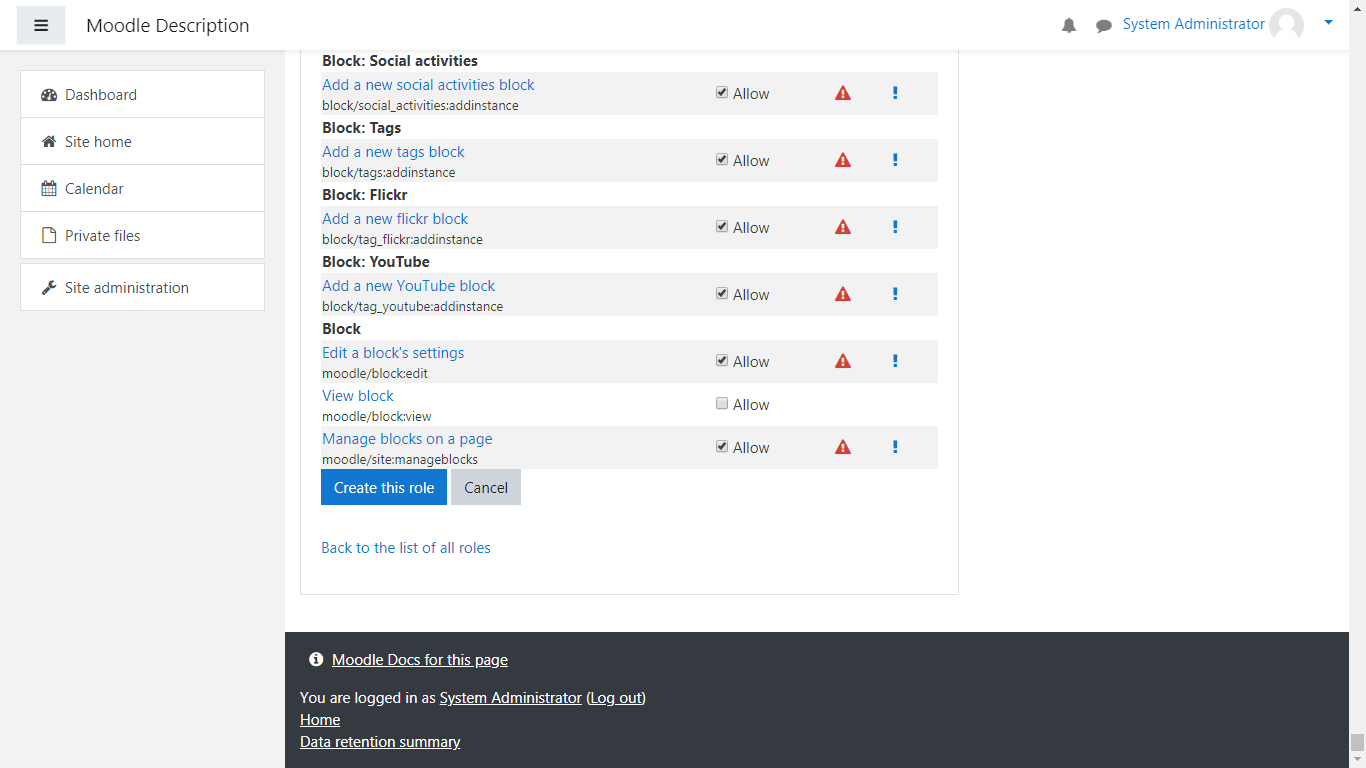
After you’ve set the permissions for this new role, scroll down to the bottom of the page and click on the “Create this role” button to create it or “Cancel” to cancel its creation:
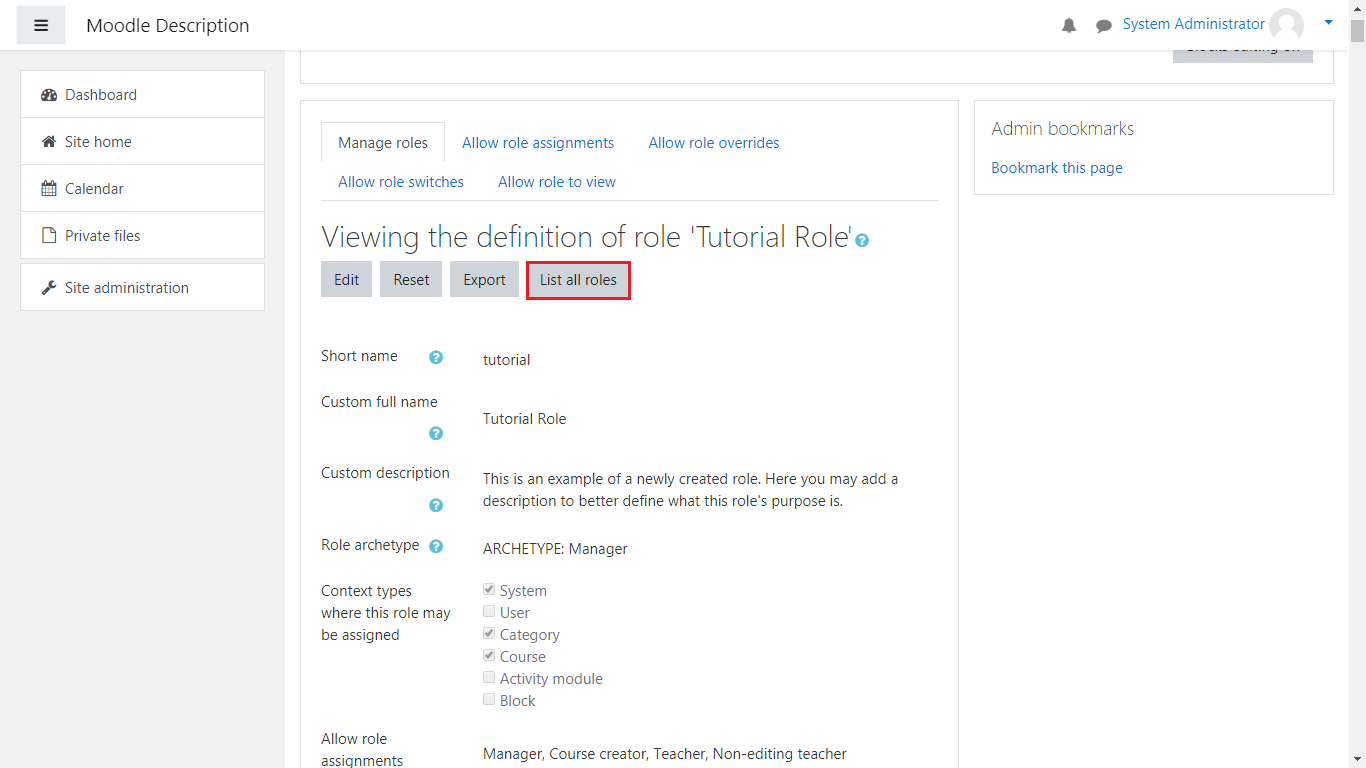
Once you’ve clicked on “Create this role”, it will give you an overview of the role and how you’ve set this role. You can always Edit the newly created role(making changes to its permissions, description, etc.), Reset, Export(in an .xml file to your local device, which will allow you to import it to a different Moodle application with its already defined information by you) and List all roles.
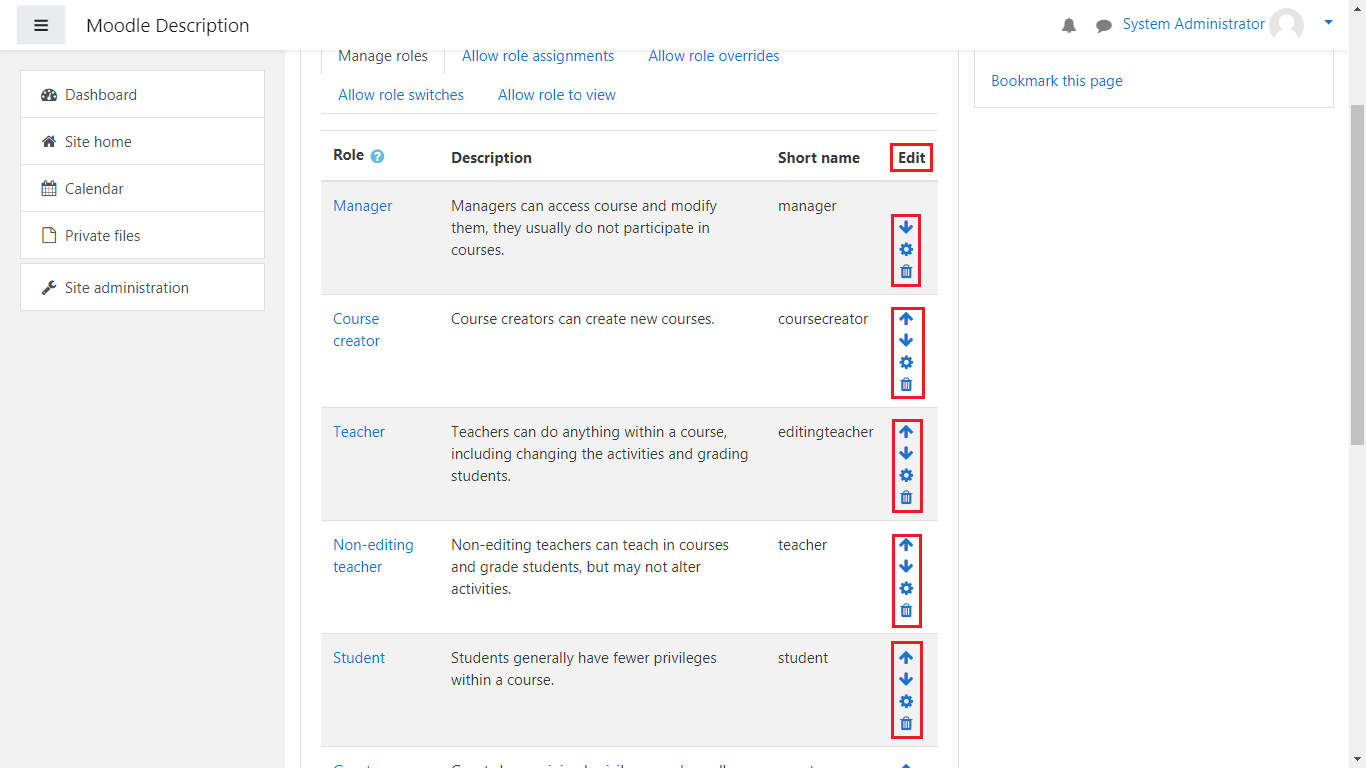
Let us click on List all roles, to go back to the management page of all the roles we have, and review the other methods we can manage our roles and permissions:

Now, on the “Edit” you can see multiple buttons, each one does a specific action:
- Arrow buttons(the arrow buttons move the position of the roles upward or downward – this does not affect their permissions).
- Cog button – The cog button allows you to edit the role’s permissions, Full Name, short name, context type etc.(The same page in which we created the new role and gave it its permissions and made changes to its role view/assignment and switch)
- Trashcan button – Clicking on this button will redirect you to a confirmation page in which you would need to either confirm the deletion(removal) of this role and cancel it(it will also show the number of users associated with the role you plan on deleting).
Next, we shall review the Allow role assignments section. Left click on it with your mouse.
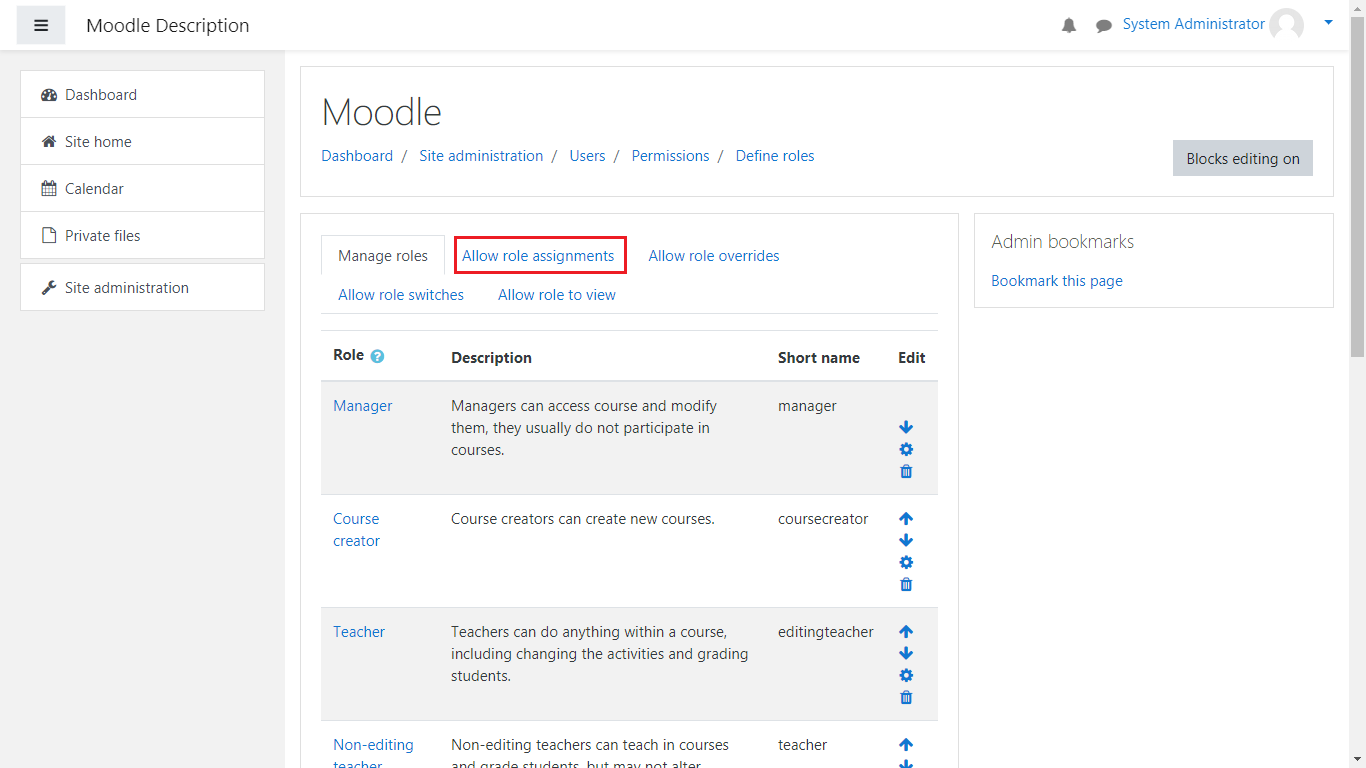
Here, you will be greeted with a table, which quickly and easily allows you to give role or roles the ability to assign roles to other people. For this example we shall allow our Tutorial role to have the ability to assign different roles to different people(in this case this will be for Students and Guests, as currently the Tutorial Role we created already has the archetype of the Manager role, and can already assign roles to the Manager, the Course Creator, the Teacher and the Non-editing teacher):

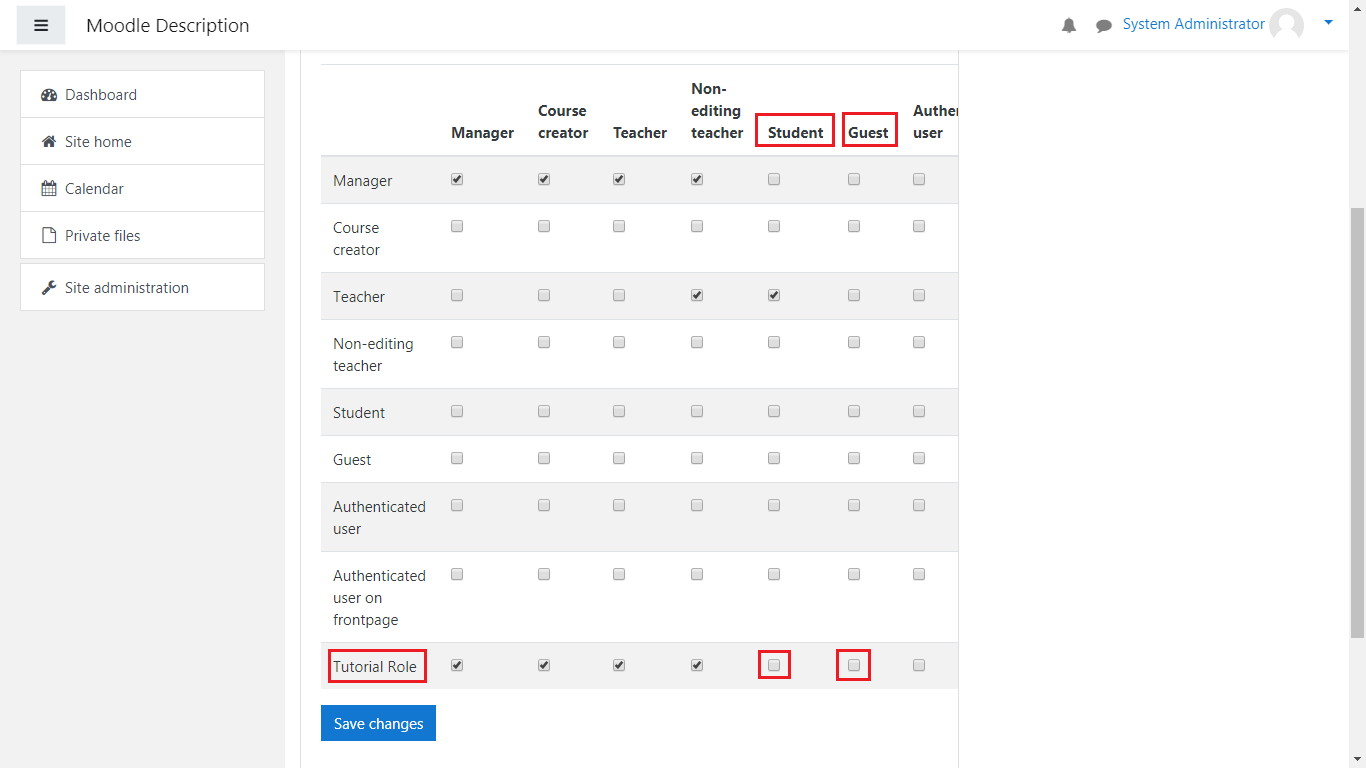
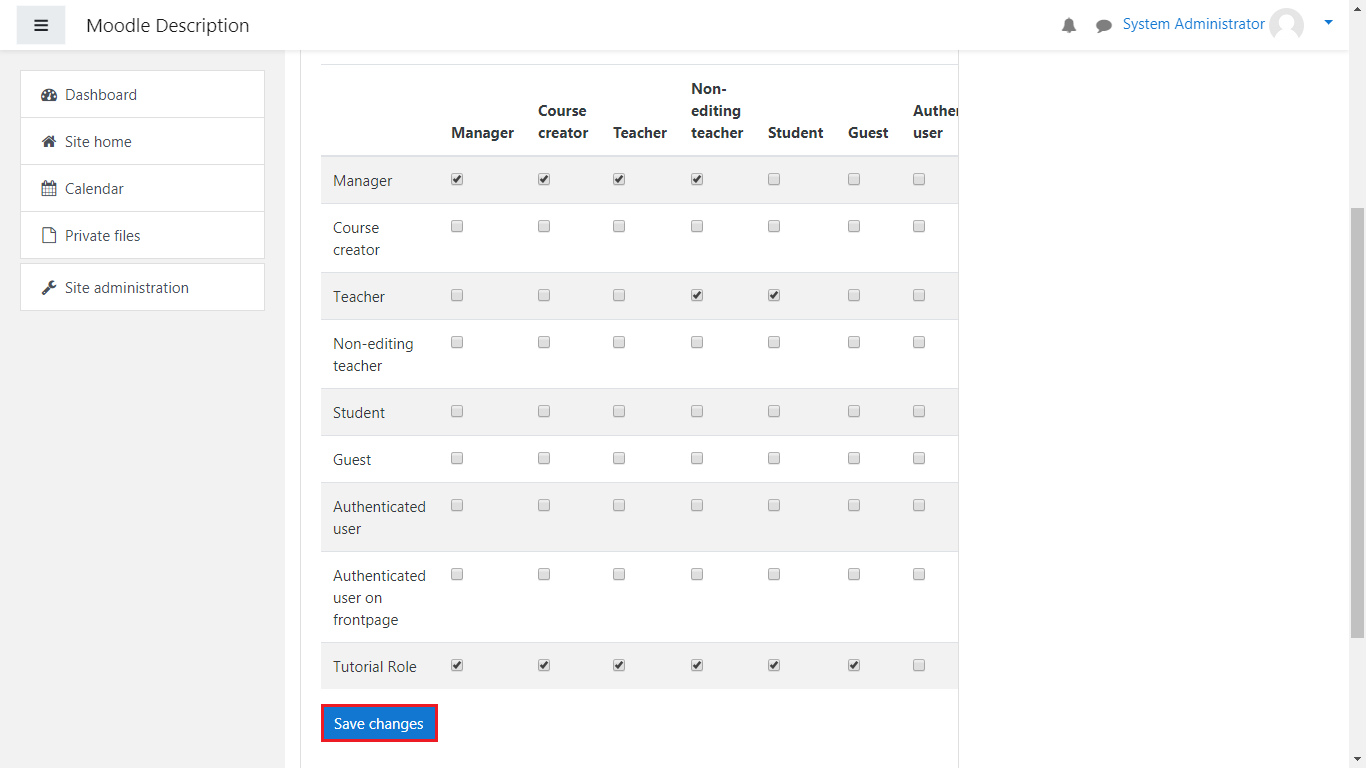
Mark the boxes and once you’re ready click on Save Changes. Now after doing so, your Tutorial Role can also assign people to the Student and Guest roles.
(Note: The row indicates for which role you’d like to allow role assignments, while the Column indicates to which other roles you’re giving rights to assign permissions).
Using this will allow you to quickly and easily give specific roles the ability to assign new people to that given role.
The next section we’re going to look at is “Allow role overrides”. Left click on it with your mouse.
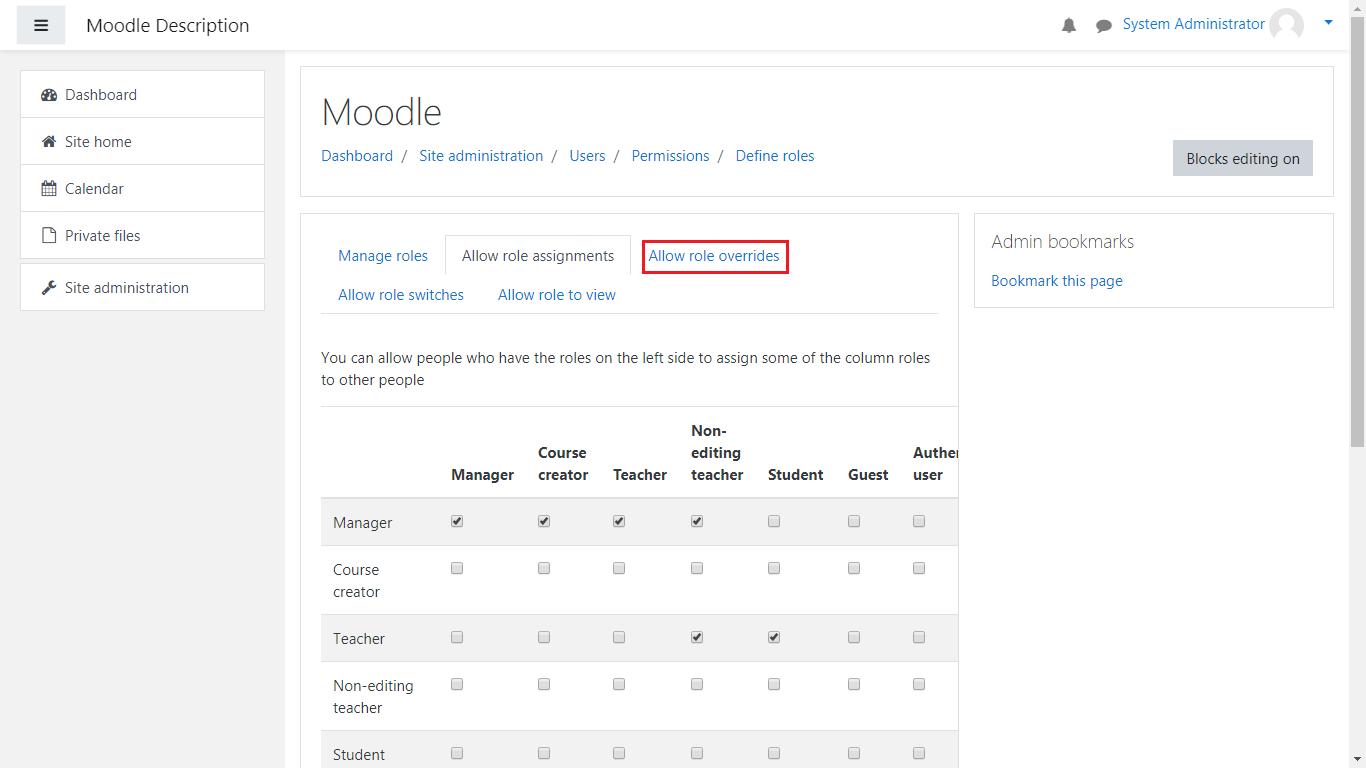
Now, once you’re there you will see a similar table as you did on the “Allow role assignments” page.
Here you can select which role will have the ability to override a specific role entirely(For example you can allow the Teacher to override the role of a Student to that of a Non-editing teacher).
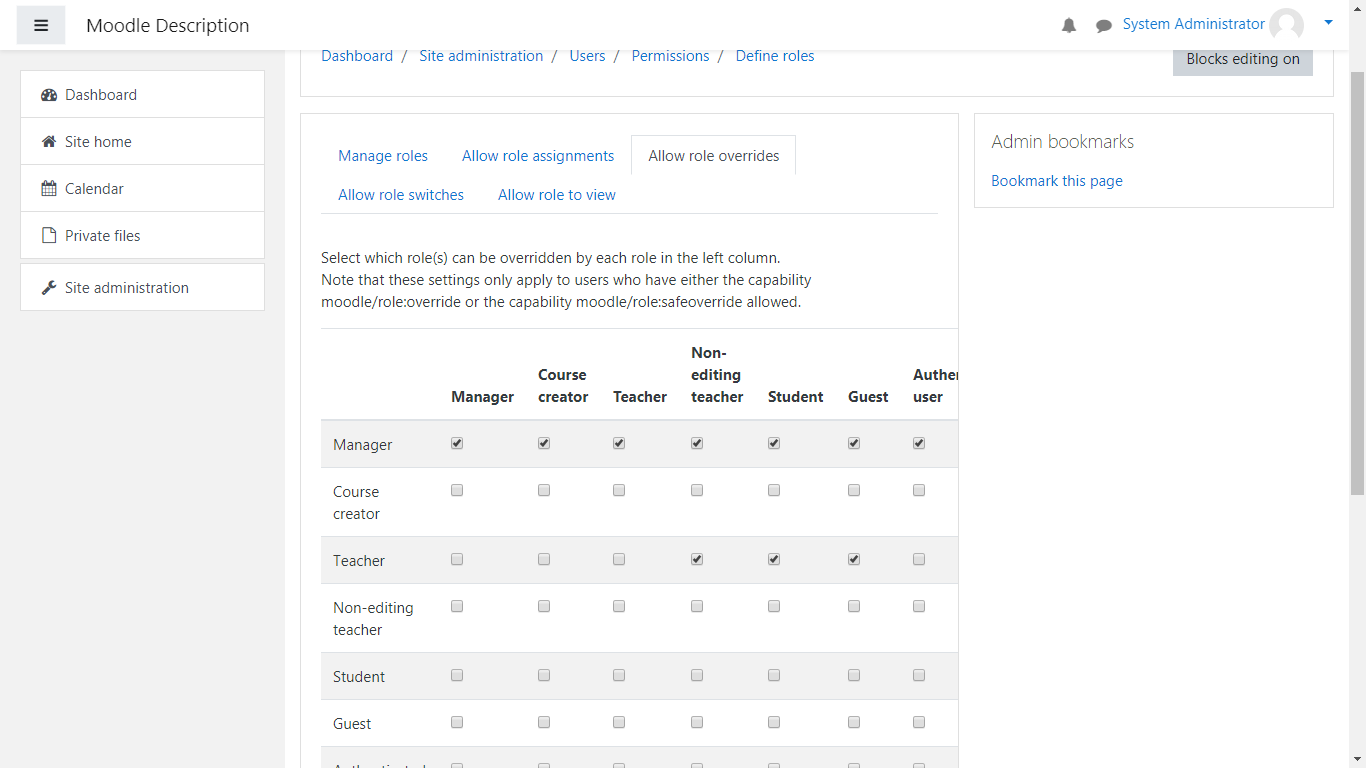
If you look closely, you can see that the Tutorial Role we created has the capability to override all other roles(since we gave it the Manager archetype when creating it).
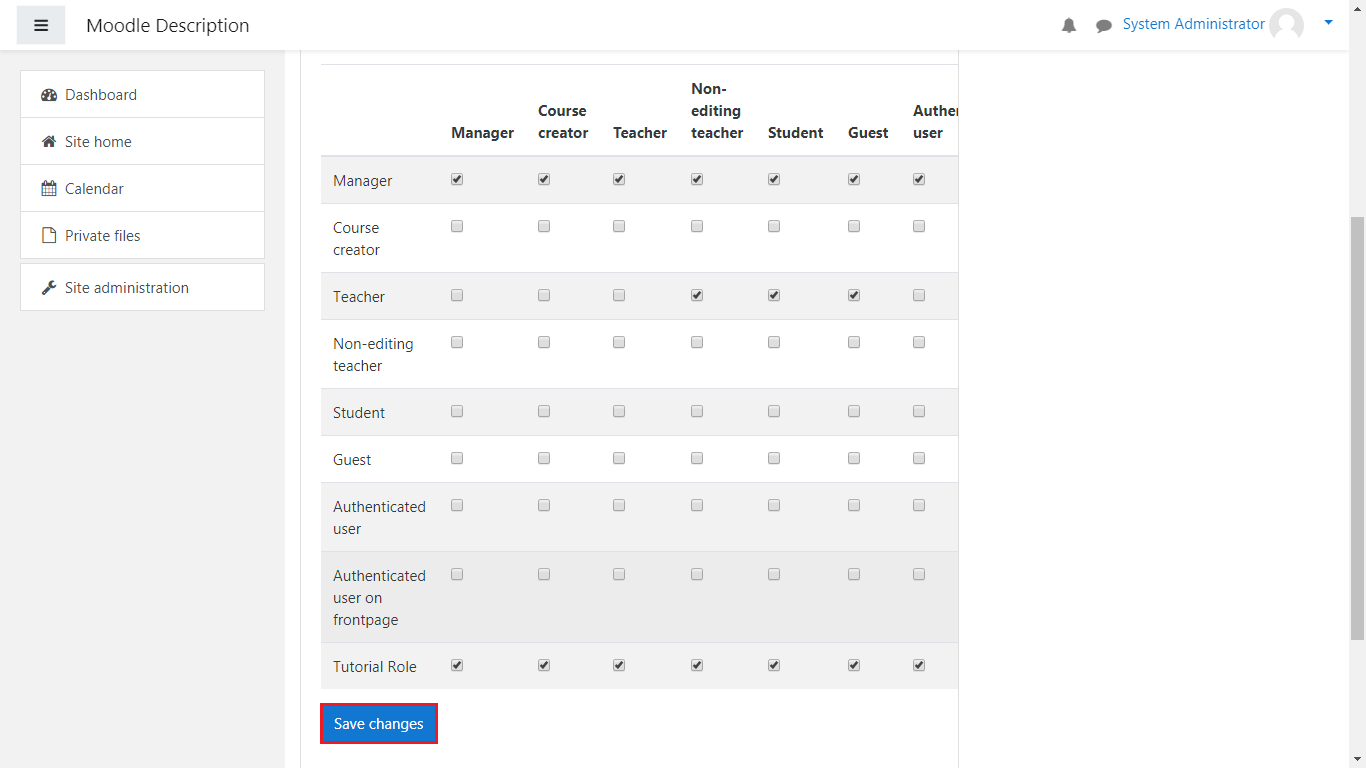
This means that our Tutorial Role can override all other roles. You can always select which role can override which the same way we did in the Allow role assignments section – just mark the role from the row with the role it can override from the column. Once you’re pleased with the changes, click on “Save Changes”.
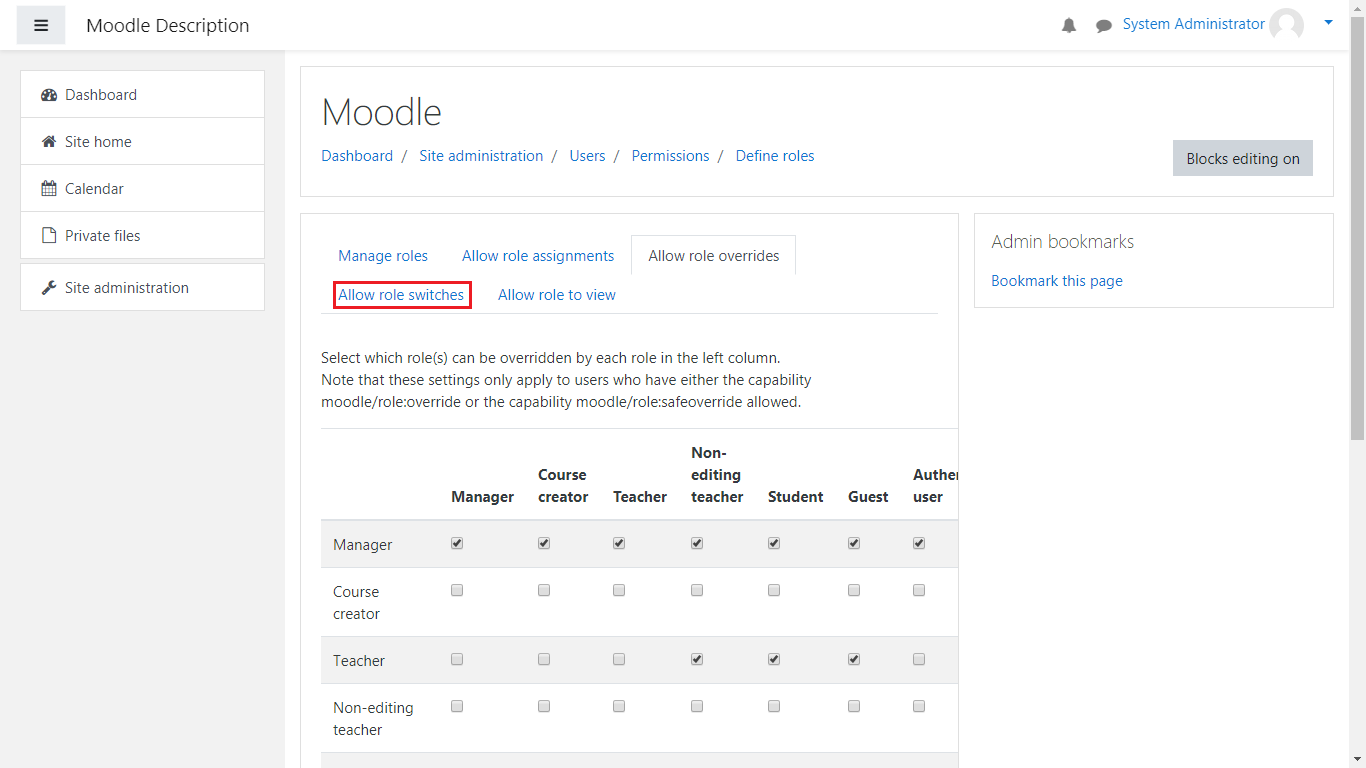
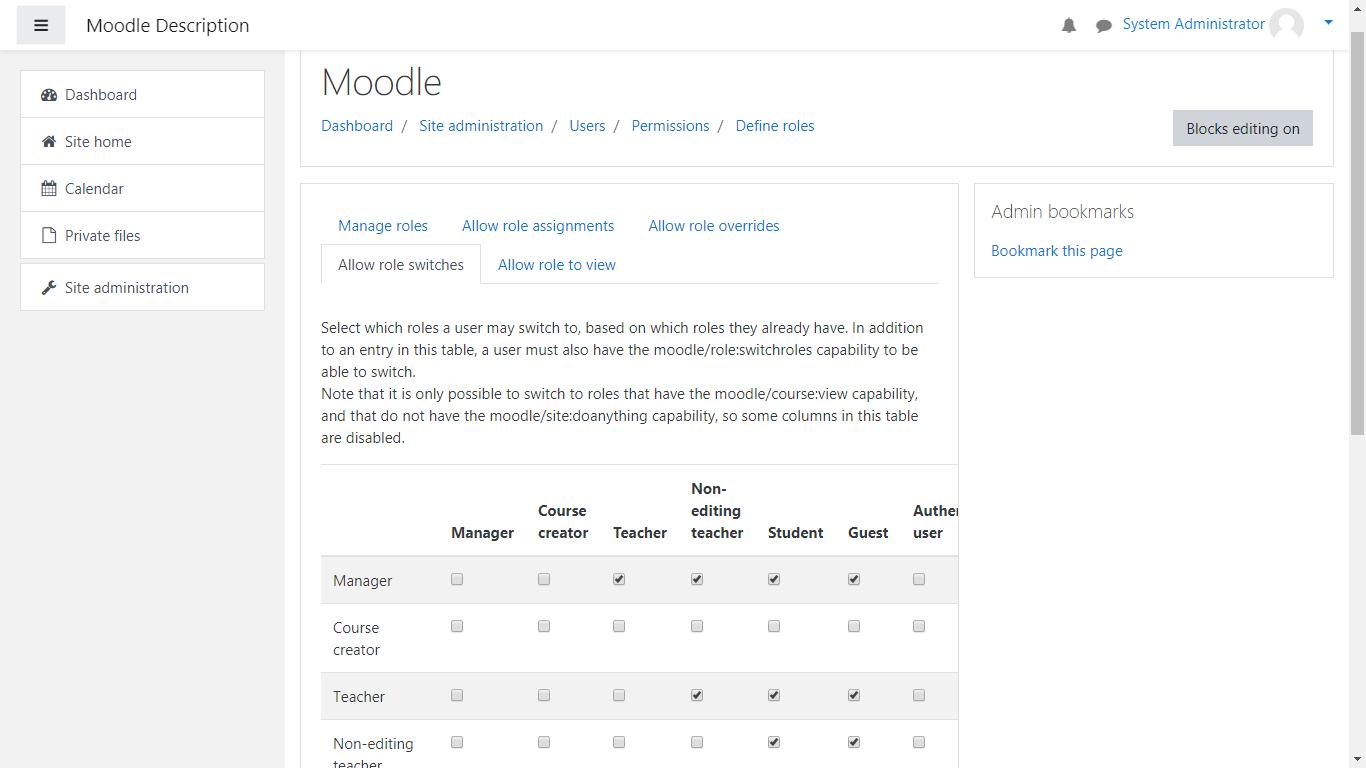
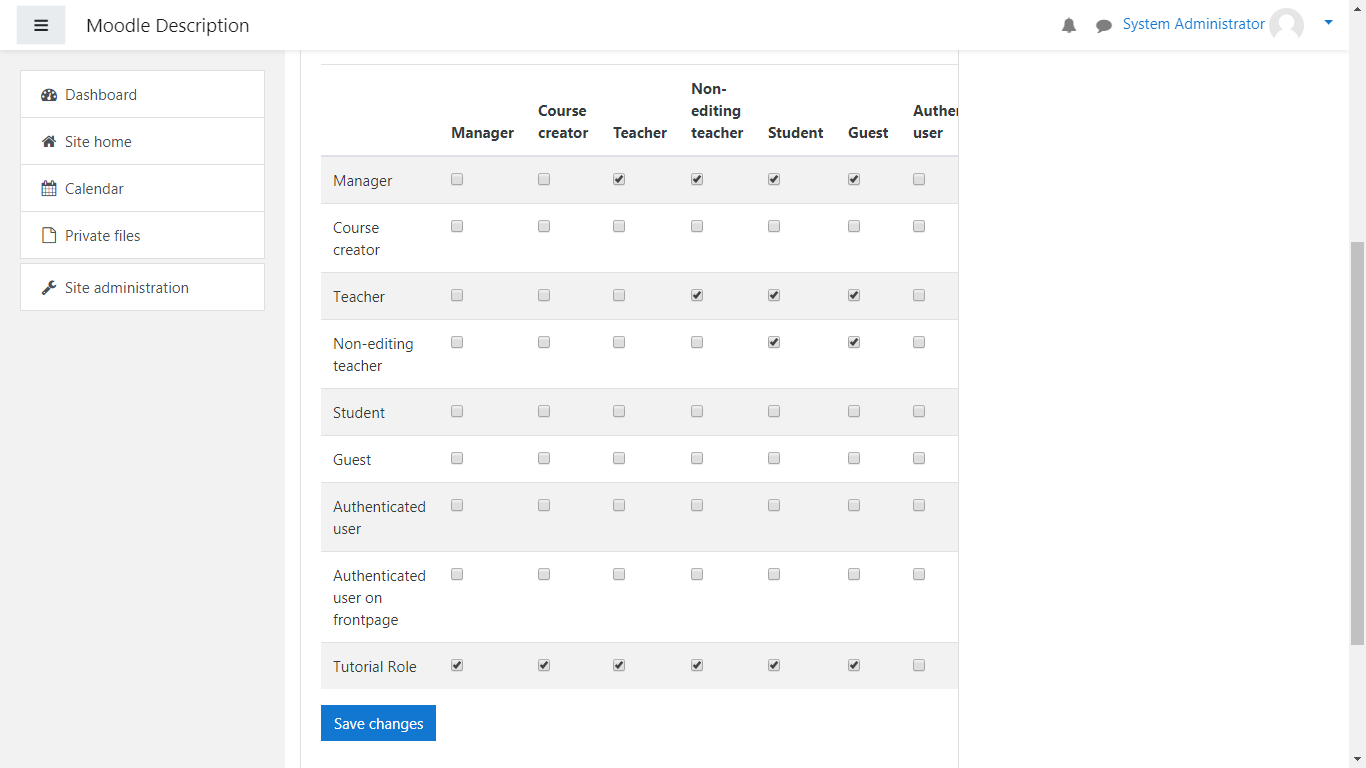
The next section we’re going to look at is the “Allow role switches” section. Click on it to be redirected to the role switch page:
This section gives you the ability to switch from one role to another. Our Tutorial Role can switch to a Manager, Course Creator, Teacher, Non-editing teacher, Student and Guest role.
It works on the same basis as the previous two sections we discussed:
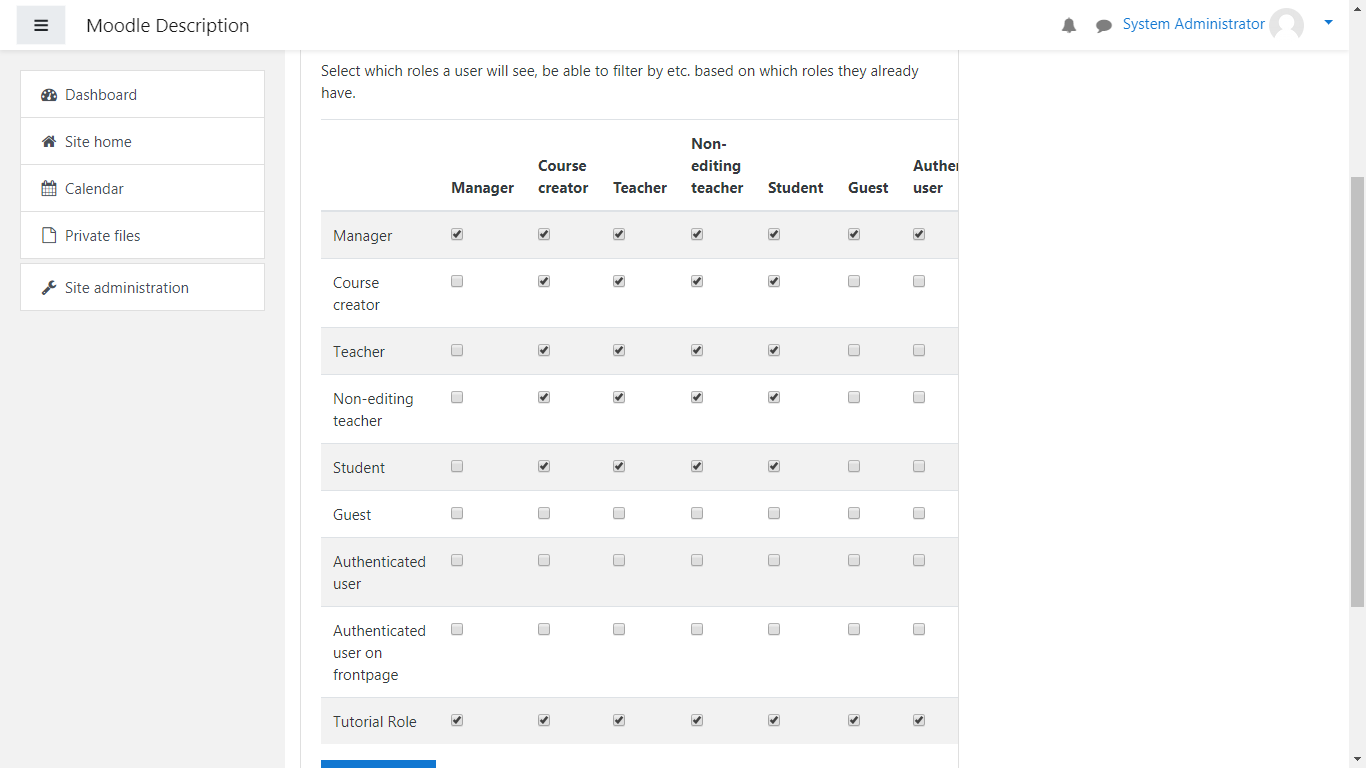
The final section we will look over is “Allow role to view”. Click on the section:
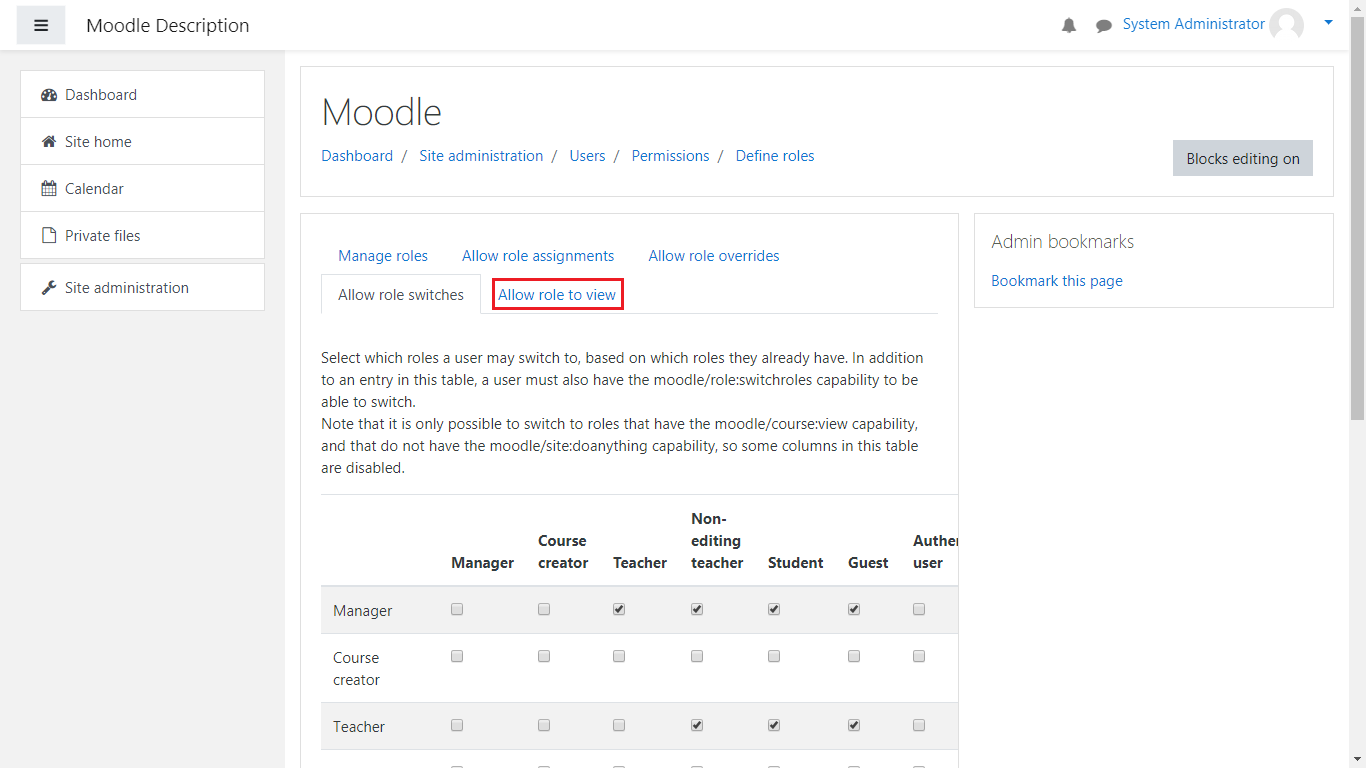
This section behaves in the same way as the previous ones, however this one allows a specific role to view or filter through selected roles.
As we can see, our Tutorial Role currently can view and filter through the same roles as the Manager role:
This wraps up our tutorial on user roles, their permissions and how you can manage them through Moodle. Good luck!