 Skip to content
In the following tutorial we will provide you with more information on how to create a backup of your Moodle application. There are two ways in which you can create the backup. Automatic using the Moodle application interface and functionality and manual using the tools in your cPanel account.
First we will review the automatic backup service which is provided by the Moodle application. For this you should access your Moodle Administrative Dashboard:
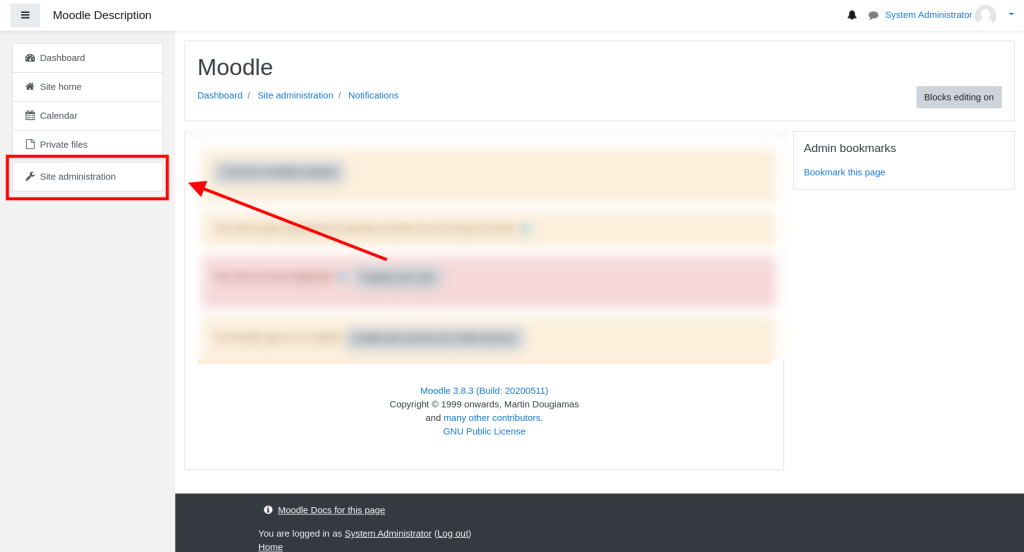
Once you have accessed your Moodle Administrative Dashboard click on the Site Administration menu.
From there you should navigate to the Courses tab where you will be provided with several options for the backup service of the Moodle application.
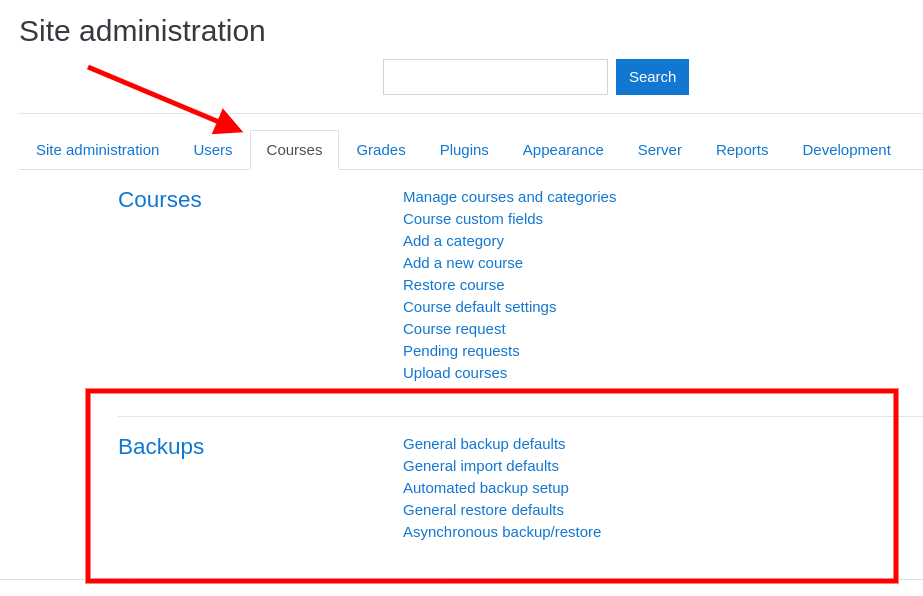
Once you are on the Courses menu select the Automated Backup setup option so you could configure the Automatic backup service of the Moodle application of your website.
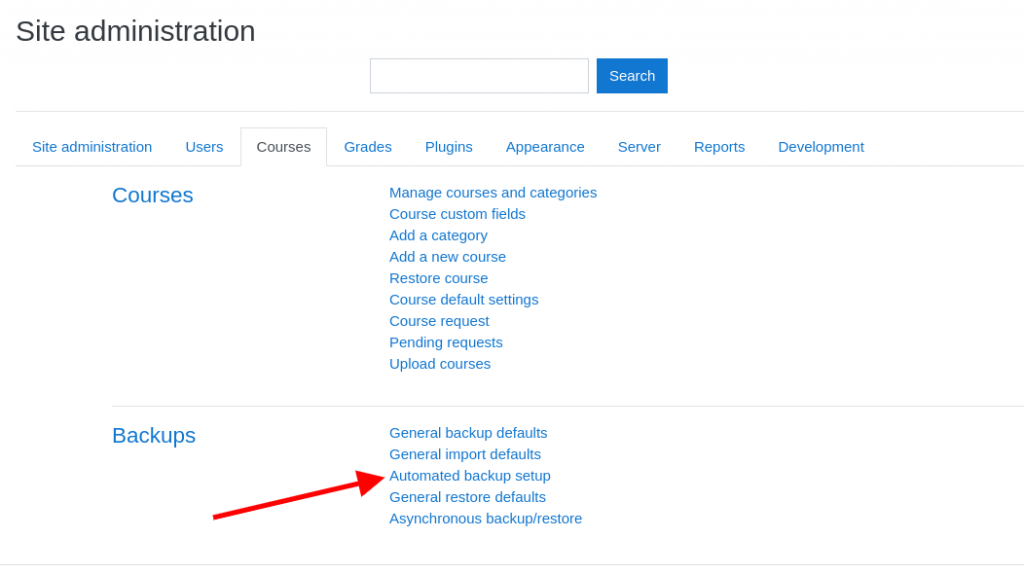
When you click on the option you will be redirected to the configuration page of the Automatic Backups. On this page you will be provided with options such as:
- How often the backups will be performed for your website.
- At what time you wish your Moodle application backup service to perform the backup of your website.
- Where the backups will be stored.
- How many backups the application will keep before overwriting the oldest backup with the newest one.
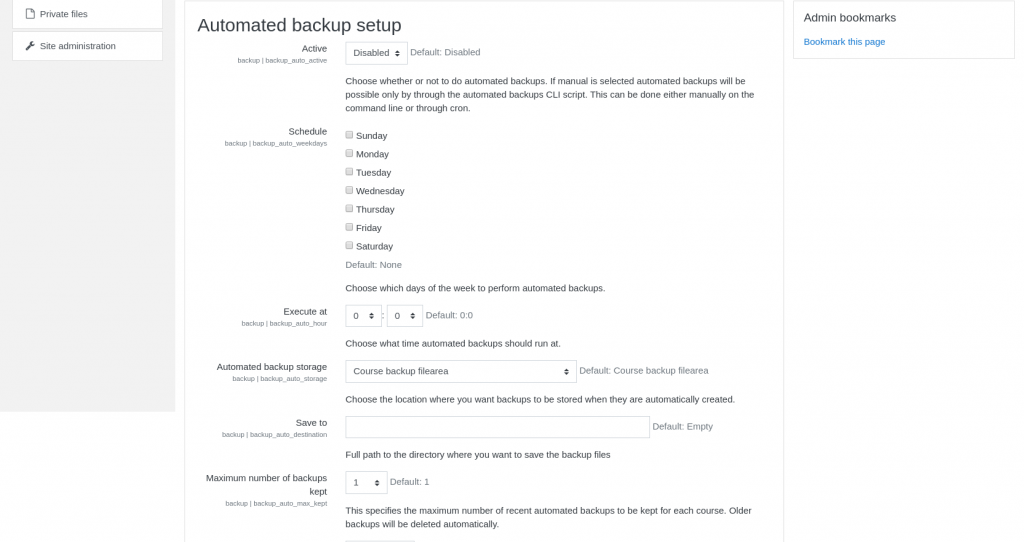
Once you have configured the backup service you should change it status from Disabled to Enable and click “Save Changes” at the bottom of the page.
The Automatic backup service of the Moodle application will create a backup of your website:
- Users
- Role Assignment
- Activities and Resources
- Blocks
- The Moodle files
- Filters
- Badges
- Calendar Events
- Logs
In short the Automatic Backup service of your Moodle application will create a backup of your Moodle essential information and later it could be used to restore your website on a new Moodle application.
At the beginning of the tutorial we have mentioned that you have two ways of creating a backup of your Moodle website. In the next steps we will provide you with information on how to create a manual backup of your website using the cPanel tools at your disposal.
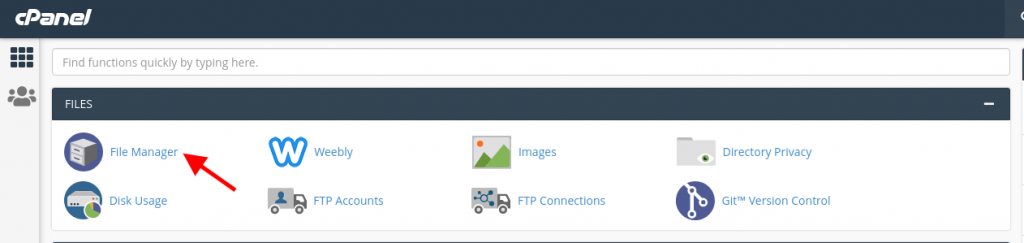
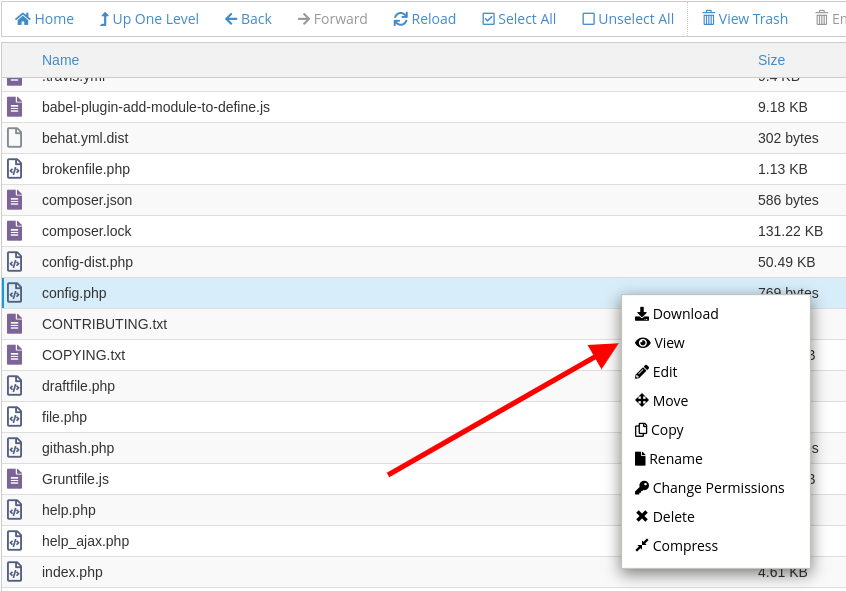
First you should access your cPanel account and click on the File Manager tool.
Once you have accessed the tool right click on the document root of your Moodle application and click Compress so you could create an archive of your Moodle website files.
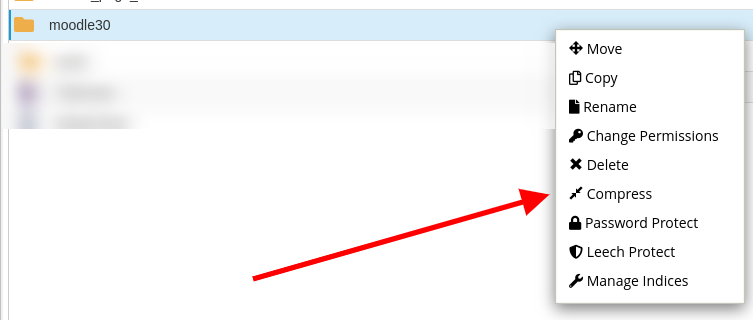
Once you select the Compress option you will be presented with a new window on which you should select the type of the Archive file for your backup, the name of the backup file and the location where it will be stored. We recommend selecting the Zip archive option. Once you have set the requested information the backup creation should proceed and once it is completed it will be present in your account and you could download it on your local device.
Once you have performed the backup of your Moodle files you should proceed with creating a backup of your Moodledata directory which contains your courses. By default the Moodledata directory will be set in your account home directory. The process is the same as for the Moodle files and creating the archive.
When you have completed the backup of the Moodle files and the Moodledata directory you should proceed with creating a backup of your Moodle Website database which is the last step.
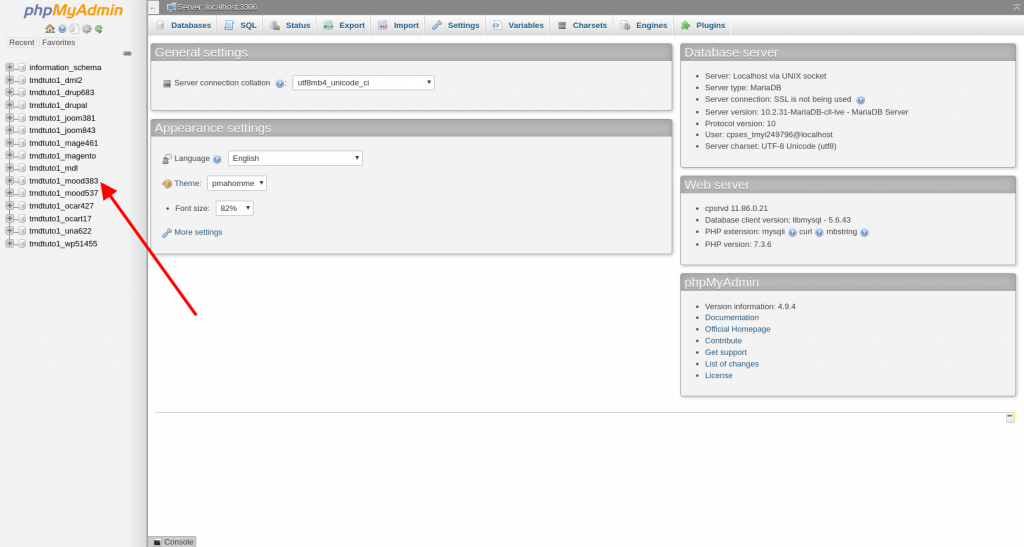
Access your cPanel account and click on the phpMyAdmin tool.

Once you have clicked on the tool you will be redirected to a page which will show all active databases on your account.
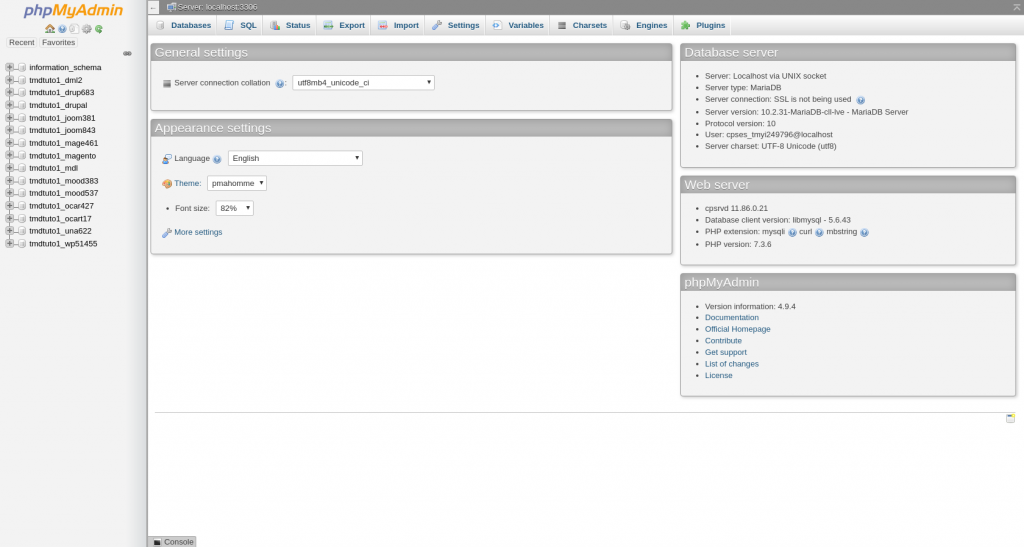
The databases which are present on your cPanel account will be shown on the left side of the page. If you have more than one web application installed you will have more than one database. To select the correct database of your Moodle application you should review with which database your Moodle application is configured. This process is easy and straightforward.
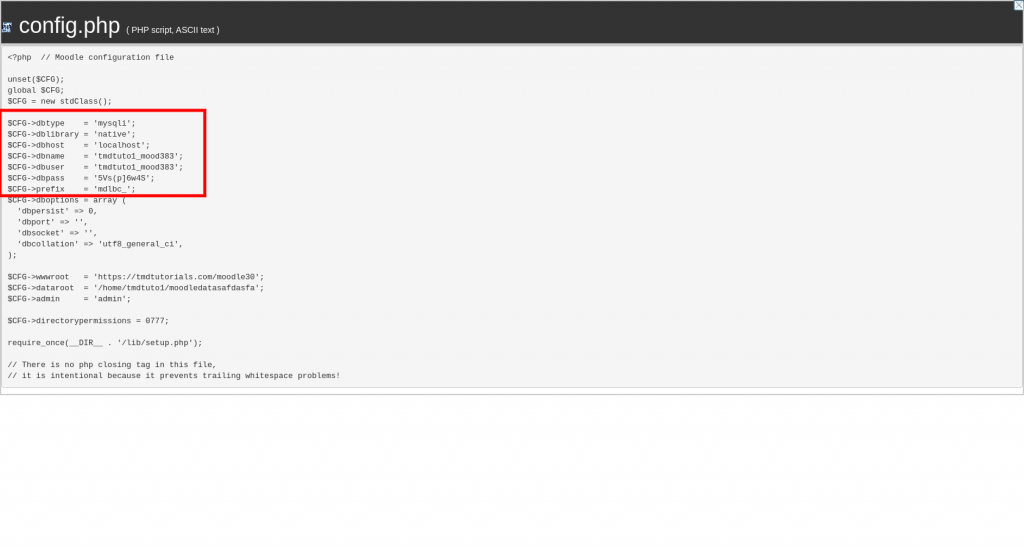
Access the File Manager tool and navigate to the document root of your Moodle application. Once there right click on “config.php” file and click on “View”.
Once you have selected the “View” option you will be presented with the configuration information of your Moodle application and the database with which your Moodle application is configured.
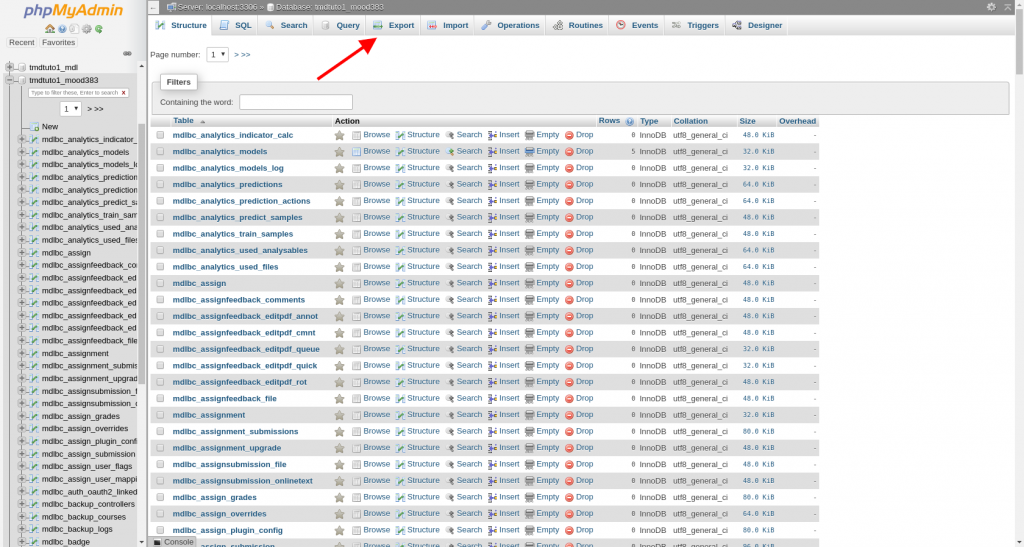
Once you have found the database name of your Moodle application navigate back to the phpMyAdmin tool and select it.
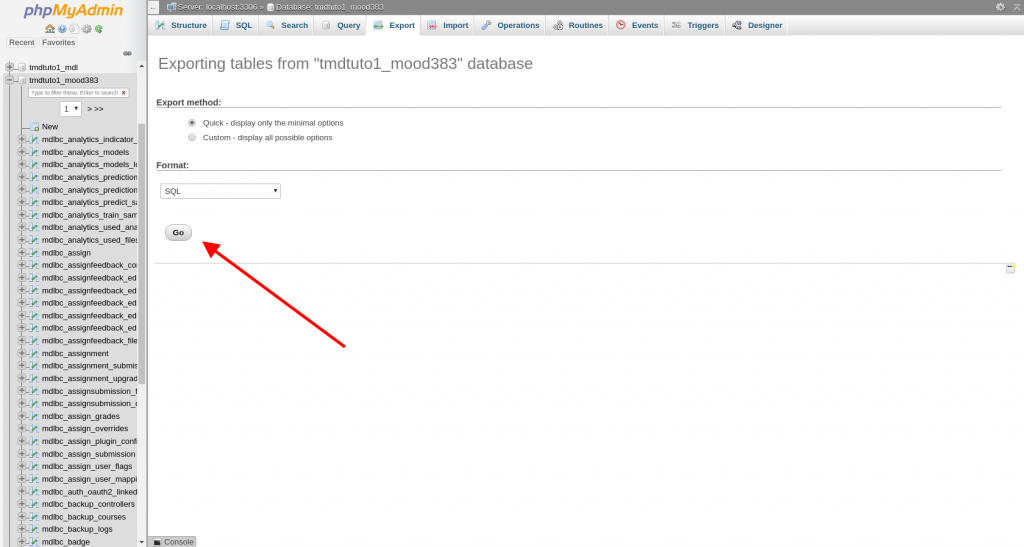
Once you have selected the database you should click on the Export button at the top of the page.
You will be redirected to a new page where you could configure what should include the backup of the database if you select to manually configure it. Or you could create a backup of the entire database by clicking on the “Go” button.
This will prompt a screen which will ask you to specify where on your local device the backup of the database should be saved.