Skip to content
In the following guide we will provide you with more information regarding Managing the users in your Moodle application. Due to its user friendly interface this task is easy to perform. All of the tools which are needed to manage your application users are present in the Administrative Dashboard of the Moodle application.
To manage your application users first you should access your Moodle Administrative Dashboard.
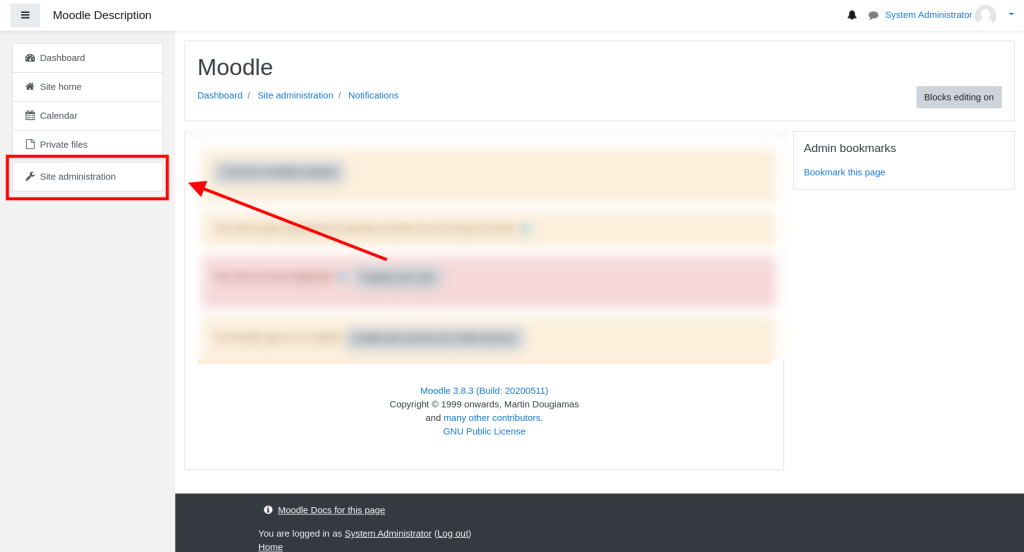
Once you have accessed your Administrative Dashboard click on the Site Administration menu.
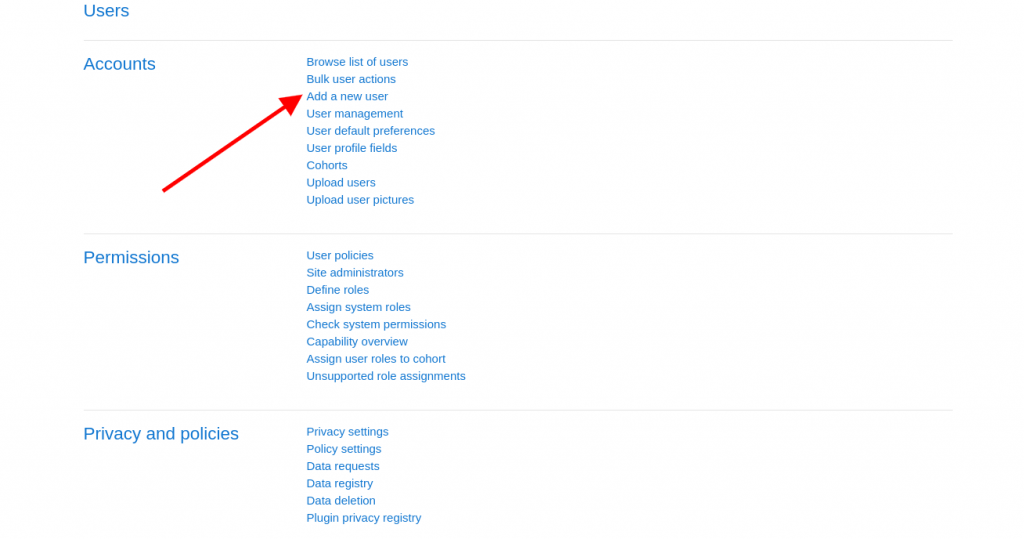
On the next page you should click on the Users tab so you could see the different options which the application is offering to Manage your users.
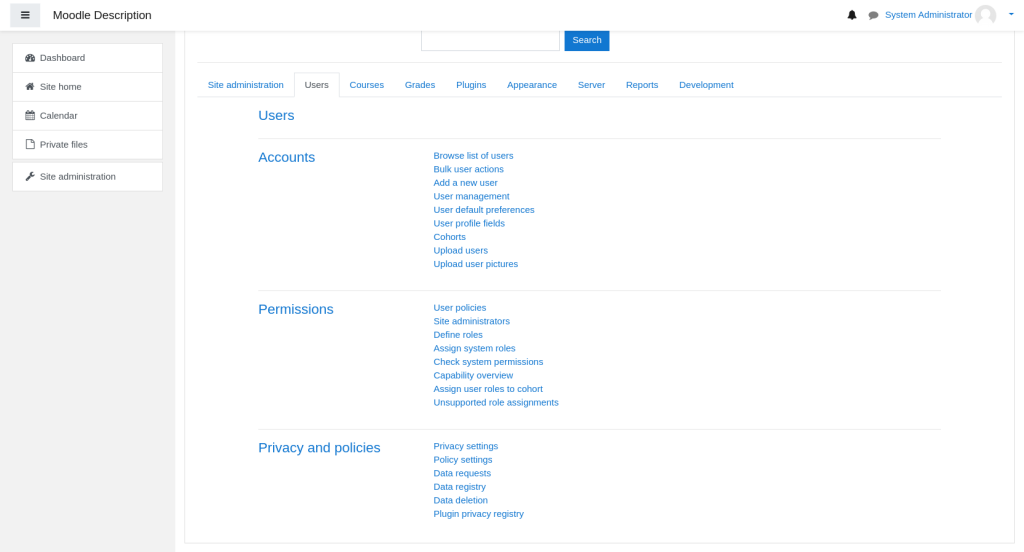
As you could see you are provided with various options such as Creating a new Username or Uploading a file with a list of Users which you have previously created. You could also assign different roles for your users which will grant them different privileges.
Creating a user is a straightforward and easy process. First you should click on the Add a new user.
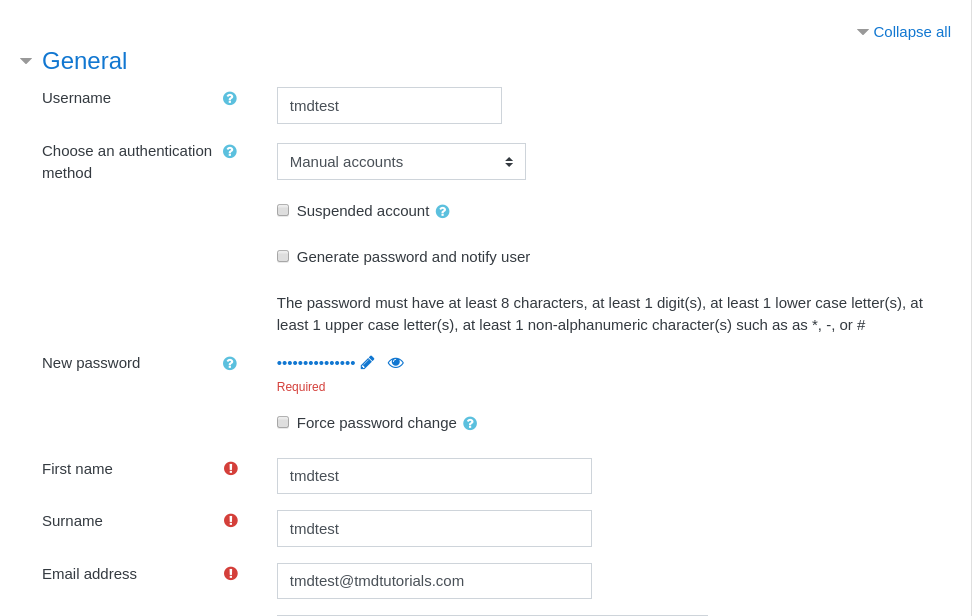
Once you have clicked on the option you will be redirected to a new page where you should input the information of the User which you wish to create. Please note that all of the details could be altered in the future if you decide to do it. The mandatory fields for the User creation are as follow:
- First Name
- Surname
- Email Address
- Username
- New Password
All other fields are optional and if you wish you could not define them during the process.
Once you have filled all of the information for the user which will be created you could proceed in saving the changes by clicking Create User at the bottom of the page.
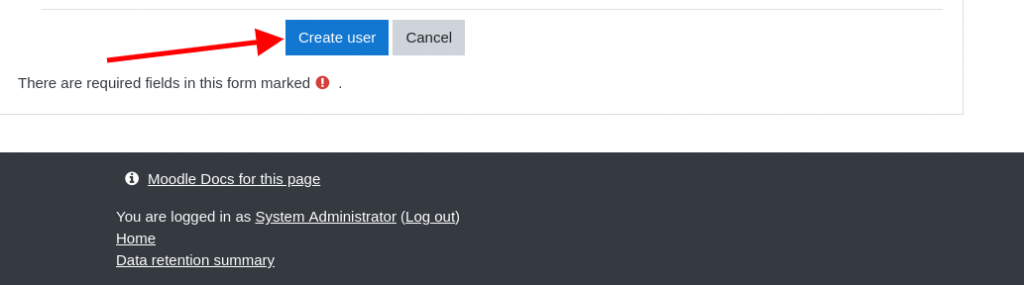
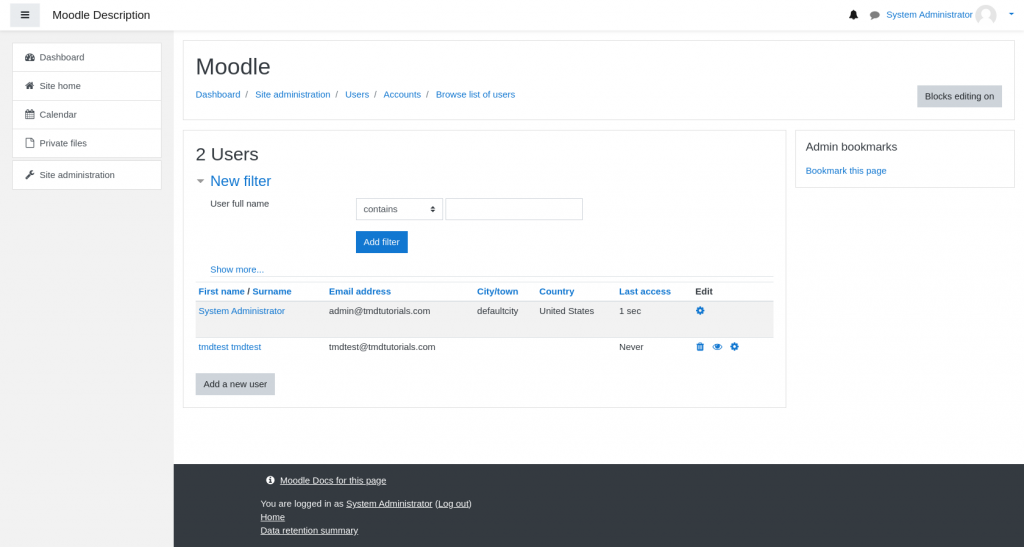
Once the creation of the Username is completed you will be redirected to the Browse List of Users section of your website where the username will be displayed. This section is providing you with information about all users on your Moodle Application.