 Skip to content
Moodle is a very easy to use LMS application and that applies also for the installation of the application. In this section you will be provided with a guide on how to install the application Automatically.
First you should access your cPanel account and scroll to the bottom of your cPanel account where you will find the Softaculous App Installer shortcut and menu:
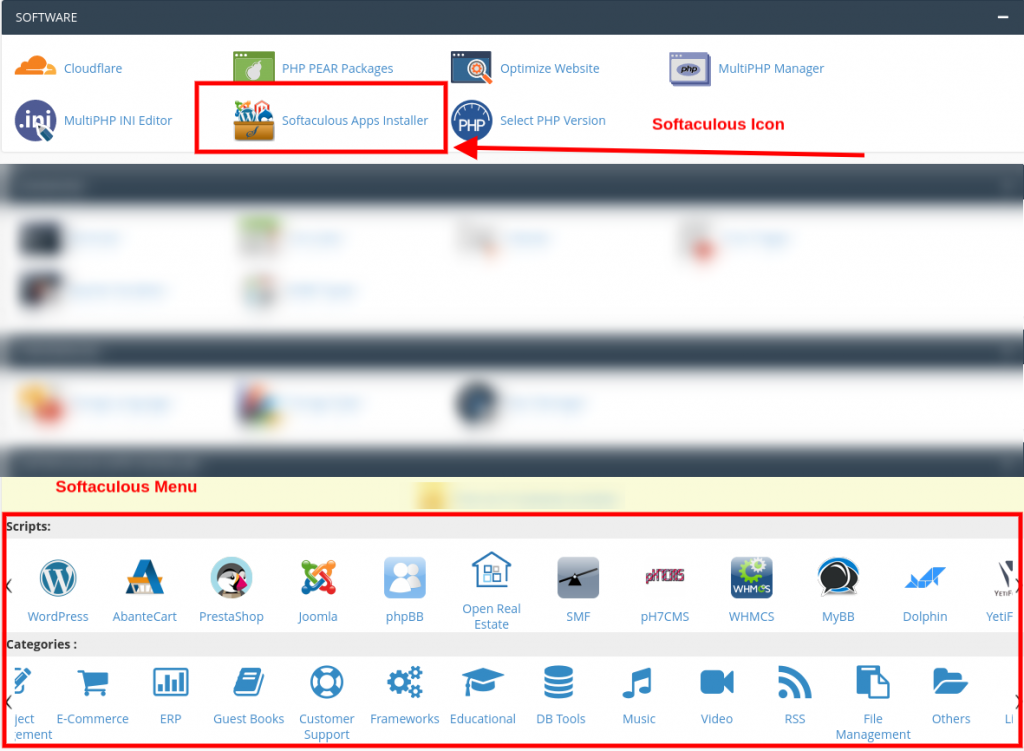
Once you have reached the Softaculous App installer you have two options from which you could access it. When you click the icon you will access the main menu of the application where all scripts which could be installed by the software and from there you should use the search functionality to locate the Moodle application:
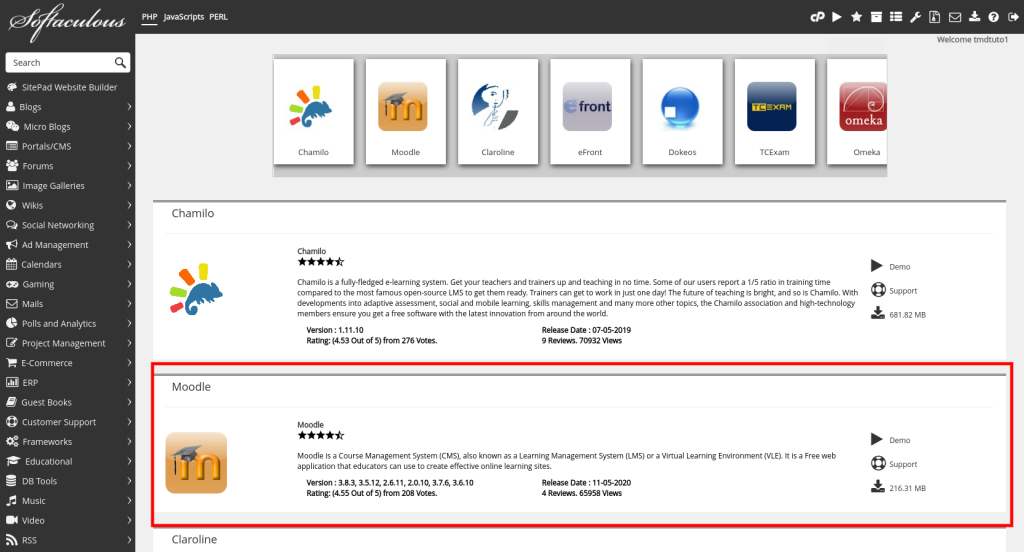
Or you could use the menu of the application to directly display all LMS applications and from there select the Moodle applications:

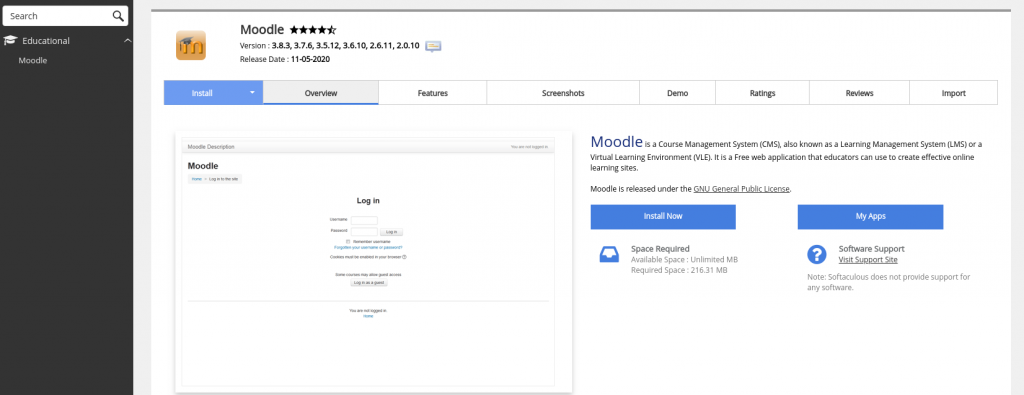
To install the application you should click on the Install button if you have found the application directly from the Softaculous icon or if you have found the application from the Softacolous Menu you should click on the Moodle logo to begin the installation. The installation screen looks as follow:
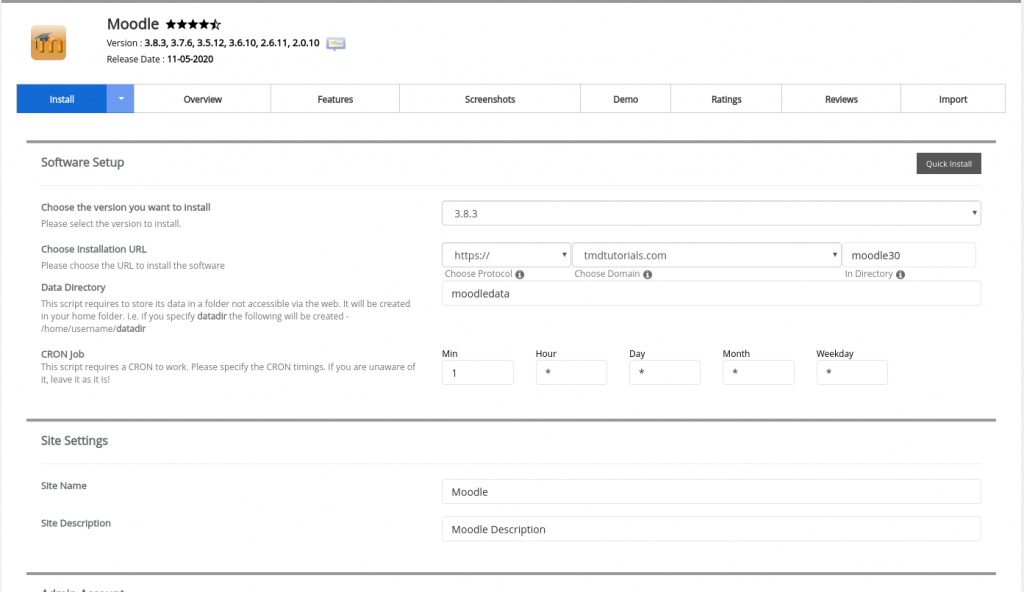
As you could see from the provided screenshots the Softaculous app installer auto fils the information needed for the application to be installed. Please note that those are the default details which are using the Primary domain of your account. If you do not wish to install the application using the default details we will provide you with a brief description of each option so you could fill them per your needs.
The first option which you could choose is the version of the Moodle application which you wish to be installed. The Softaculous App installer is providing you 6 different Moodle version and by default the latest stable version is selected. But if you wish to install an old version of the application you just have to select it from the drop down menu:
![]()
Once you have decided which Moodle version you will use the next step is to decide on which domain name you wish the Moodle application to be installed. Also you could choose to install the Moodle application to a subdirectory by filling the “In Directory” option with the name of the subdirectory to which you wish to install the application. If you wish the application to be installed on your domain and not in a subdirectory the “In Directory” field should remain empty as it shown on the following screenshot:
![]()
As we have stated earlier the Softaculous App installed by default will select the Primary domain of your account. If you wish the LMS application to be installed under another domain you should click on the domain name and a drop down menu will show you the available domains on which you could install the application:
![]()
The next field which you should populate is the data directory. In this directory Moodle will save information such as courses, users and other site information which is used by the Moodle application. By default the Softaculous App installer will name this directory “moodledata” but if you wish you could change it to a name that you would like to use:

In the next field you will be asked to configure how often the Moodle Cron job will be executed for your website. The Cron job of Moodle will run different task which are necessary for the the proper functionality of the software. By default the Softaculous App installer will set the cron job to be executed every minute which could cause performance issues for your account and websites. We would recommend adjusting the Cron job to be executed every 30 minutes:

In the next section of the Installation wizard are the SEO options for your Moodle applications such as the Site Title and Site Description you could leave this field as it is or you could customize by addining the Site Title and description which your website will use in the future. Please note that these information could be changed later in your Moodle Administrative Dashboard:

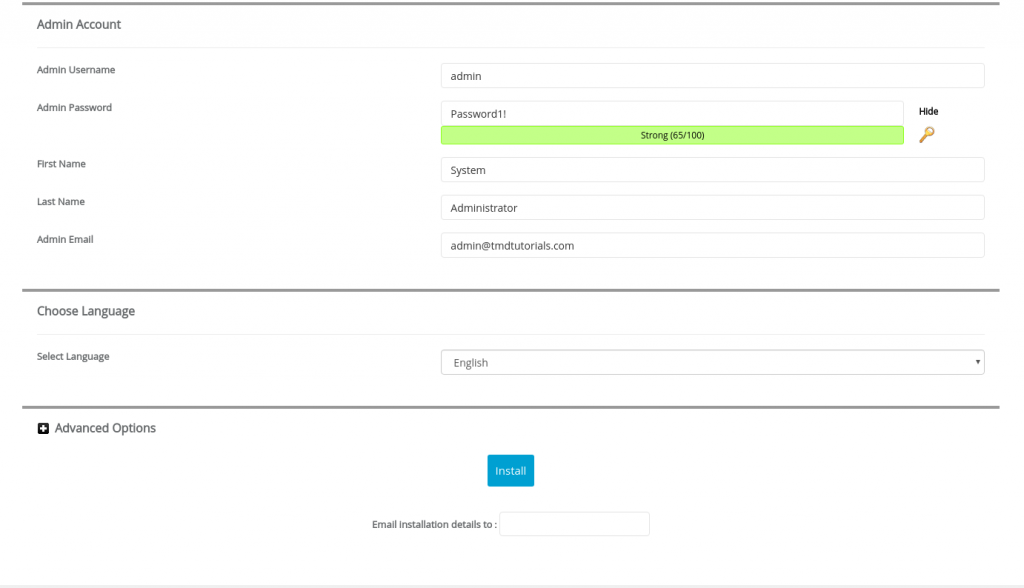
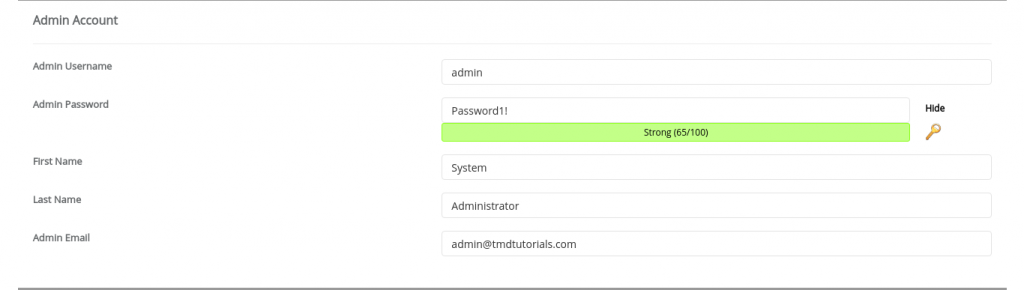
Next you will have to populate the details for the Administrative account of your Moodle application. This account will be used to manage your Moodle application. By default the Softaculous App installer have populated the section with default details but we recommend changing them and save them to a secure location so you could not forget them:
The last section of the installation Wizard is regarding what language the Software will be using. By default English is selected but you could choose from 17 different languages:

Once you have adjusted the details of the application you could click on the install button:

After the installation process is complete you will be provided with the URL of your Moodle application home page and the Administrative page:
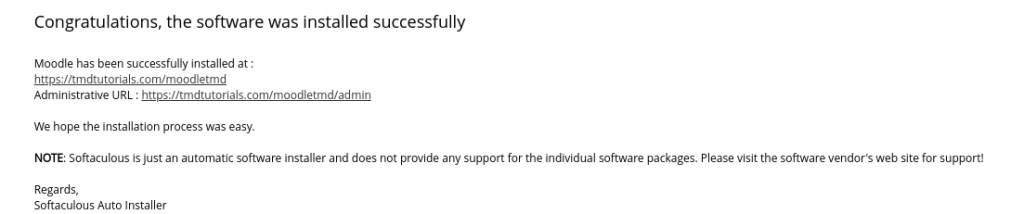
Please note that during the process we have selected the Moodle application to be installed in a subdirectory and not directly on the domain which is used.