 Skip to content
How to activate the default Joomla cache
By default, Joomla is not configured to cache any content. The good news is that Joomla does have a built in caching setting, which can be easily activated through the Joomla administrator dashboard.
To begin, you would need to be logged into your Joomla’s administrator dashboard. In case it has not been changed, the login URL should be yourdomain.com/administrator, where you would need to fill in your administrator Username and Password.
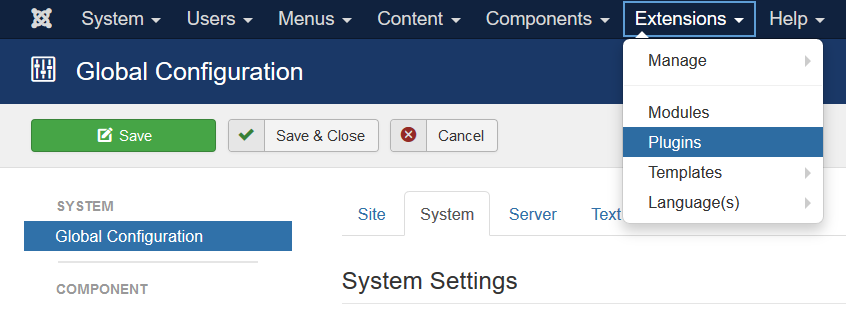
Once logged into your Joomla dashboard, select “System” from the menu on the top of your screen and click “Global Configuration” from the drop-down.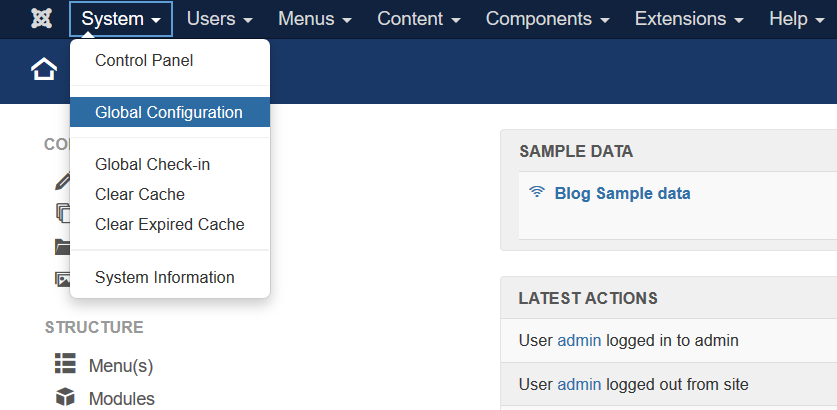
Once the “Global Configuration” page loads, you would need to click on “System”, where you will find the Cache Settings.
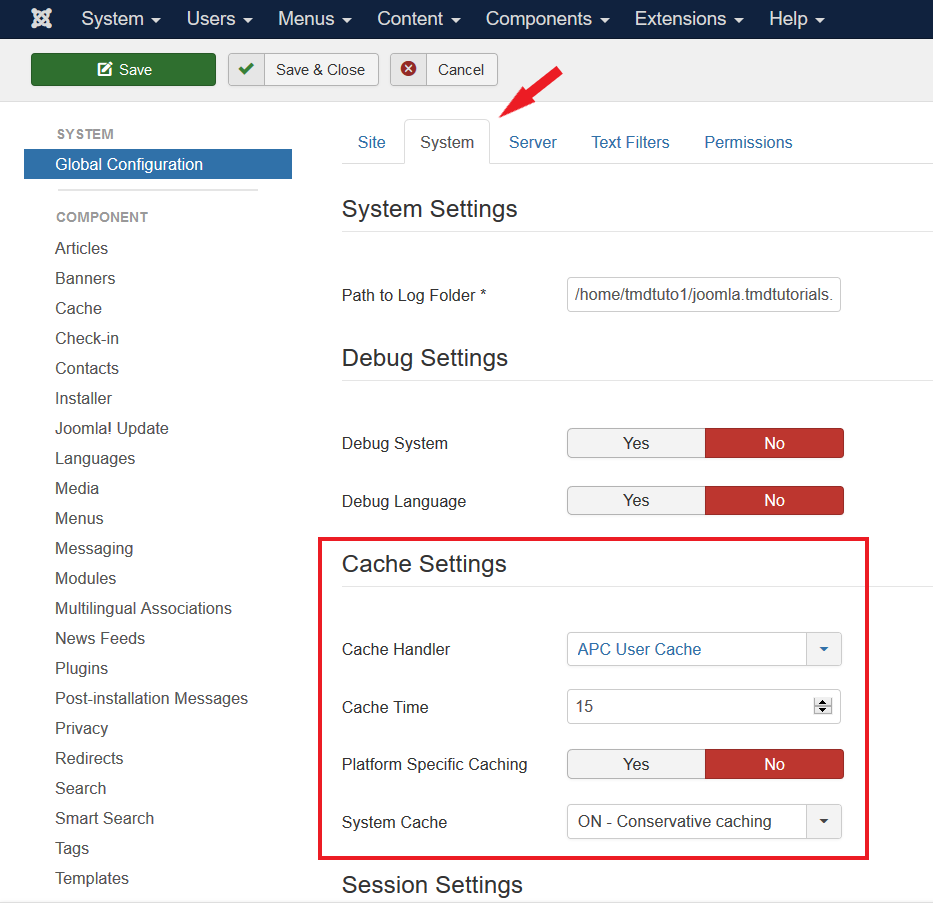
In the “System Cache” option you will see three types of caching options. You would need to select the one that best suits your needs.
- The first option “Caching disabled” will disable all the caching for your website. In case you are using a different type of caching, you may select this option to avoid any conflicts with your other caching configuration.
- The second option “Conservative caching” is the most popular type of caching used by developers and Joomla website owners. The way it functions is, when there is a visitor on one of your website’s pages, Joomla will check the cache directory and if there is a non expired version of the page, it will be served to the visitor. And in case there isn’t a cached version of the page, Joomla will create such, and it will be served to the next visitor.
- The last option “Progressive caching” can be used when your modules mostly have static content. By selecting this option when you have a new visitor on your website, Joomla will create cached versions of the pages that the specific user visits. However, the cached pages will only be served to the specific visitor.

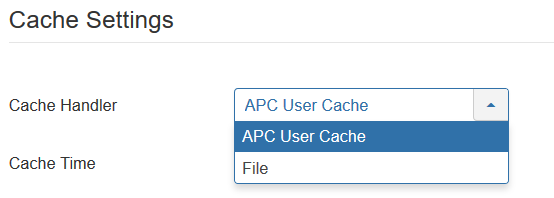
Another tool that you can use for more caching options is the Cache Handler. This option will allow you to use different caching systems rather than the default “APC User Cache” or “File” options. However, this is not a straight forward setup and requires advanced developing skills.
The “Cache Time” option will allow you to set the period of time(in minutes) for which a cached version of a page remains valid and served to your website’s visitors. In case your website is being updated frequently with new information and content, then you could set a lower cache time. And in case your website has mostly static content, you may set the cache to be kept for a longer period of time.

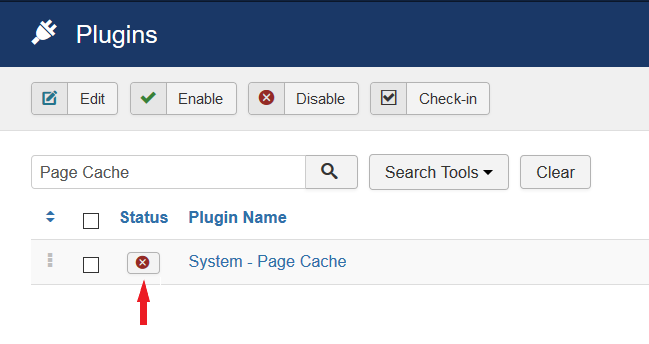
When installed, Joomla also comes with a plugin called “Page Cache”, which can be enabled through the Plugins page. To go to this, click on the “Extensions” option from the menu on the top of your screen and from the dropdown menu select “Plugins”.
Now that you are one the “Plugins” page, use the search bar to enter “Page Cache”. Once the plugin appears, click the red “X” button to enable it.
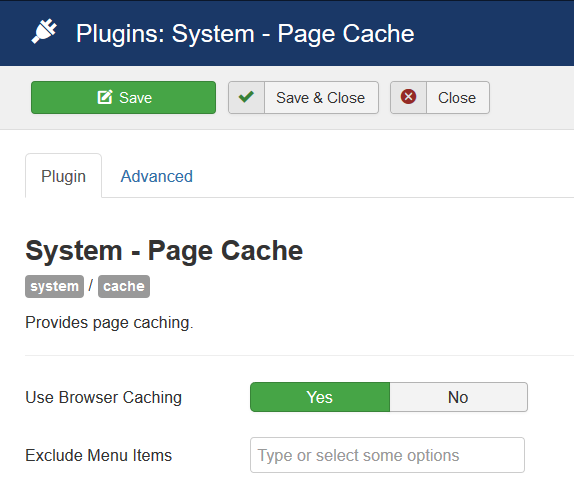
One the plugin is enabled, click on the plugin’s name to open it. In the plugin’s options click “Yes” for “Use Browser Caching”. This way the visited pages of the website will be cached by the visitor’s browser and the server would not have to call the pages again and again while the visitor is browsing your website.
Using cache for your website is always a good idea. This will simply speed up your website and will make the visitor’s experience more enjoyable. Joomla definitely has a lot to offer when it comes to caching options, so once configured correctly, your website’s performance will be significantly improved.