 Skip to content
For anyone interested in publishing Articles, Jooma provides numerous features and customizations, but an Article may also be created in just a few steps.
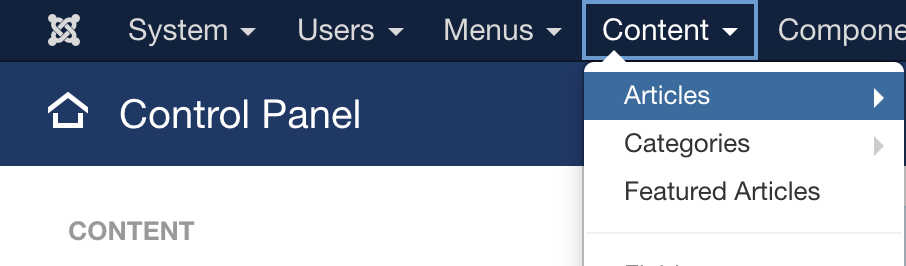
To create an article on Joomla 3, first, access the Administrative area of the website. Once there navigate to Content -> Articles -> Add a New Article:

- The “Content” tab will be displayed:
This tab has two main parts:
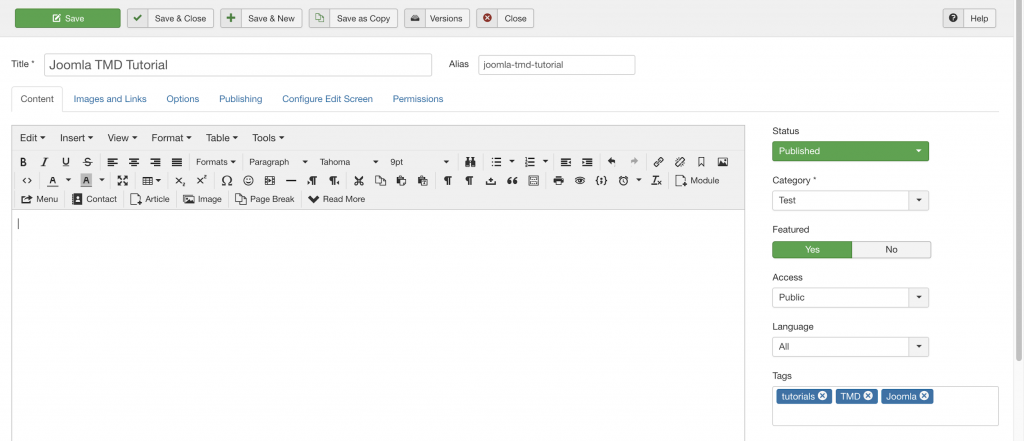
1.1. On the left side, you can set the Article Title and Alias, which is added as an additional SEO improvement. You can let Joomla auto-fill the Alias, by using the Article Name strings. An example of how Joomla auto-fills an Article Alias:
Article Title: Joomla TMDHosting Tutorial
Alias: joomla-tmdhosting-tutorial
But you can manually fill in the Alias to your preference.
Here, you can also find numerous options for text-editing or adding tables, inserting images, add or embed media to the article.
- In order to display only the Introduction of the Article in the home page of your website or blog, left click with your cursor just below the Introduction and click on “Read More”:
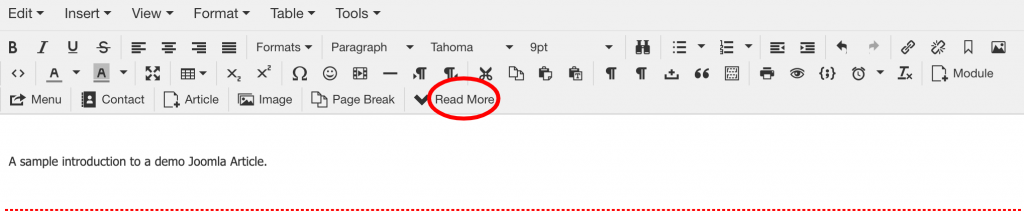
This will add a red line where your cursor was placed, to separate the Introduction from the rest of the Article. To view its full content, a “ Read More” button will automatically be placed for visitors to click on.
- You can use the “Page Break” button in the same way, to further separate the Article into multiple pages.
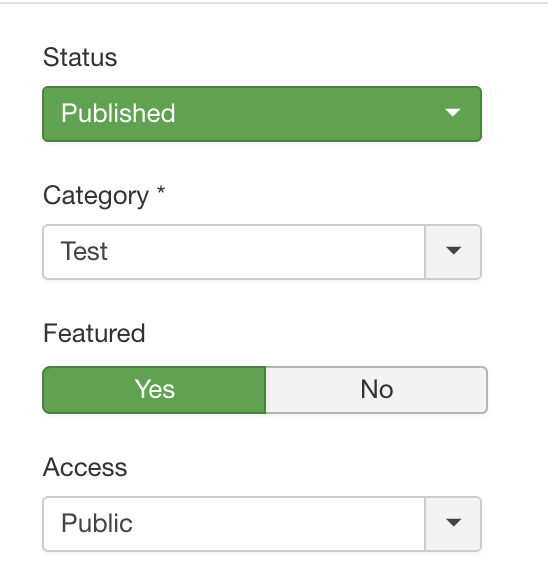
1.2 From the right side of the “Content” tab you can adjust the Article accessibility.. In order for it to be fully displayed, make sure that the “Status” is on Published and that “Featured” is set to Yes. Additional options include selecting the Category of the Article and which User Groups can access it:
Additional notes:
- To avoid visitors viewing an unfinished Article while it is still being created, you can leave “Featured” to “No”, or temporarily change “Access” only to “Super Users”. You can later return to the “Content” tab to revert those changes and make the Article publicly accessible.
- In order to not lose any progress on the Article, always make sure to click on the “Save Changes” button, located on top of the “Articles” menu:

Next, the “Images and Links” tab allows you to add links and images to your Articles:
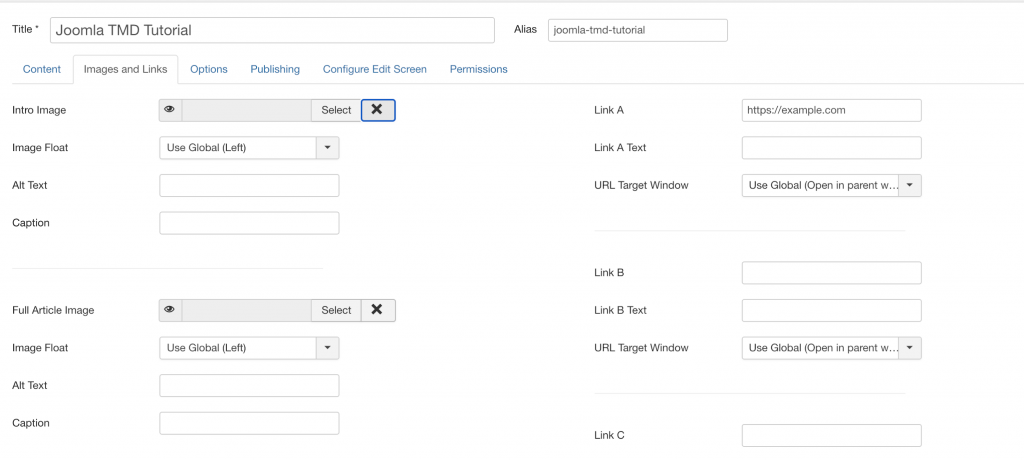
The “Intro image” will be displayed next to the Introduction text of the article, while the “Full Article Image” will be displayed on the Article pages, when the article is being accessed. You can attach images from the Joomla template, from URLs or from your local device.
The “Options” tab, provides you with a wide variety of choices regarding the content and information that will be displayed in the Article:
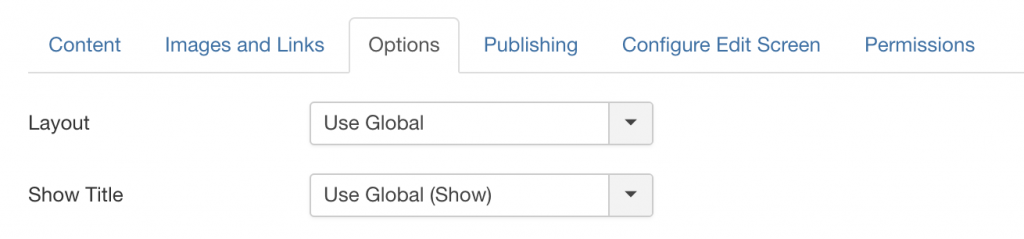
The assortment of options varies from lay-out settings to editing author name, whether a date of publication should be displayed, visibility of tags or keywords and other extensive customizations related to published content in order to suit different needs.
You will see that many of these options are left on “Use Global”. You can view and change these Global options in the following manner:
- From the Admin Navigation Menu access Content – > Articles:
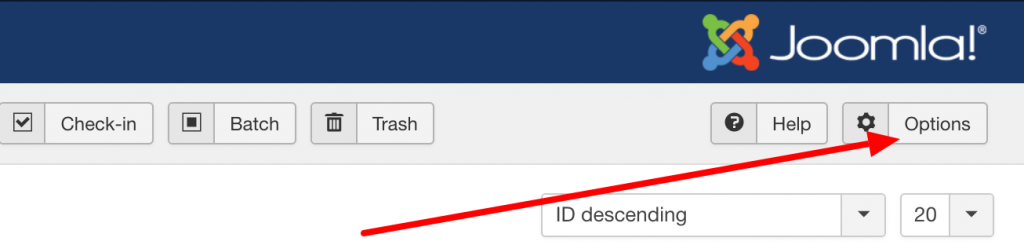
Once there, you can click on the “Options” button at the top right side of the page to gain access to the Global options and set them up to your preferences:
You can always separately select each option, but these ones here will globally apply by default to the ones already on “Use Default”
The “Publishing” tab will let you manually set an Article’s publishing date, author, in case it is is set to be displayed.
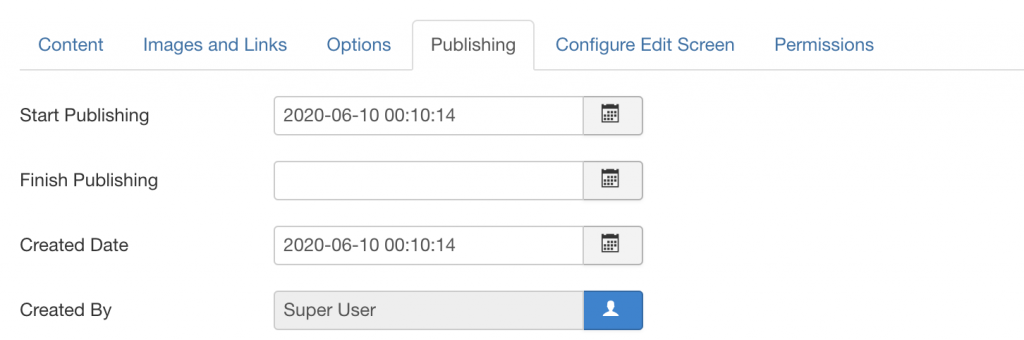
As an optional SEO for the article, entries such as meta description or keywords may be added from the right side of the “Publishing” tab.
Next, you will find the “Configure Edit Screen” tab:
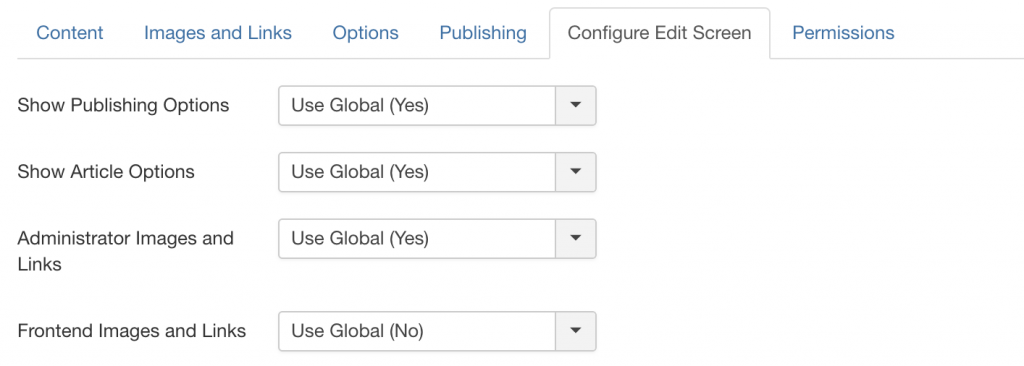
These settings apply to the users who have been granted privileges to write and edit Articles. As mentioned earlier, options can be manually set, or the Global settings can be changed from Admin Panel -> Content -> Articles -> Options.
The “Permissions” tab is used to set permissions for the different website/blog visitors and registered users by groups. They are conveniently set by default, but you may manually change the specific permissions different groups of users will have to Articles. The options include whether specific groups of users can Edit, Delete, or Edit the Status of an Article.
Once you an Article is fully set up, make sure to Save the changes:

And return to the first “Content” tab to check the Article status if it is ready to be published.
Should you need to remove or edit an existing article, you can always access the Admin area -> Content -> Articles to access and manage all of the articles on the website.