 Skip to content
In this section of our Magento Tutorials we will provide you with the basic step in creating a Magento Promotions campaign. As you might already be aware when running an Online Store it is also important to sometimes create such campaigns in order to attract new customers and increase sales.
The first step in Managing your Magento Promotions would be accessing your Admin Area Dashboard. In Magento you have two options for creating Discounts – Catalog and Cart Price Rules, which we will cover both in this tutorial.
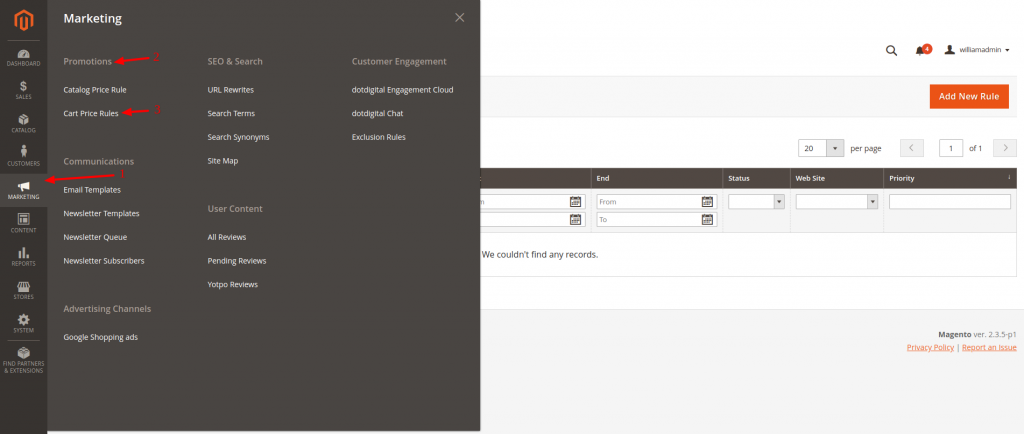
To create a Catalog Price Rule, you would need to navigate to Marketing (1) > Promotions (2) > Catalog Price Rule (3):

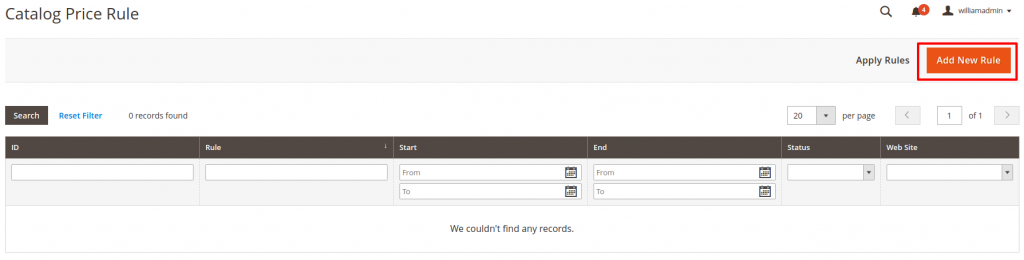
You will be taken to a new Page in which all of your Catalog Price Rules will be listed, since we haven’t created one yet, the page will be empty. In order to create a new Rule, you should click on the “Add New Rule” Button on the top of the page:
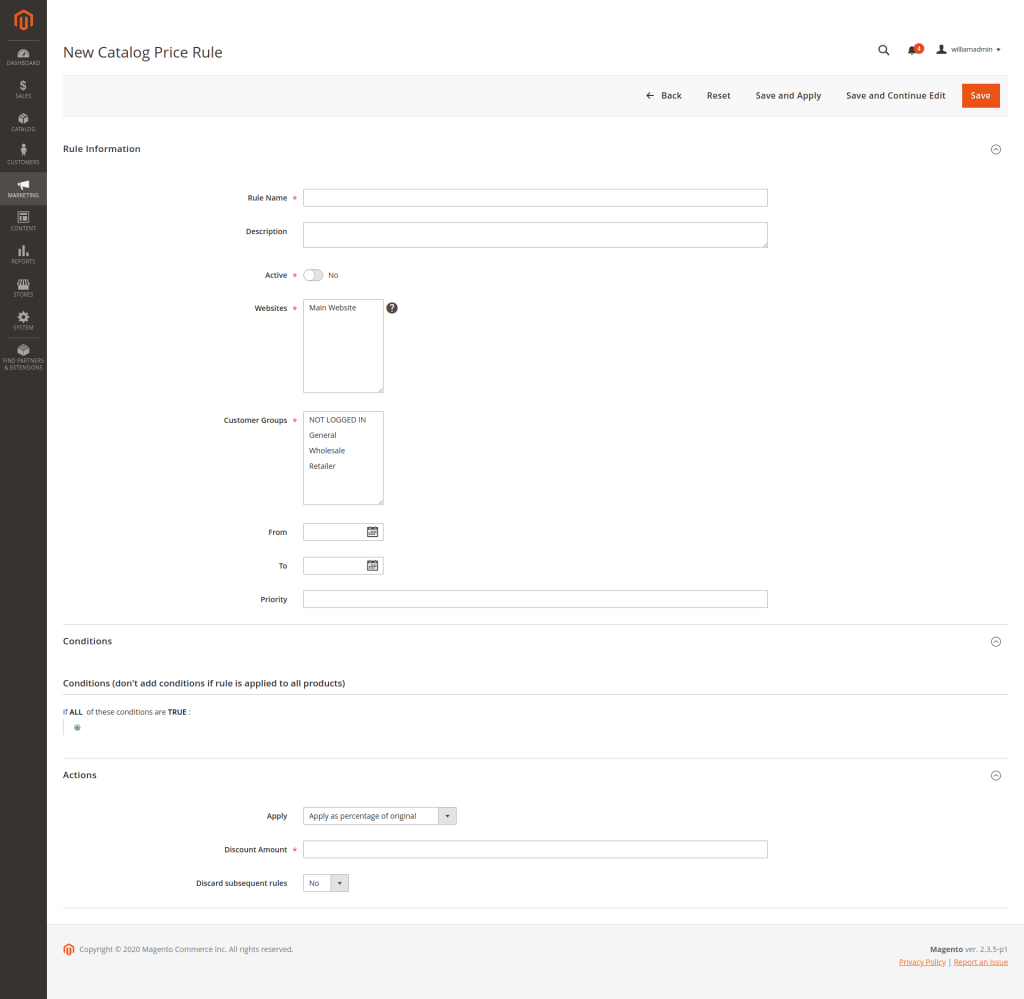
This will take you to a new page in which you will need to fill out the Price Rule’s Information, Conditions, and Actions, looking like this:

In here, you would need to input the following information:
- Rule Name – The New Rule Name that you wish to create. It will not be visible to your customers, therefore, you can name it to whatever you would like for your convenience.
- Description – A short description of the new rule, this is an entirely optional field, therefore, you can leave it blank
- Active – Whether the rule is active or not.
- Websites – In case you are running a Magento MultiStore installation, you can select the exact store in which the Price Rule will be active. In this case, we only have the option to select the Main Store.
- Customer Groups – This can filter the rule to be active only for 1 of the listed customer groups.
- From and To – You can set the date range from which to which the rule will be active
- Priority – This is a number which will be used as a priority in case you have multiple price rules active at a time. The smaller the number, the higher the priority.
- Conditions – You can apply the rule to be active for only specific products by using attributes or attribute sets that you have previously created. We have a separate tutorial on creating attributes and attribute sets. For instance, if you are selling multiple colors of the same item, you can create a Condition in which the color “red” is discounted, for instance.
- Apply – The type of Discount that you wish to apply with this Price rule. You have the following options:
- Apply as percentage of the original – Applies the amount set in the next field as a fixed percentage discount
- Apply as fixed amount – Applies the amount set in the next field as a flat discount to the product. In other words, if the product costs 100 dollars, if you select this option, and write 20 in the next field, the product will cost 80 dollars once the discount is active
- Adjust final price to this percentage – It adjusts the final price of the products in the cart by a fixed percentage
- Adjust final price to discount value – This value will use the Discount Amount in the next filed as the final product price
- Discount Amount – The field in which you put the value for the discount based on your choice in the “Apply” drop-down menu
- Discard subsequent rules – This option allows you to specify whether additional of your Price rules can be applied to the same order. If you wish to avoid this, you should set this to “Yes”
Another way to apply Discounts on your online store is by creating Cart Price Rules. To create a Cart Price Rule, you would need to navigate to Marketing (1) > Promotions (2) > Cart Price Rule (3):
You will be taken to a new Page which will list all of your available Cart Price Rules. Once again we do not have any created yet, therefore, the page should look like this:
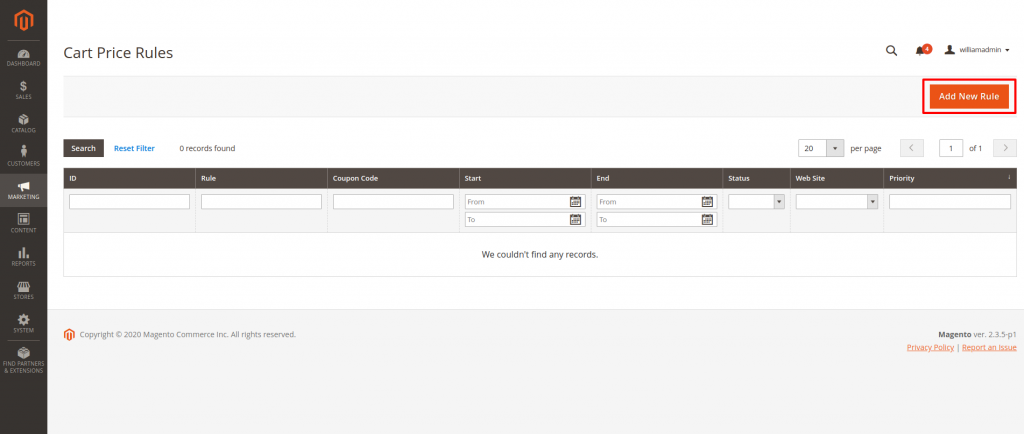
To create a new Rule simply click on the “Add New Rule” button highlighted in the screenshot above
You will be taken to a new Page that looks like this, which is segmented for different options. You can click on each Segment to review the available under it, which we will covers below:
The first Segment is the Rule Information, where you will need to provide the following information:
- Rule Name – The name of the new Cart Rule that you are about to create. This is entirely for internal use and your Customers will not see it. Therefore, you can create the name in any way that is convenient for you to remember
- Description – A short description of the new Cart Rule, once again entirely for your convenience, so you can remember the purpose of the rule.
- Active – You can select “Yes” or “No” which will determine whether the Cart Rule is currently active on your website or not
- Websites – If you are running a Magento MultiStore instance, you can select which one of your Stores will have the Cart Price rule applied once active. For a Single Store instance, you should simply select “Main Website”
- Customer Groups – Select the Group of Customers that will be able to take advantage of the Discount applied via the Cart Price Rule
- Coupon – If you want, you can provide your customers with a Custom Promotion Code for this discount that will be applied if the products in the Customers Code meet the conditions you apply in the Cart Price Rule settings
- If you select the Coupon option, a couple of new fields will appear:
- Coupon Code – The exact Code that your Customers can use to apply the discount, you can also select the “Use Auto Generation” option, that will create a random one.
- Uses per Coupon – How many times this Coupon can be used before it is expired
- Uses per Customers – How many times a single customer can use the Coupon
- From and To Dates – The dates from which to which the Coupon is valid
- Priority – this feature is used in order to prioritize all of the Cart Price Rules you have added.
- Public in RSS Feed – Whether the coupon will be visible on the RSS Feed on your website, you can select “Yes” or “No”
The next segment is the Conditions rules, where you can apply the rule to be active for only specific products by using attributes or attribute sets that you have previously created. We have a separate tutorial on creating attributes and attribute sets. For instance, if you are selling multiple colors of the same item, you can create a Condition in which the color “red” is discounted, for instance.
After that there is the Actions Segment, that should look like this:
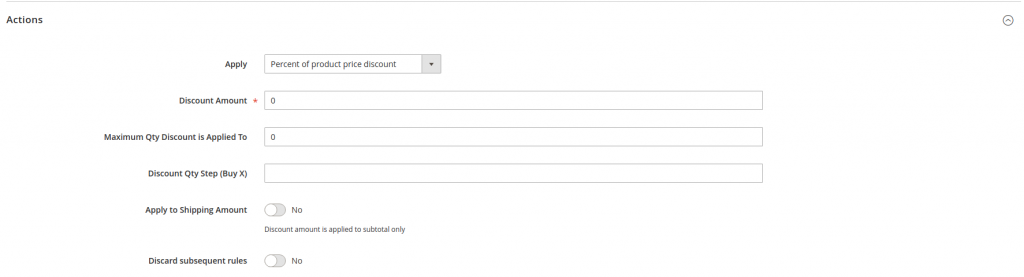
In the Apply Drop Down Menu, you will have the following options, and all the values below will be affected by your choice:
- Percent of Product Price Discount – A set percentage for the Discount applied for the total price for all the Products that are in the Shopping Cart of your Customer, which you can then enter in the “Discount Amount” field
- Fixed Amount Discount – A fixed amount of Discount for the total price for all the Products that are in the Shopping Cart of your Customer. For instance, if you set it to 20 dollars in the “Discount Amount” field, and the Customer selects Products that total to a 100 dollars, the final price will be 80 dollars.
- Buy X get Y free – Here, you can create a sub-rule for your Cart Price Rule, that will allow your Customers to get an Y amount of free products, if they have an X amount in their Shopping Cart, both variables can be set in the options below, if you select this option.
All of the other Segments below are entirely optional, and are simply cosmetic if you wish to perform more advanced changes to the Cart Price Rules. However, what we have covered in this Tutorial is all that is required for you to be able to create the Rule and activate it on your website. As a final step of the process, click on the “Save” button on the top right corner and you are good to go.