 Skip to content
In this section of our Magento Tutorials we will share how you can edit the Footer Links in your Magento Application.
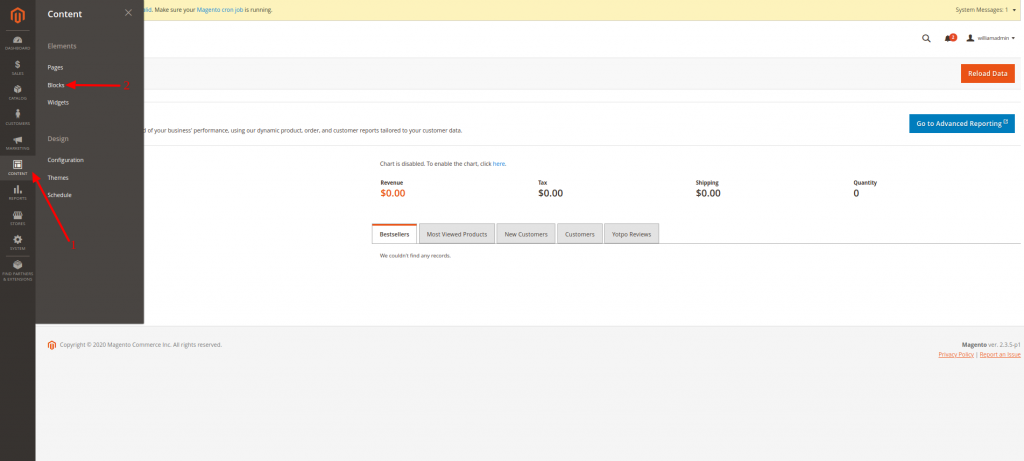
The first step would be to access the Admin Area Dashboard of your Magento Application. After that navigate to Content (1) > Blocks (2) as you can verify from the following screenshot:
You will be directed to a new Page, where you will see all of the available CMS Blocks, which by default should be completely empty. In order to create a Footer Links Block you would need to click on the “Add New Block” Button on the top right corner of the page:

You will be taken to a new Page that looks like this:
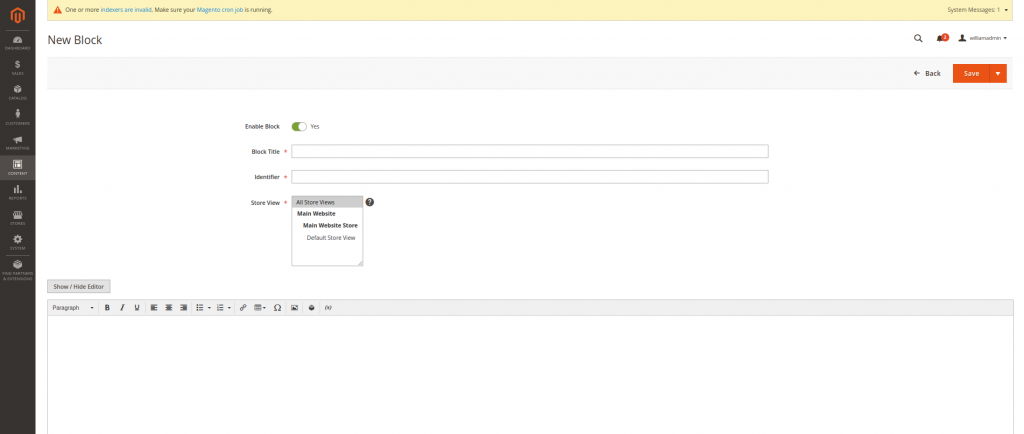
And enter the following details:
- Enable Block: Yes
- Block Title: Footer Links Block
- Identifier: footer_links_block
- Store View: All Store Views (Or in case you are running a Magento Multistore Installation, the corresponding Store that you wish to add the CMS Block to)
- Click on “Show/Hide Editor” and Enter something along the lines of the following in the WYSIWYG (What You See Is What You Get) Editor:
<ul class=”footer links”>
<li class=”nav item”><a href=”{{store url=”page-url-key”}}”>Link 1</a></li>
<li class=”nav item”><a href=”{{store url=”page-url-key”}}”>Link 2</a></li>
</ul>
Where of course, you can edit this field, as you seem fit, this is merely an example, which will create two separate buttons called “Link 1” and “Link 2” that will lead to the website’s Homepage.
Click on the “Save Block” button on the top of the screen.
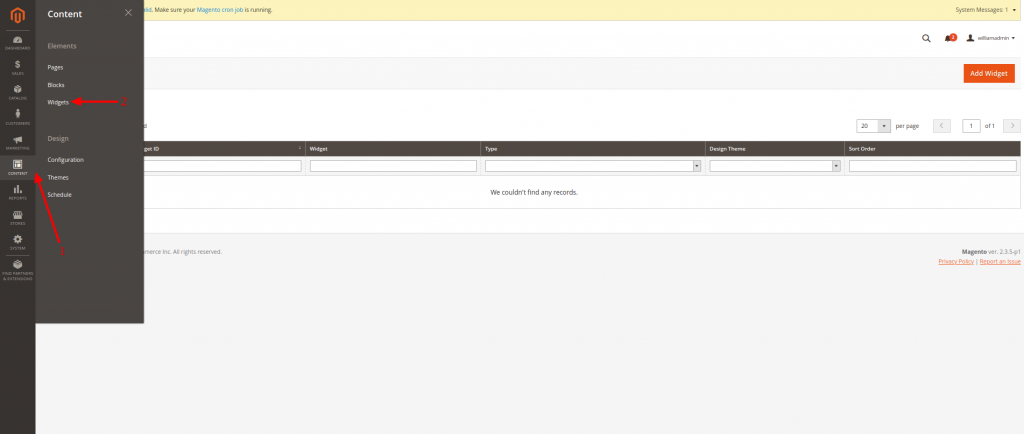
Once done, you would need to create the Footer Link Widget by navigating to Content (1) > Widgets (2), as in the following screenshot:
You will be taken to a new Page, where you would need to click on the “Add Widget” Button that will redirect you to the following page:

Where you will need to add the following settings:
- Type: CMS Static Block
- Design Theme: By default Luma, or whatever Theme you have installed or active on your Magento Website
- Click “Continue” which will open additional options
- Widget Title: Footer Links
- Assign to Store Views: All Store Views (Or in case you are running a Magento Multistore Installation, the corresponding Store that you wish to add the CMS Block to)
- Click on “Add Layout Update” on the “Layout Updates” Section
- Select “On all pages” from the “Display On” Drop-down menu
- Select “CMS Footer Links” from the “Container” Drop-down menu
- Click on the “Save” button on the top right corner of the page, which will open the final option menu, which is the “Select Block…” option
- Click on “Select Block…” > Select the “Footer Links Block” we have previously created
This is it, you have now created your Footer Links and you can now preview them on the Front-End of your website.