 Skip to content
In this section of our Magento Tutorials we will cover how to manage your Product Attributes and what they are exactly.
When creating an online Store, it is also important to provide to your Customers the option to choose between different variations of the Product that you are offering. The Magento developers have implemented this functionality within the core Magento application, meaning that you would not need an extension to achieve this. By assigning different attributes to your Products, your Clients will also have the option to filter your Products based on the attributes that you have assigned to them.
In order to understand the process better, we will now guide you through a Basic attribute creation process in this section of our Tutorials.
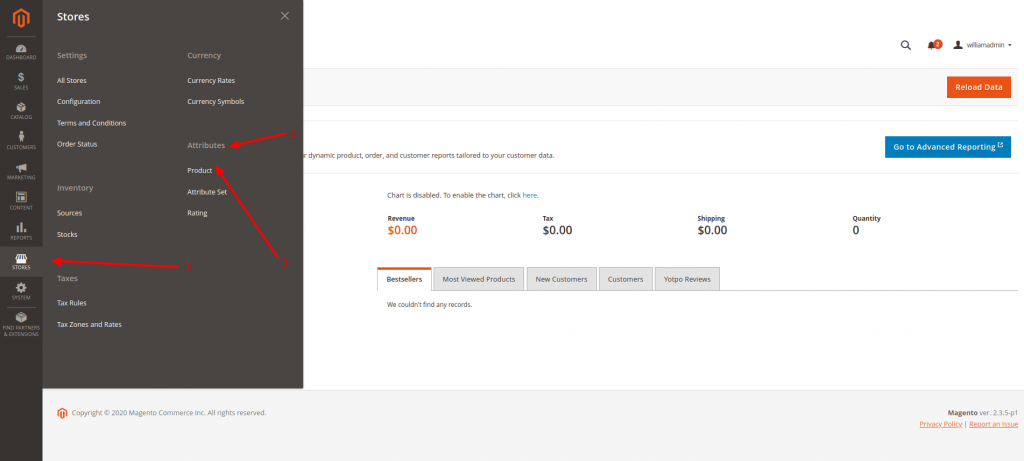
The first step would be to access your Magento Admin Area Dashboard and navigate to Stores (1) > Attributes (2) > Product (3) as described in the following screenshot:
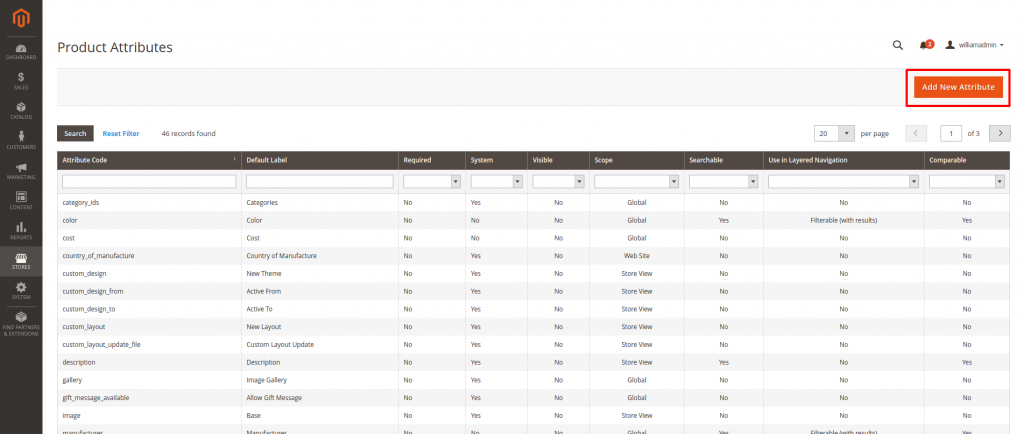
You will be directed to a new Page that will display all the created attributes that every Magento Store has by default. In order to create a new attribute you should click on the “Add New Attribute” button on the top right corner of that page. You can see the layout of the page and the button itself in the screenshot below:
This will direct you to a new Page where you would need to assign the Attribute Name and all of its’ different values, such as the tags that can be used in the Search window of your Store to find Products with this attribute, whether it can be used in the Search window and what is the priority of this attribute in the search window. The page will look something like this:
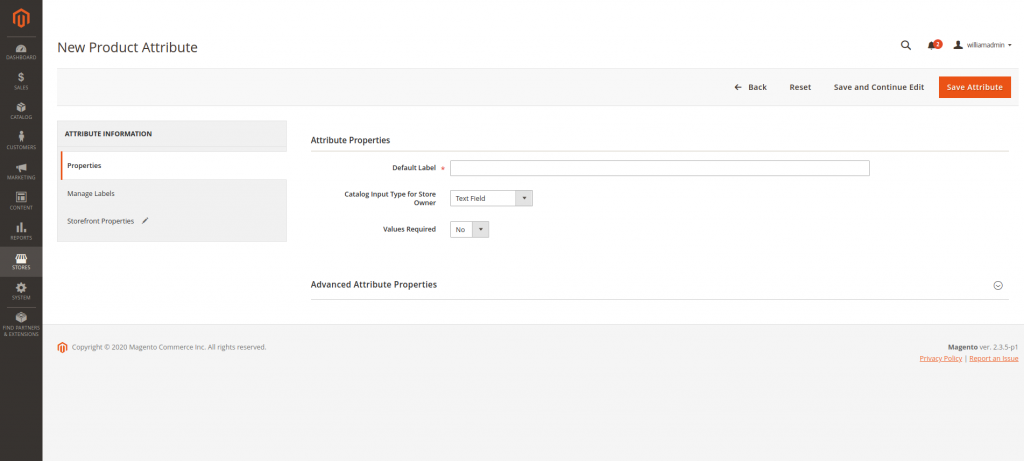
Once you have assigned all the necessary options for your Attribute, you should simply click on the “Save Attribute” Button on the top right corner of that page.
Please note, that those changes are not final and you can edit them anytime, by returning to the previous Product Attribute Page, where you will find your new attribute listed in the available attributes. You can click on it, which will take you to the same page as the screenshot above, where you can make the changes.
In order to make sorting your Products via different attributes even easier, as some products may have different attributes assigned to them, the Magento developers also implemented the option to create Attribute Sets. What this means is that you will be able to assign multiple attributes to a single Product from one menu. For instance, if you are selling clothes, you will be able to create the material, color, and size attributes from the same page.
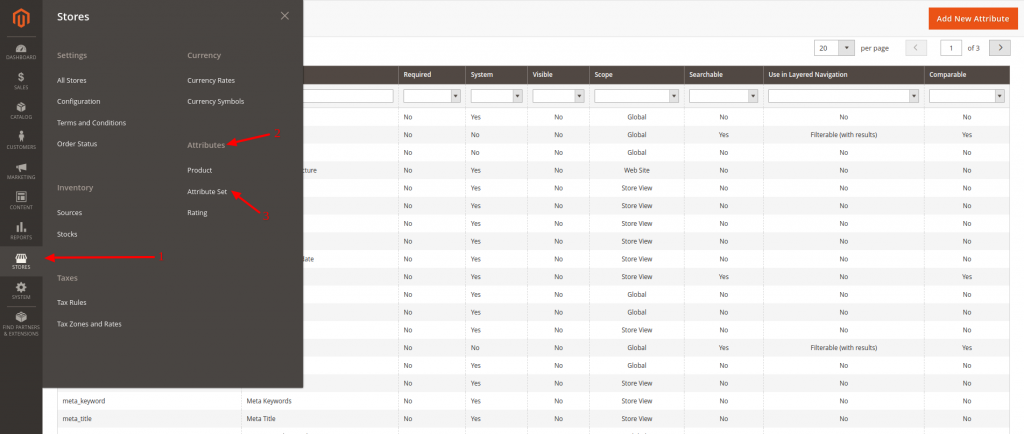
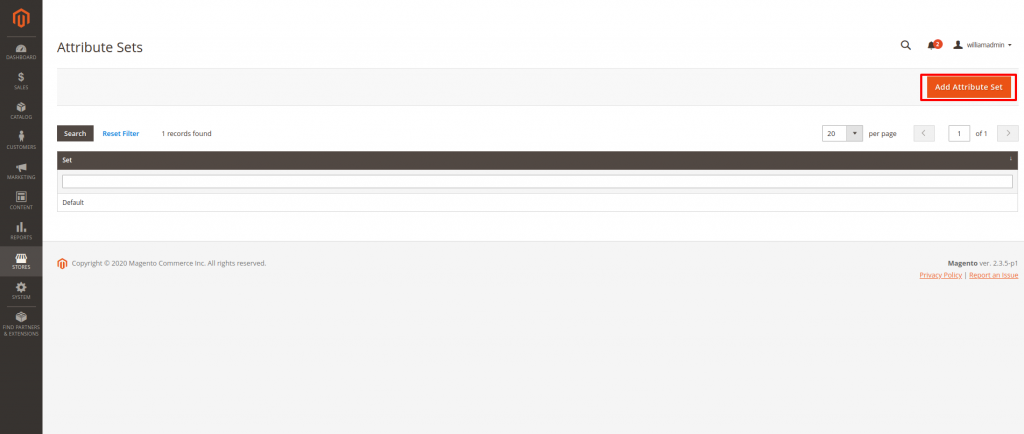
To access the Attributes Set menu, you would need to navigate to Stores (1) > Attributes (2) > Attribute Set (3) as described in the screenshot below:
This will take you to a new Page, where you can create a new Attribute Set by clicking on the “Add Attribute Set” button on the top right corner of that page. The page will look something like this:
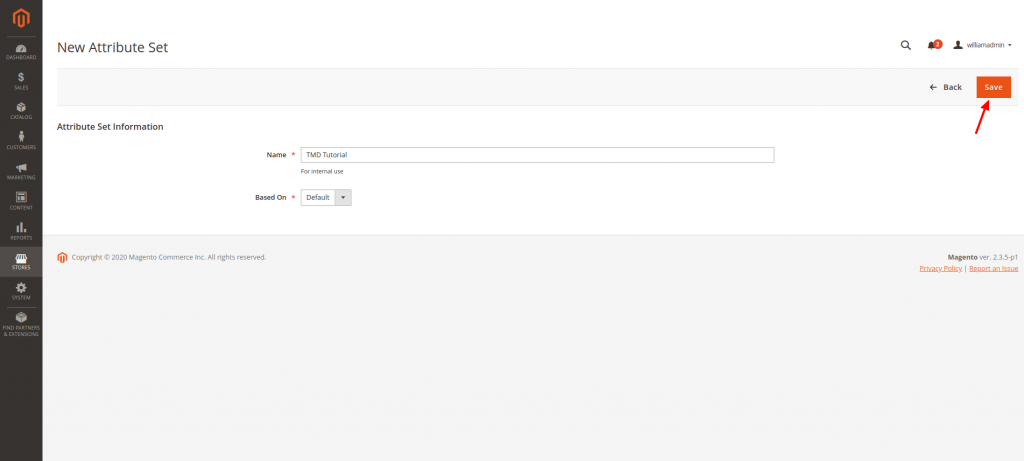
You will be taken to a new Page that only has the option to create the Attribute Set Name, but this is completely normal, as we will address the rest of the options later in this Tutorial. Once you have chosen the Attribute Set Name, simply click on the “Save” Button:
Once you “Save” the Attribute Set Name, you will be immediately take you to a new Page that will allow you to add new Attributes for the category in question. In order to do so, click on the “Add New” Button:
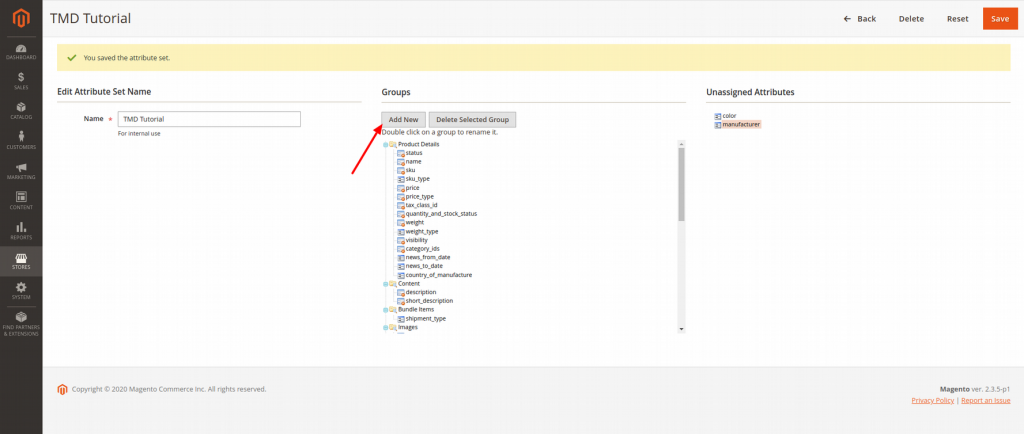
Now that you have your Group, you will be able to see it in the “Groups” list and you can now assign different attributes to that group, available from the “Unassigned Attributes” list on the right.
In order to assign the attributes, you should simply click on them with your mouse, keep holding the button, and drag them (Drag & Drop) to the new Group that we have created.
Once Done, click on the “Save” button once again on the top right corner and you should have your new Attribute Set ready for use.