 Skip to content
In this section of our Magento Tutorials we will provide you with more information on how you will be able to install extensions from the different Magento Extension Vendors.
You might be asking why would you be needing extensions on your Magento installation and we are here to answer this question for you. The Magento Developers managed to implement a lot of integrations in the application by default, however, they also gave you the option to expand on those integrations by installing native (from the Magento Developers) or third-party (from an Independent Developer) extensions.
In this Tutorial we will be showing you on how to install the Native Magento Extensions with the in-built integration, as Third-Party Options usually require a lot more experience and will be covered in a different tutorial in the future.
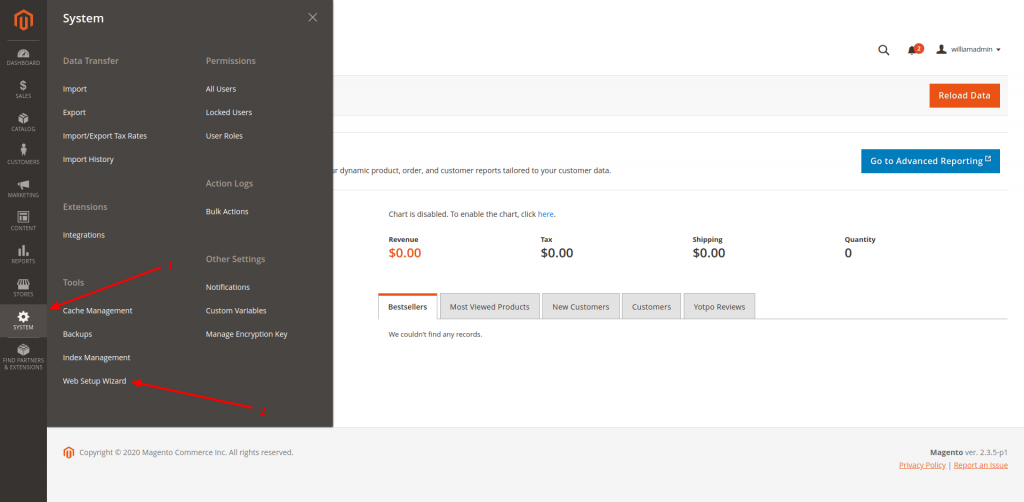
This first step of installing a new extension would be navigating to System (1) -> Web Setup Wizard (2) as displayed in the following screenshot:
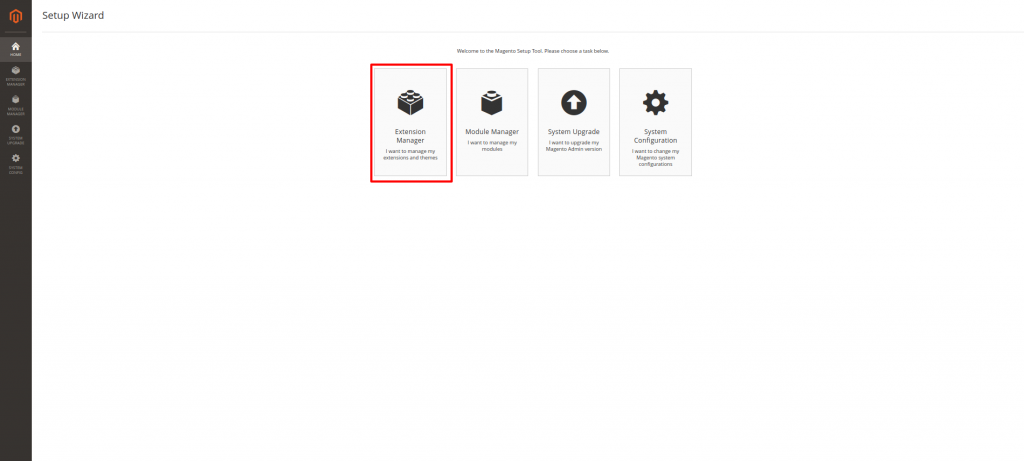
This will take you to a new Page on which you would need to click on Extension Manager:
Upon accessing the Extension Manager you will be displayed with the following page:
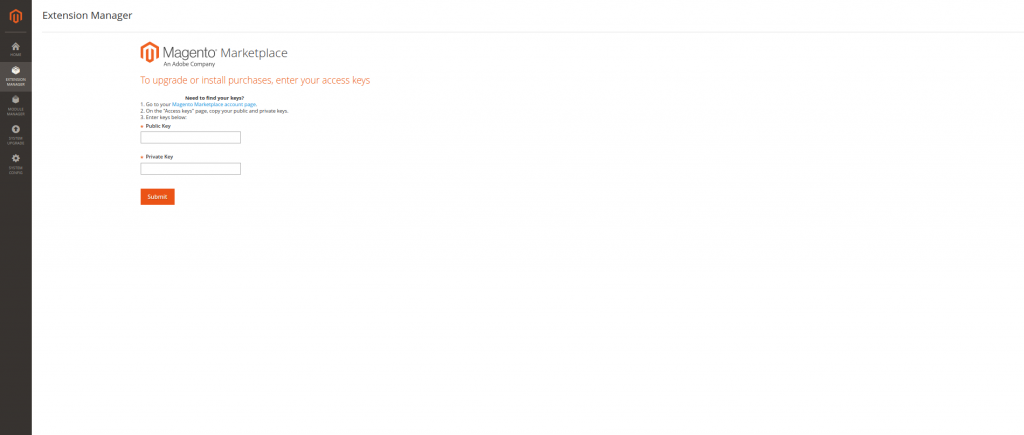
You can obtain your Public and Private Key at the Magento Markerplace on their official website. You would need to create a new account here:
https://account.magento.com/customer/account/create/
Once you have an account, in the Magento Customer Area, you should navigate to the Marketplace Tab and click on Access Keys under My Products. Your will see a Public Key (Username) and a Private Key (Password) that you can use to access the Extension Manager.
Once you manage the Extension Manager, you will see all the official Magento Extensions that you have purchased via the Magento Marketplace and you will be able to install them easily, by selecting them from the list and clicking on the Install Button right next to them.
You will be directed to the Readiness Check Page, where Magento will automatically check whether the Server Environment Supports the Extension that you wish to install. This should usually go without any issues, however, in case the Readiness Check somehow fails, you can always contact us via a Support Ticket and our Technical Support Team will gladly address this for you. Once the Readiness Check finishes, click on the “Next” Button.
The final step of the Extension installation will ask you to create a Backup of your website. Usually, this is completely optional, and it is up to you whether you would like to create a working restore point prior to the extension installation. If you decide to proceed with generating a Backup, it may take a while for the process to complete depending on the size of your website. Once the Backup is complete click on the “Next” button.
You will see a new window tracking the installation process of the new Extension, once complete click on “Finalize” button.