 Skip to content
Creating a successful and good-looking online store might be a time consuming process which requires a lot of knowledge and experience and we know that it could be difficult at the start. That is why we will try to show you the basic things you need to care about so you can focus on the more important aspects of your business. You can also check our PrestaShop hosting packages which will provide you with the required resources to create your new website.
The first thing you should start with is to disable the Demo mode of your store. It is designed to provide you with some kind of demo content so you can review the basic functionalities of the application the same way as you would once you have added the actual products, categories, customers and so on. To turn off the demo mode you need to go to your application’s dashboard. Once you are there you should be able to see the Demo mode button on the upper right-hand side of the screen. You should turn it off:

Deactivate your store
This feature is implemented to allow you to make changes to the store’s back-office without making them visible for the public. You can disable the store from the Dashboard > Configure section > Shop Parameters > General > Maintenance subsection:

Set the Enable Shop button to No. In the maintenance IP field you need to add your IP address, from which you wish to access the website while modifying it. That is the only IP address that would be able to access the front-end of the shop. In the Custom maintenance text field you can change the massage that will be displayed to the visitors of your website.
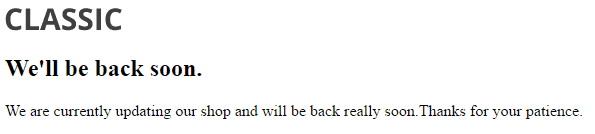
Once you disable your store the visitors will see the following screen once they access it:
Delete the content of the default shop
Once you have explored the organization of the website using the default demo content it is very important to delete all the items before you start to add real ones. The things you need to delete are:
– Products (along with the categories, attributes, features, manufacturers, suppliers, image mappings,, tags)
– Orders and order messages
– Customers, customer groups and shopping carts
– Carriers along with the price ranges and weight ranges
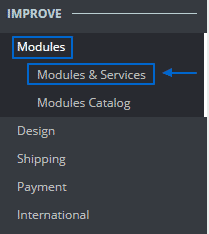
You can delete these items by browsing through the menus associated with them but there is an easier and more effective way. To proceed go to the Improve section > Modules > Modules & Services:
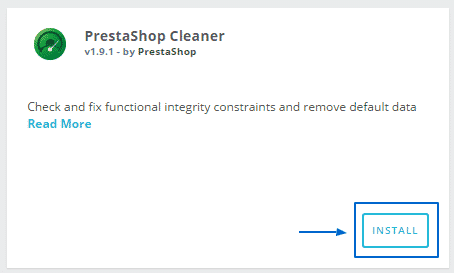
In the search field type PrestaShop Cleaner, find it among the suggestions and click on the Install button:
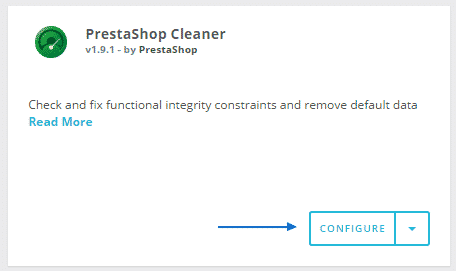
Once the module is installed click on the Configure button:
Then you should complete the following steps:
– Set the catalog cleaning to Yes and click the Delete catalog button
– Set the orders cleaning to Yes and click the Delete orders & customers button
– Under the Functional Integrity Constrains section click the Check & fix button
– Under the Database Cleaning section click the Clean & Optimize button
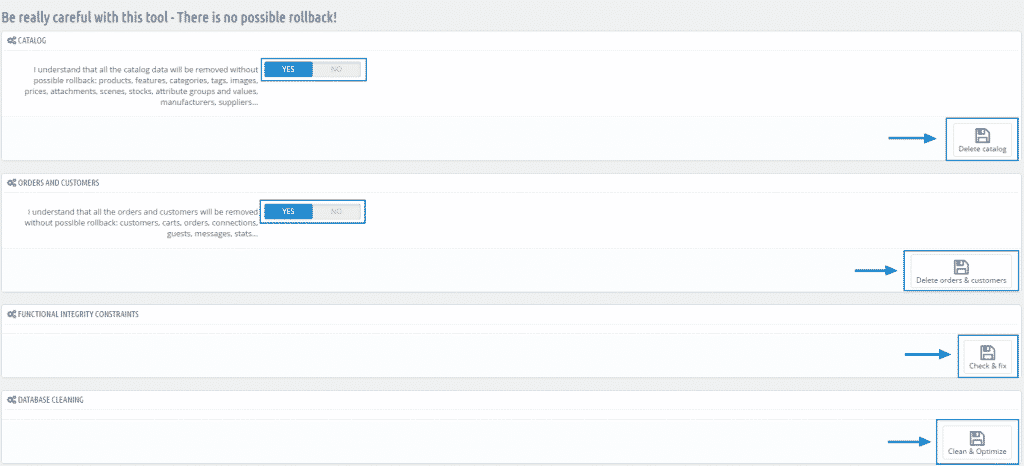
NOTE: Please have in mind that once the default content is deleted there is now way to roll it back!
Configuring your store’s basic settings
Here we will show you the basic things you need to configure which are visible to your customers and therefore they are important.
Shop Name – it defines your brand and it is indexed by the search engines. You can set the name of your store from Dashboard > Configure section > Shop Parameters > Contact > Stores subsection:

While you are on the same page you can set your store’s administrative email and the address of your business.
Localization settings – From here you can manage the settings associated with the specific region of your store. You can configure them from Dashboard > Improve section > International > Localization. As you can see there are four subsections. Let’s have a look at them separately:
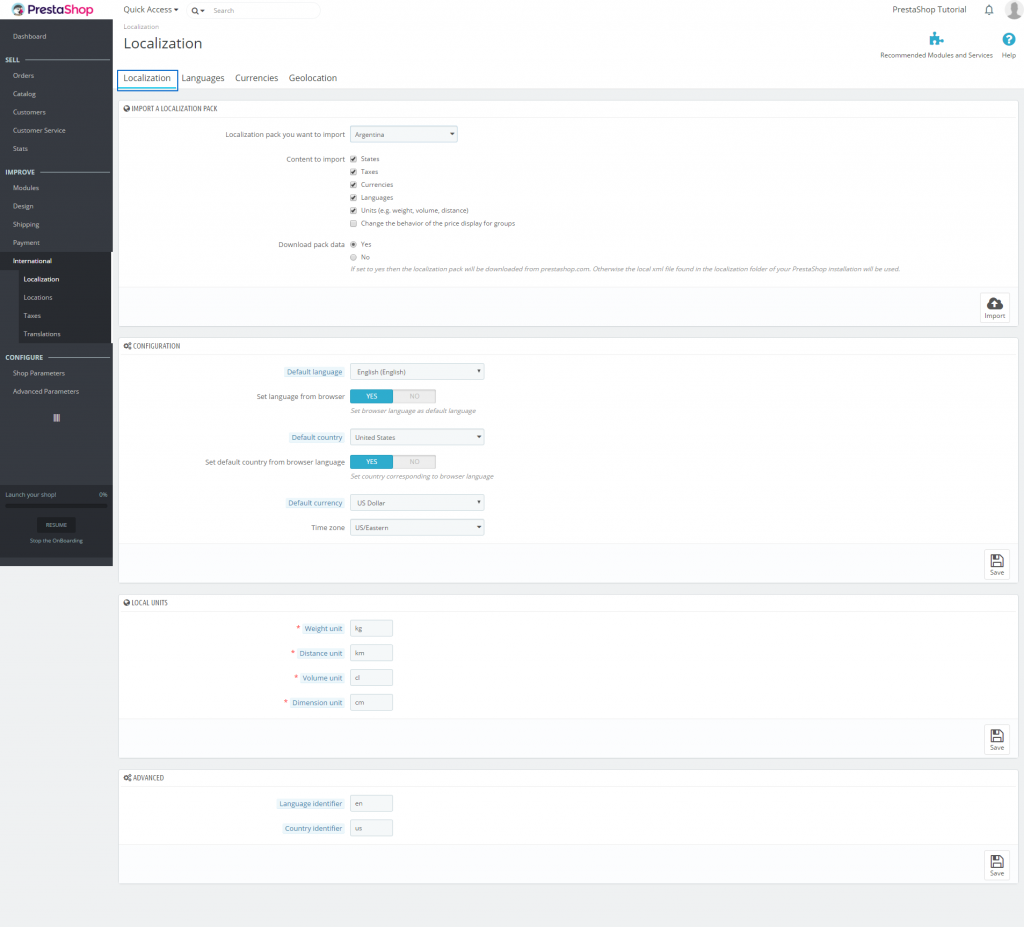
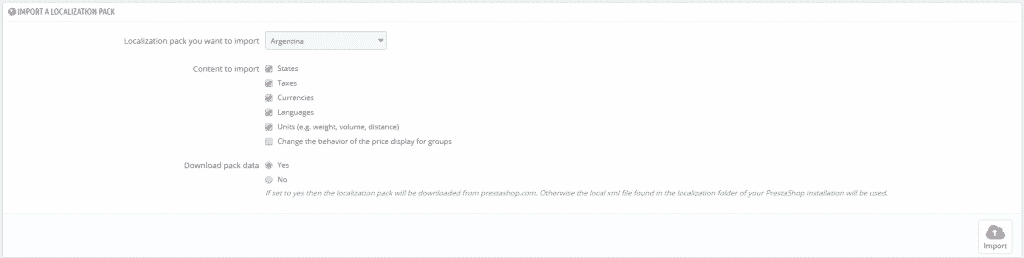
The first option here is to import a localization pack including taxes, currencies, languages and units:
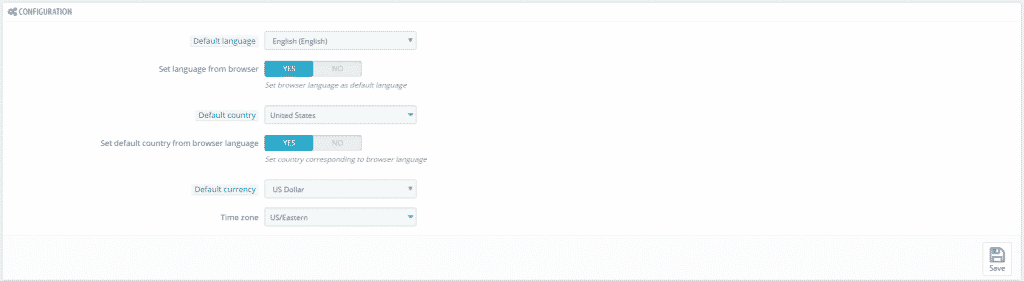
On the next section you can configure the Default language, country and currency, also the Time zone:
From here you can also set the local Weight, Distance, Volume and Dimension units:

Languages subsection:

It allows you to add and remove languages for your store.
Currencies subsection:

This is the place from where you can add, remove and manage the currencies available in your store.
Geolocation subsection:
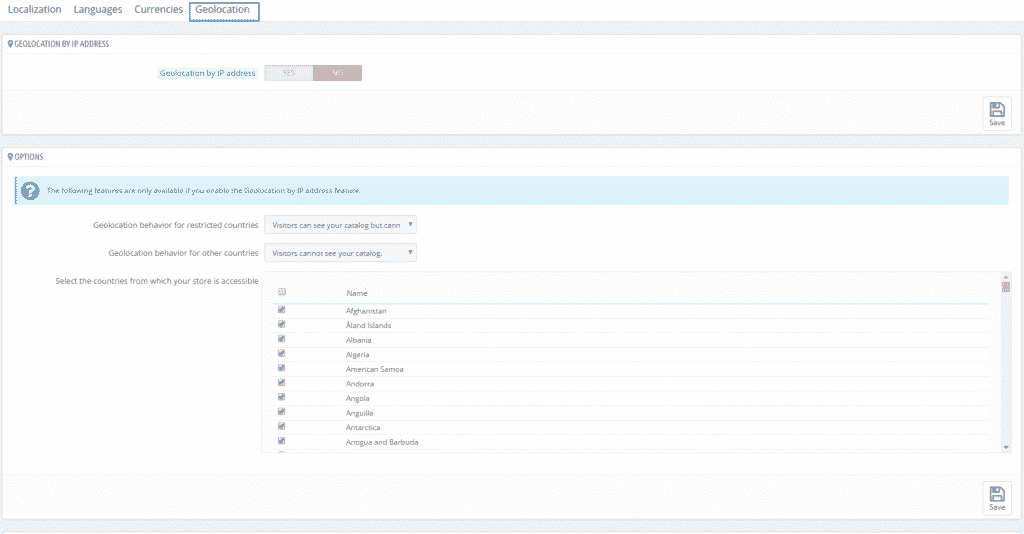
Here you can restrict the access to your shop from specific countries or IP addresses. This feature is very helpful if you do not want to sell your products worldwide.
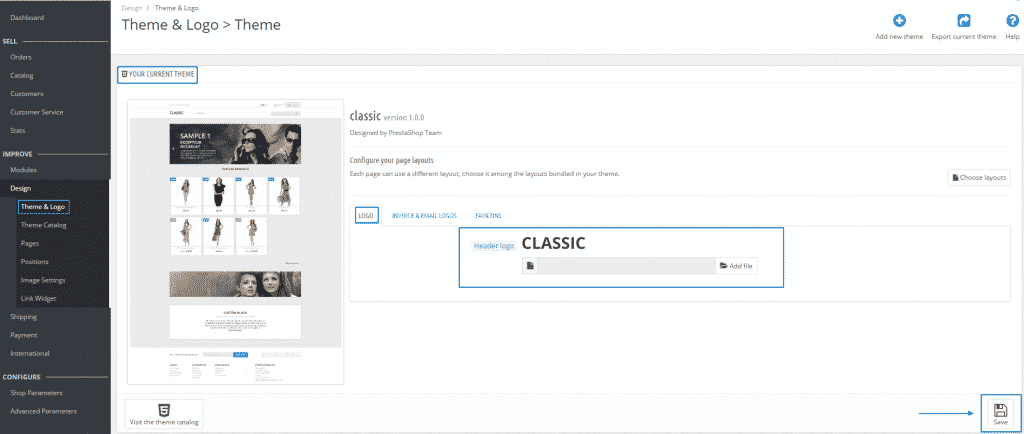
Changing your store’s logo
The logo is important part of the online store because it makes the customers more confident and your attitude looks more professional.
You can change the logo by going to Dashboard > Improve section > Design > Theme & Logo > Your Current Theme section. There you need to upload your logo and save the changes:
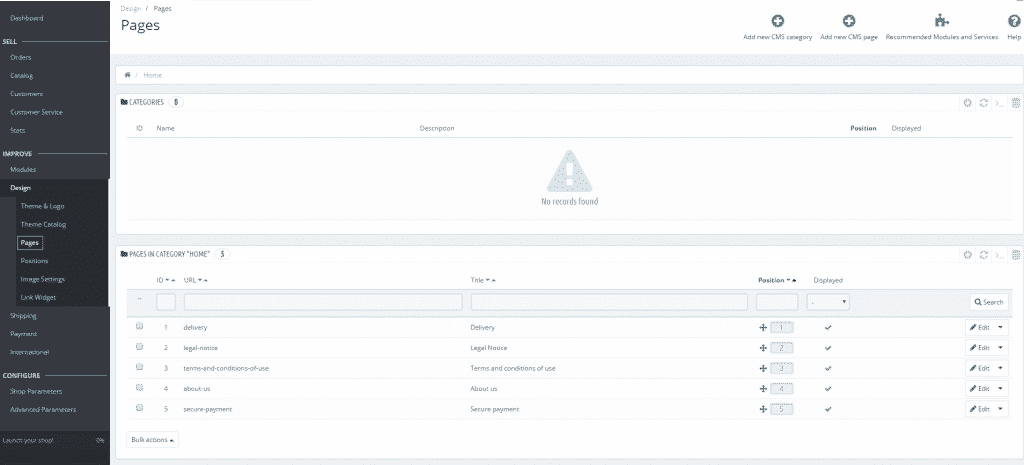
Create pages
Depending on the structure of your website and the field of your busyness you might need to create different pages. You can create, edit or remove pages from Dashboard > Improve section > Design > Pages:
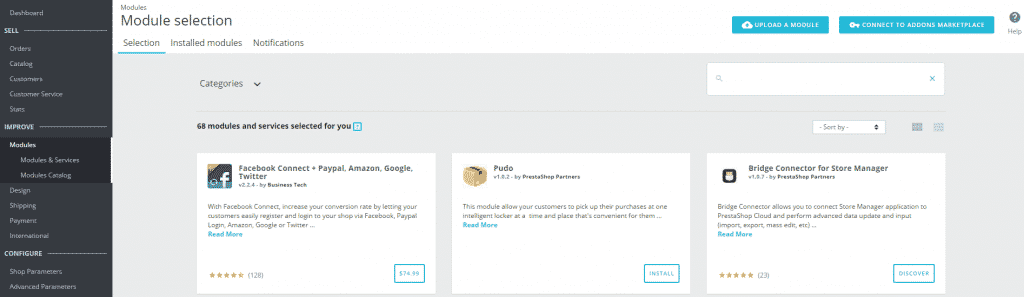
Payment methods
When creating an online store your main goal is to earn money from it and therefore it should provide some way for the customers to pay for the products you offer. To make this possible you need to configure at least one payment module.
You can configure the currently installed payment module or add new ones from the dashboard > Improve section > Modules > Module & Services:
Please note that Check and Bank wire modules are installed by default on your application and if you want to use them you need to fill in your information.
Carriers and Shipping
If you are selling a physical goods they must be delivered to your customers. You should set the shipping method you want to use so your visitors can select it.
You can add carriers and configure the options from dashboard > Improve section > Shipping > Carriers/Preferences.
Once the above mentioned features are configured you can change your store’s theme, install the modules you need and start adding products.
As soon as you have configured the application, modified its appearance in the way you want it to look like and added products you can enable your shop and start selling.