 Skip to content
The Dolphin Admin Panel is pretty user-friendly and intuitive and once you browse it couple of times you should get used to it. However we will go the extra mile to cover the basic features that the administrative area of the script provides so you can start building your website right away.
When you access it for the first time you might be surprised with a message that requires you to buy a license for the application. There is nothing wrong with the application and it is not mandatory to purchase such – you can simply click on the continue trial link:
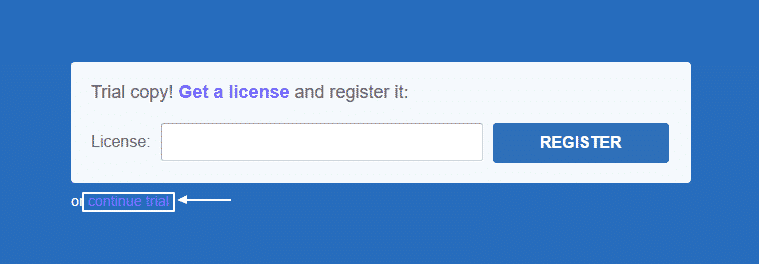
This is one of the drawbacks of using the free version of the application. In some pages of the dashboard you will be displayed with this message and you would need to click the button mention above every time to proceed with your work. However if you are using the licensed version of the script you would be displayed with the message only the first time you access the backend and once you apply your license code you should not see it any more.
We will now explain the purpose of all sections available in the administrative dashboard of the Dolphin application. For your convenience we have placed number for each of them:
![]()
1 – It shows the exact version of the application that you are using. It is important when you search for an appropriate module or template for your website.
2 – In this section the Boonex developers have placed several quick links that you would most probably use in your everyday work. The first one on the left leads to the frontend of your website. The second one leads to the official Boonex Market from where you can get modules, templates and other extensions for your website. Next comes the link to the official documentation for the script. The last one allow you to leave the administration area.
3 – This button will display the home page of the dashboard.
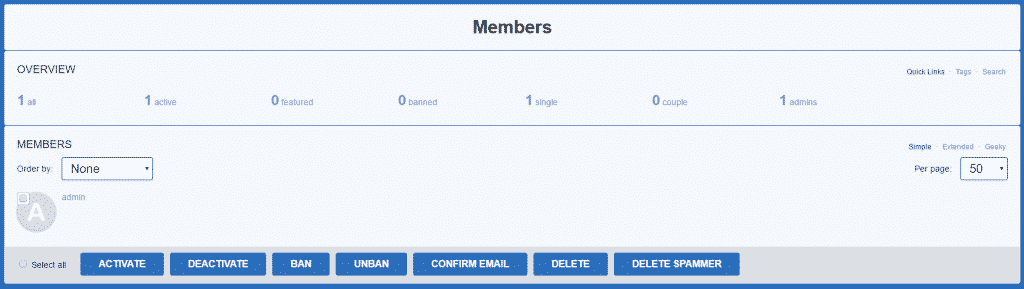
4 – This section allows you to manage the members of your community:
5 – The Modules section allow you to install new extensions and manage the already installed ones.
6 – Tools. Here you can control some of the basic features associated with your website. The one which are included are the following:
Mass Mailer – it gives you the opportunity to create and send an email to all of the subscribers of your community at once.
Banners – this options allows you to create a banner leading to specific URL and manage its time range and positioning.
IP Blacklist – this feature makes it possible to deny the access to your website from specific locations by blacklisting IP ranges.
Database Backup – as you can understand from the name this is a built-in functionality for creating a backup file of your database or restoring it from one, stored on your local computer.
Host Tools – here you can obtain information for the status of all services required from the application that need to be configured on the server.
Antispam Tools – it allows you to block spammers on your website using DNS zones.
Sitemap – this feature makes it possible to generate a sitemap for your website automatically. This is important for indexing your website properly in the search engines.
Cache – the Dolphin application generates cache for the separate elements of the website in order to make it load faster. In case that you make edits on it you might want to clear the cache so you can immediately see the changes. This option allows you to do that with ease.
7 – This section allows you to make changes to the separate menus. You can add, remove and rearrange the features represented in them. Additionally you can edit the pages of your website and the profile templates.
8 – The settings section provides you with all the required tools for managing your community website. The configuration that you can make here is associated with the basic, language, membership, email, appearance, privacy and all other settings you might need to set up.
9 Here is the place where you need to apply the license code for your application in case you have purchased such.
10 – Initial steps – here the developers of the Dolphin application have placed some useful shortcuts to features that users occasionally need. Once you have mastered your skills and when you already feel comfortable to the interface you can hide this section using the Don’t show it anymore button.
11 – Quick Links – this is another handy toolkit for the most commonly used features.
12 – Growth Charts – here you can see statistical information for the growth of your website for a period of time of your choice. You can review information about the Members, Subscribers, Messages, Greetings, Tags, Categories and Banner Clicks.
13 – Content – This section provides you with an overview data concerning the entries in your website such as members, articles, photos, groups, products, news, videos, events, files and etc.
14 – This section depicts the latest news published on the official Boonex website.
15 – Here you can find the latest modules added in the official Boonex Marketplace. If you have found one handy you can review it and purchase it there.