 Skip to content
CS-Cart is, without a doubt, one of the most professionally crafted scripts for building an online store. You can navigate through the software and use it to accomplish your shopping cart goals and we are going to cover the basic aspects of it in the other entries of this tutorial, but in this one we are going to focus on the first step towards using CS-Cart, namely – the installation process.
The installation of CS-Cart is easy and here are the instructions of how you can do that yourself:
Initially, you need to create an empty database. If you are not sure exactly how to create a new one, you can find precise instructions in this article.
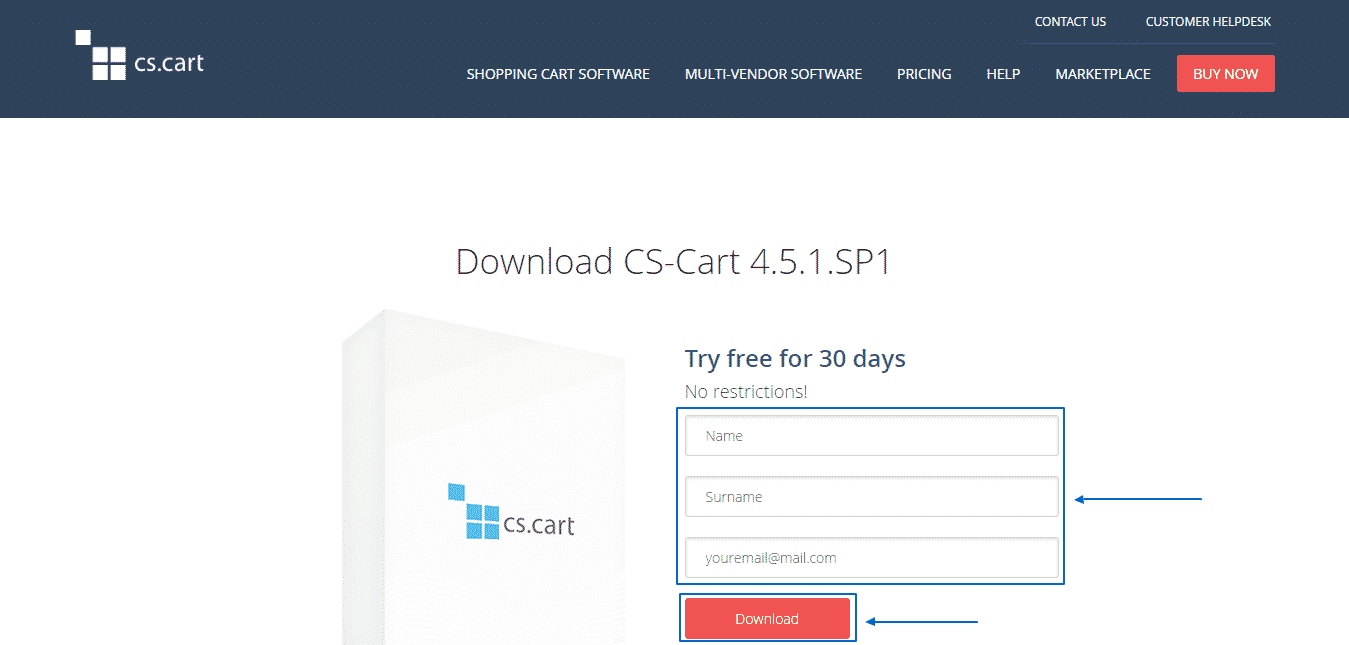
Next, you can access the download section of the CS-Cart official website. There, you need to fill in your name, surname and email and press on download:
Within a couple of minutes you will receive a link for downloading your copy of the software on your email. Once you have downloaded the ZIP file on your computer, you need to unzip it and then upload all the files via FTP, to a folder, where you want your CS-Cart installation to be stored. You can find the detailed step-by-step instructions of how you can do that in this article.
As soon as you do that, you need to change the permissions of the following files to 644:
Admin.php
Config.php
Index.php
Image.php
As well as those of the following folders to 755:
Var
Images
Skins
through your cPanel > File Manager. The files and folders in question are located in the root folder of the application.
After you are done with that procedure, simply type down the URL to the root folder of your CS-Cart installation. If you have uploaded them, for example, into a subfolder, called “CS-Cart” then you should type “yourdomain.com/CS-Cart” into your browser. When you do that, the following message will appear and you have to then click on the install link:
![]()
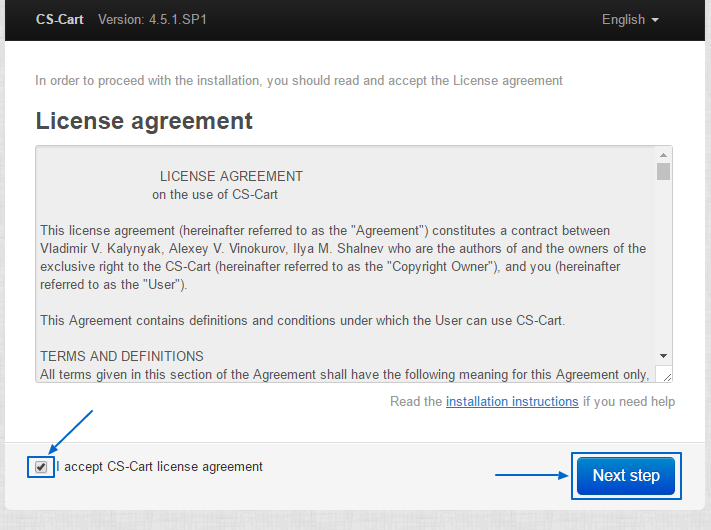
Next, you will see the License agreement, which you may read and then tick the I accept CS-Cart license agreement box and click on Next step:
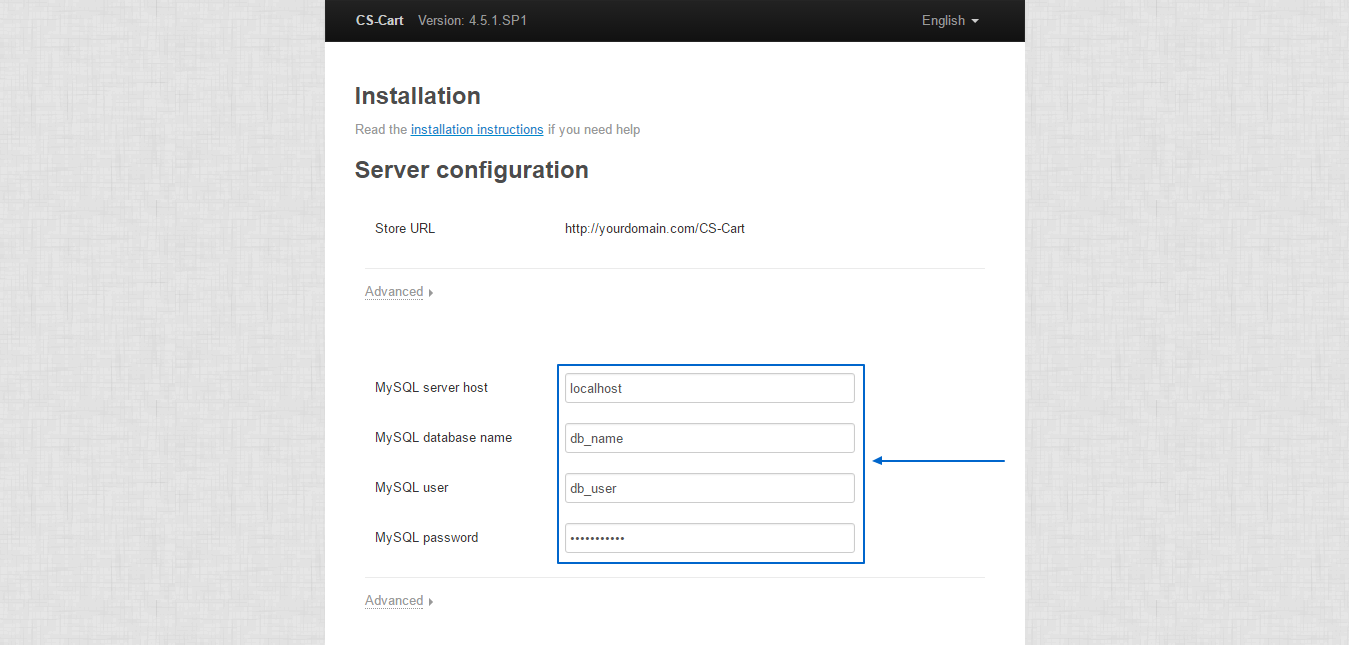
You will then be presented with the Installation wizard. In the Server configuration section, you need to enter the credentials for access to your database (the one, which you created earlier on):
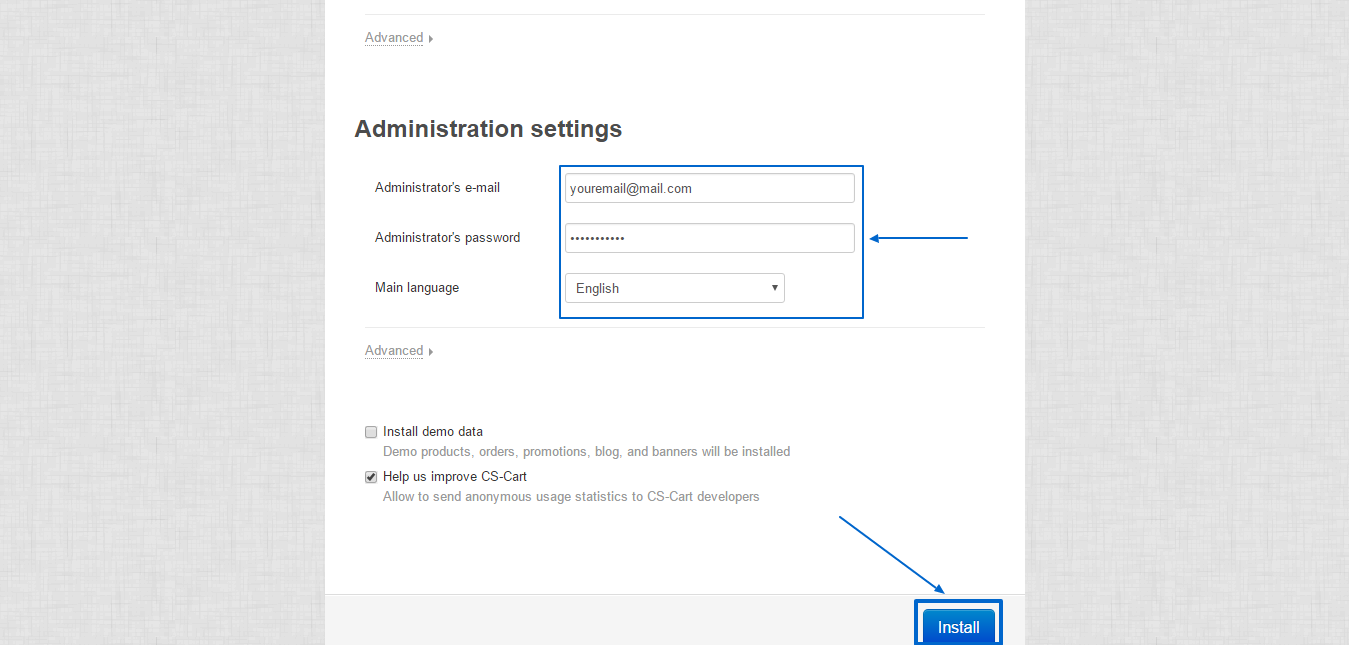
Then, scroll down to the bottom of the page and fill in the Administration settings section with your email, the password, which you want to access your Administration Panel with as well as your preferred main language. After completing this process, you just need to press Install:
After about a minute, the installation of your CS-Cart would be successfully completed and you will get the following message, regarding the Licensing mode:
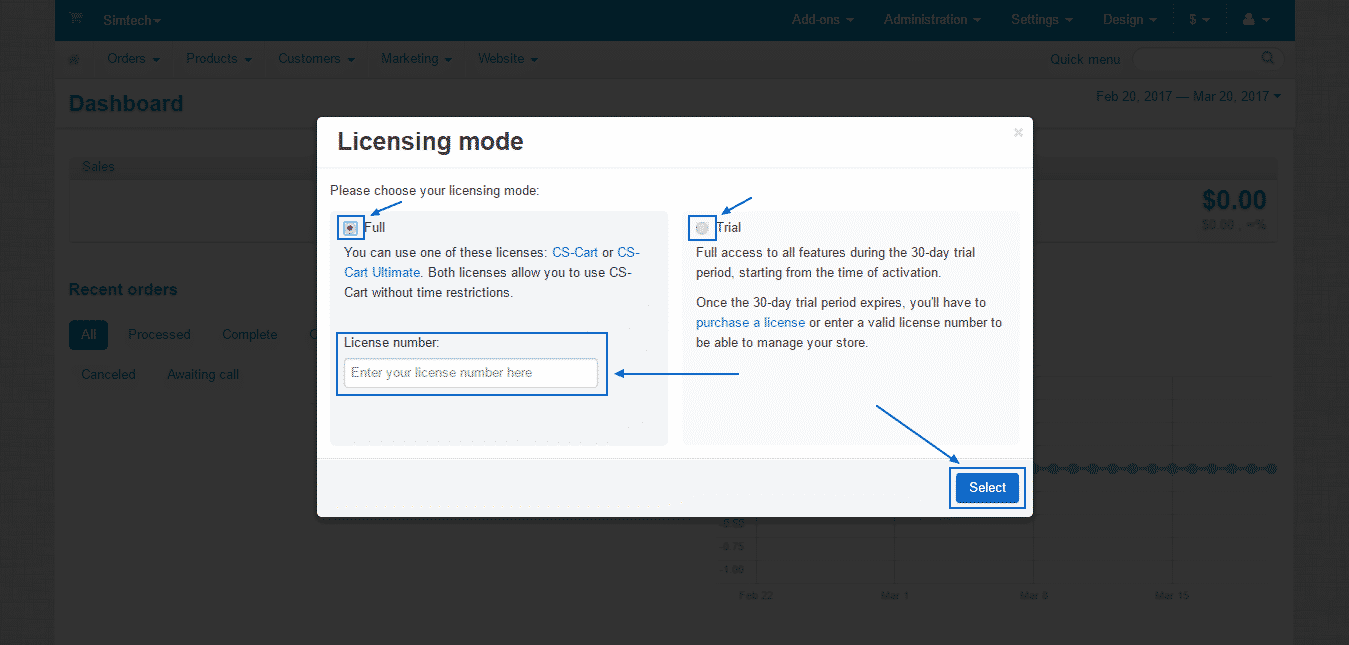
There, you can either choose the Full version and fill in the License number (a number, which you get when purchasing a license) or alternatively – choose the Trial option, which gives you the ability to use CS-Cart for free for a period of 30 days. Have in mind that when this period finishes you can continue using the software only if you purchase a License. More information regarding the plans CS-Cart offers can be found at their official website.
If you are struggling with any part of the installation procedure you can always contact our Genius Technical Support Team, who are there to assist you with your CS-Cart, every day of the year and any time of the day.