How to update Modules in Drupal
In this article, we will discuss on how to update the Modules of your Drupal-based website.
Updating the Modules of your Drupal application is an essential step in keeping your website in a good health. Usually updates provide better functionallity and fixes of bugs regarding the modules you are using.
IMPORTANT: Before updating the modules or themes of your Drupal application, always create a backup copy of the website and it's database.
The first step in updating the Drupal Modules is to login into the Administrative Panel of the Drupal application.

In order to be able to update Modules, we will need to first install the core module "Update Manager". This can be done by navigating to the "Extend" section of the Administrative Panel. Simply scroll down until you find the "Update Manager" module and select the box infront of it.

Once you select the module, simply scroll down to the bottom of the page and click on the "Install" button on the bottom of the page.
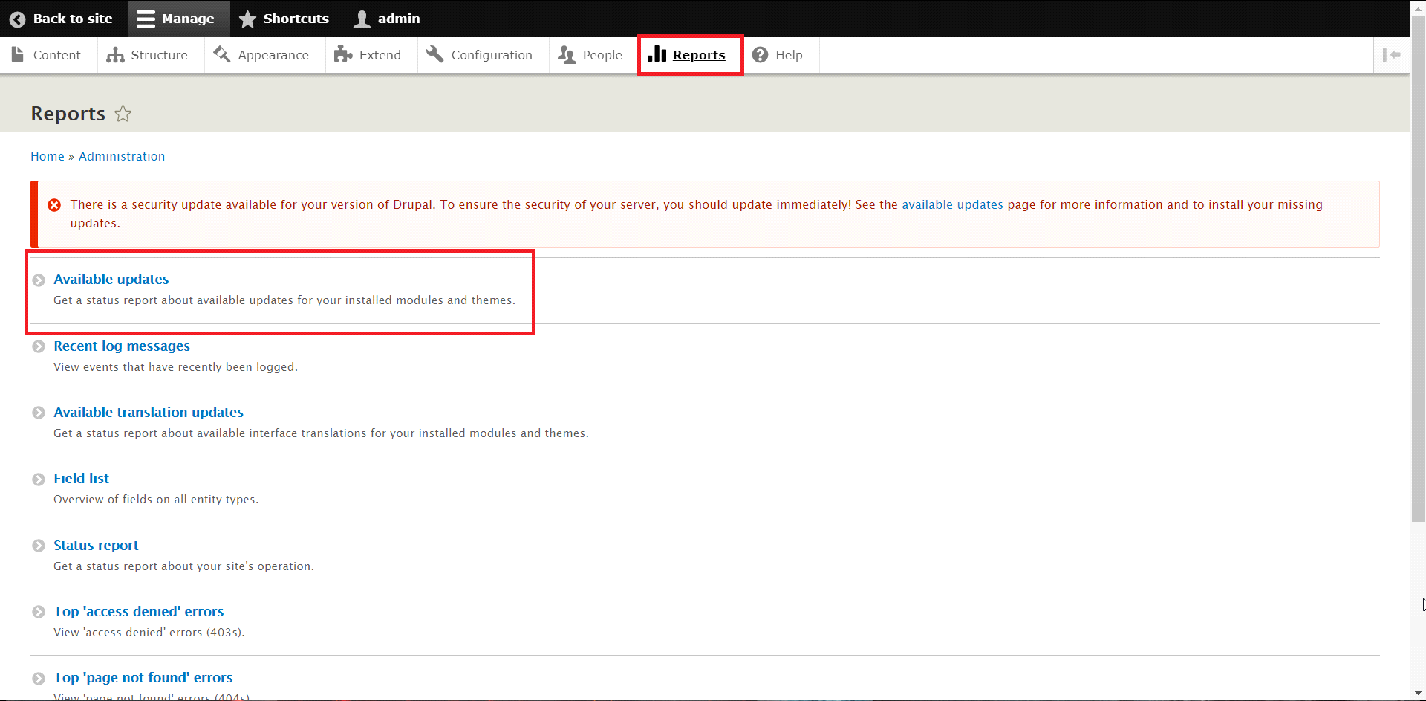
Now that we have installed the "Update Manager" module, we can proceed in checking the Modules for updates. In order to check for updates, navigate to the "Reports" section of the Administrative panel and then select "Available updates".

Once inside the "Available Updates" page, we have to click on the "Check Manually" link in order to check for available updates.

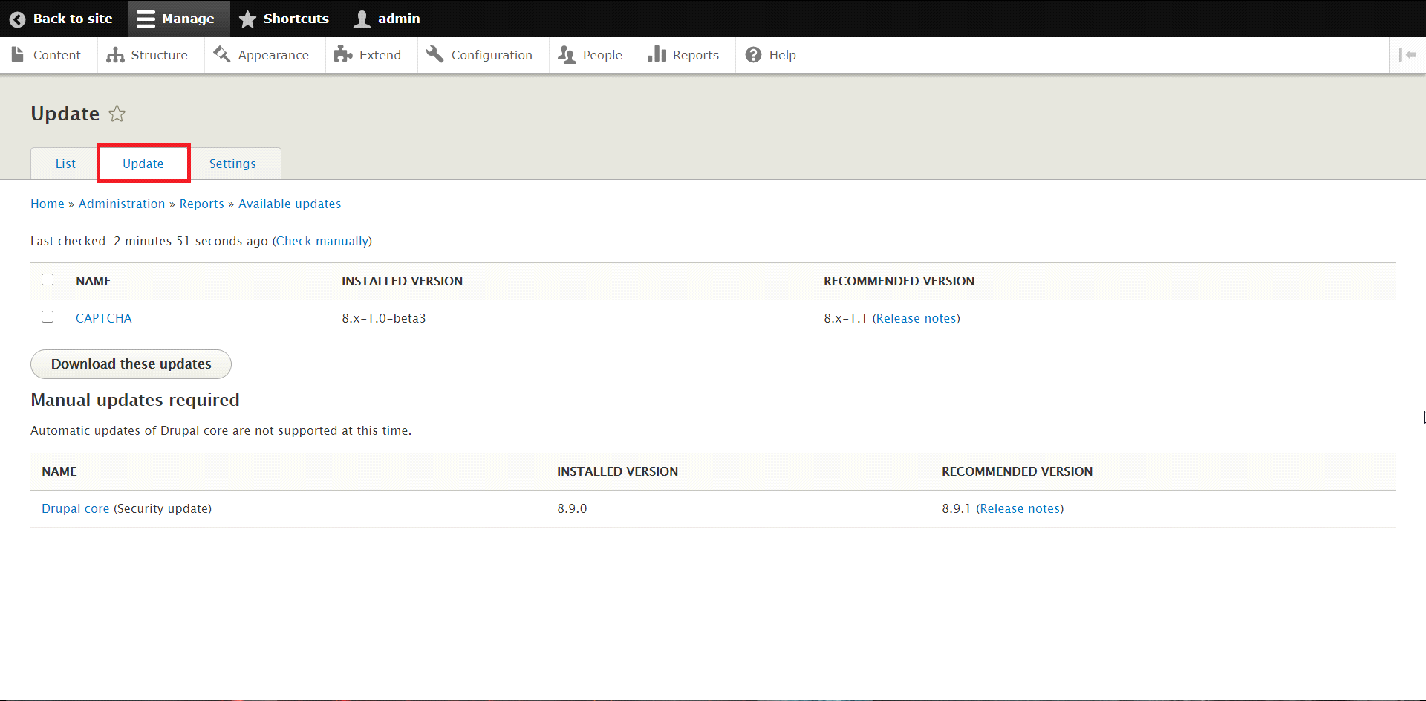
When clicked, the page will be refreshed with updated information regarding the available updates for the Modules of the Drupal website. As an example, there is an available update of the "CAPTCHA plugin stated on the bottom of the page.

Now that we have checked for available updates, we may proceed in updating the Modules. We have to navigate to the "Update" tab at the top of the page.

There, select the checkbox infront of the Modules that you would like to update and then click on the "Download these updates" button.

Once the updates are downloaded you will be redirected to a new page, where you have to confirm that you would like to update the modules by clicking on the "Continue" button.
Keep the "Perform updates with site in maintenance mode (strongly recommended)" option checked as it would automatically set your website in Maintenance mode which is recommended for this process.

Once the installation process completes, you will then have to click on the "Run database updates" in order to update the database with the new records.

Once the process of updating the databases completes, the Modules will be successfully updated for your Drupal application.
Since the website is now in maintenance mode, in order to restore its normal functionallity, we will have to disable the maintenace mode.
Navigate to the front page of the Drupal website and a new message will appear regarding it.

Simlpy click on the "Go online" link in order to proceed to the next step. You will now be redirected in the "Maintenance mode" section of the Administrative Panel.
There, uncheck the option "Put site into maintenance mode" and then click on the "Save configuration" button in order to successfully disable the Maintenance mode of your Drupal website.
