Skip to content
In some cases, you may need to manually install Drupal, which we will learn how in the following article.
The first step would be to navigate to the official Drupal website and downloading the latest stable version.
After downloading the archive containing the latest version, you should then proceed with uploading it to your account and in the document root of the domain which you would like to use for your new online project with Drupal. This may be easily achieved through your cPanel’s File Manager tool or via an FTP connection with your account.
You could also create a sub-directory and place the archive inside, in case you would wish to use a sub-directory for your online project.
Once the archive has been uploaded, you would need to extract its content inside the directory.
We would like to mention that extracting can be easily achieved through the File Manager, however, if you are using an FTP connection, you would need to extract the archive on your local device and then upload the files.
Prior to continuing with the installation, we would first need to create a new database and a database user. This could be achieved through your cPanel’s Database Wizard.
You would simply need to navigate to it and follow the onscreen instructions on creating the database name and user.
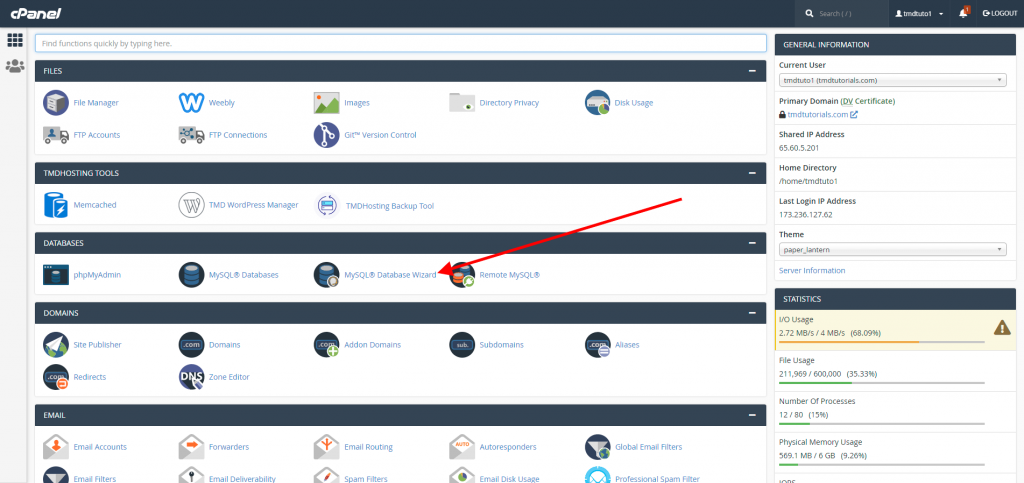
Don’t forget to save the exact database name, user, and password as you would need it further down the installation process.
Once done with the database creation and all of the Drupal files are placed in the designated directory, we may proceed with the installation. In order to do this, we would need to navigate to the exact URL of the domain, which document root you have used to place the application’s files inside.
For example https://mydomain.com.
If the application’s files have been placed in a sub-directory named “drupal” for example, you would simply need to navigate to:
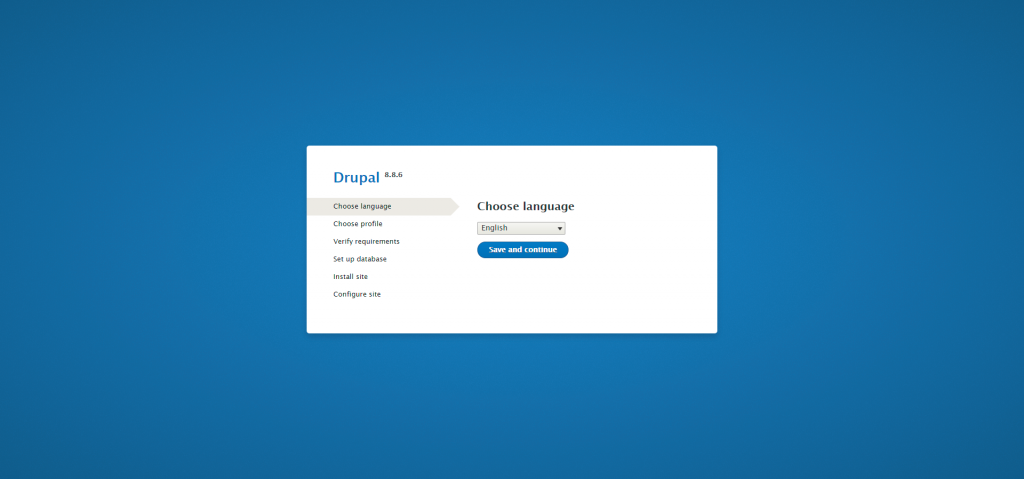
Upon accessing the URL, you would be taken to the installation wizard.
The first step would be to select the desired language that the application would operate in:
Once ready, you may proceed to the next step, which would ask you to choose a profile.

The types of available profiles are the following:
- Standard:
This would install the default Drupal experience, with all of the common features pre-configured.
- Minimal:
This would install Drupal without any pre-configurations, which would allow you to build anything from scratch. ( Please note that this profile is suitable for advanced users. )
- Demo
This profile would deploy a demo site, which would provide you with the ability to test out a fully built website.
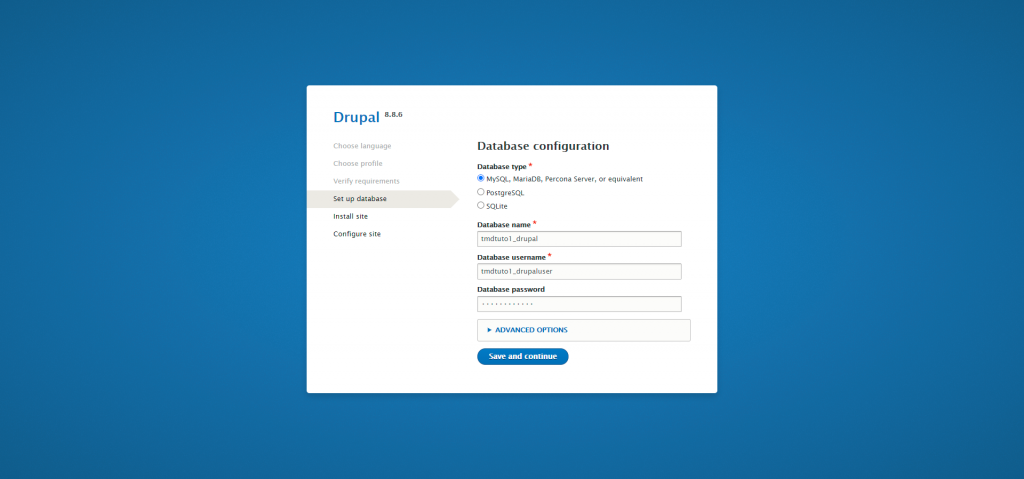
The next step would be to enter the credentials of the database that you have just created.
Once ready, please click on the “Save and continue” option, which will begin the deployment process.
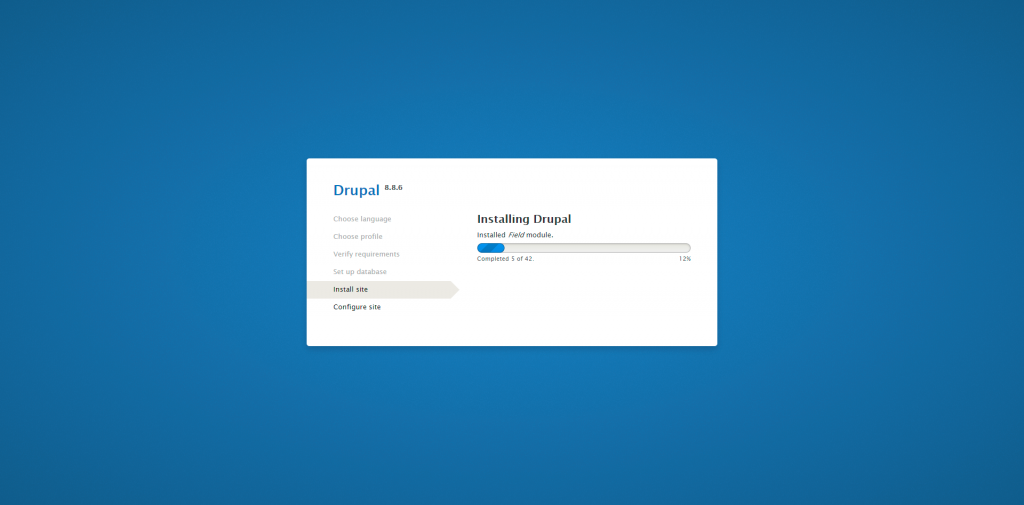
Once the progress bar reaches 100% you will be taken to the last step of the installation process.
Here you would need to input the following details:
- Site name – the name that you would wish to use for your Drupal website.
- Site email address – the email address that will be used to send out website related notifications to your customers.
- Username – the administrative account’s username
- Password – the administrative account’s password
- Email address – The email address that you would use for your administrative account.
Optional details:
- Default country – the country where your business resides
- Default time zone – the time zone for your website.
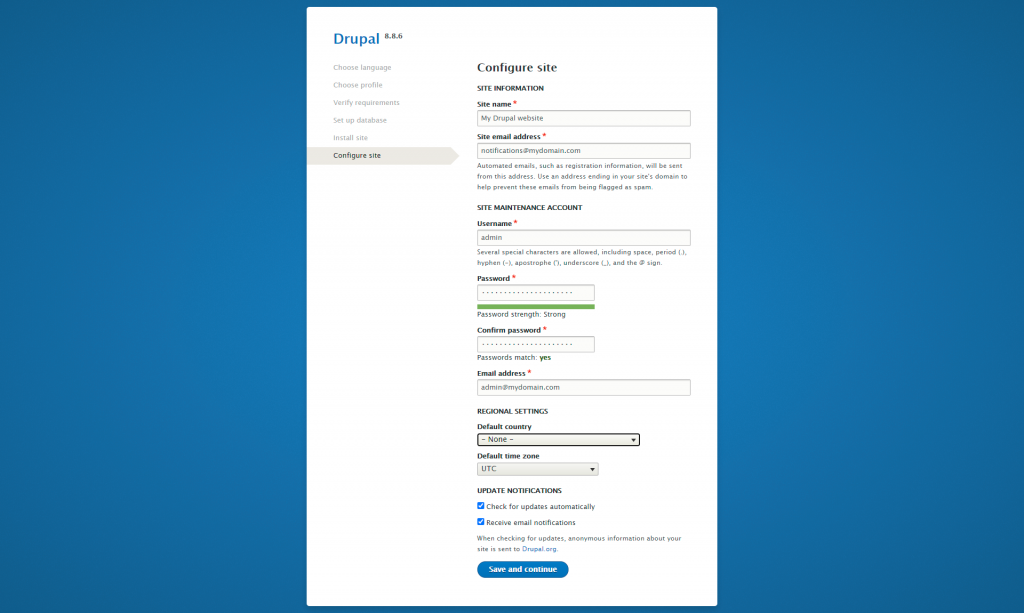
When you are ready and all of the information has been entered, simply select the “Save and continue” option once again to finalize the installation.