 Skip to content
With our vTiger CRM hosting packages you have access to a variety of amazing features and will be able to achieve great results. Here, we are going to focus on describing the steps towards one of the key processes – those of how exactly to create a new contact on vTiger CRM.
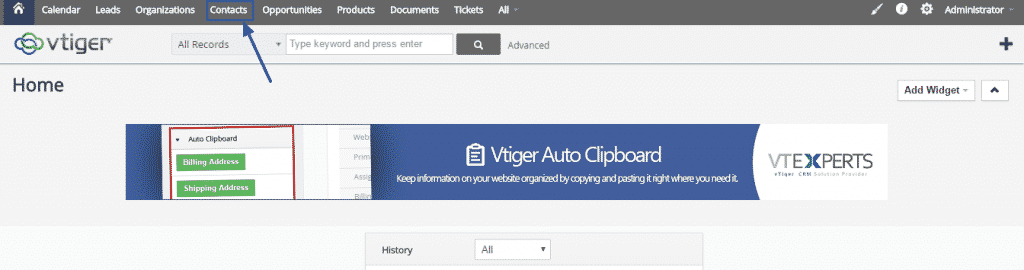
It is actually an extremely easy thing to do. As with other features – it is designed to be executed effortlessly and intuitively. You just need to follow a couple of steps. The first thing you need to do is to access your vTiger CRM’s Administration Panel. Once you are there, simply locate the Contacts option at the top of the page and click on it:
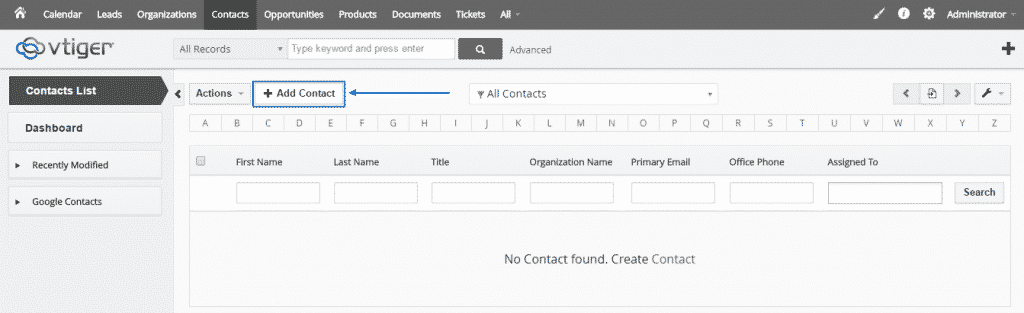
It will lead you to the Contacts main page, where you will just need to select the Add Contact button, with the plus sign in front of it, in order to proceed further:
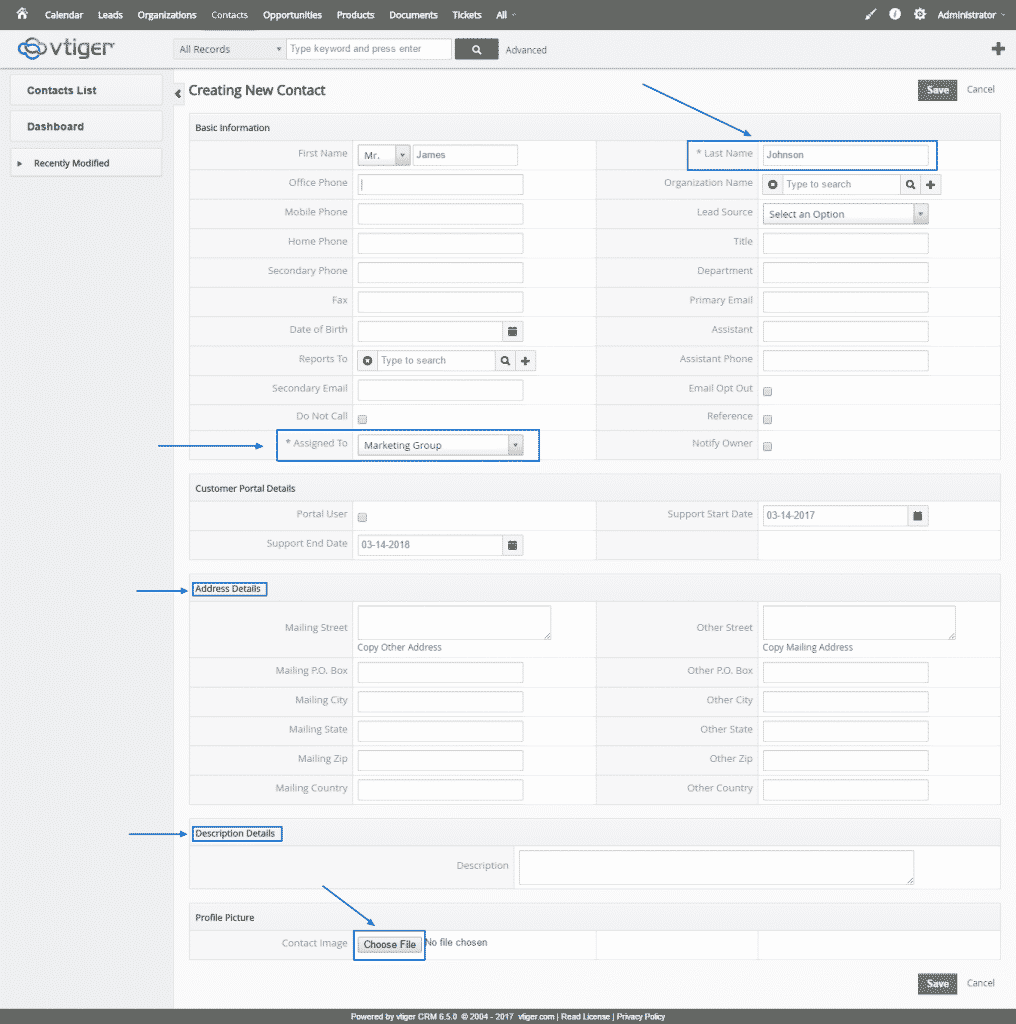
Afterwards, you will be redirected to the Creating New Contact area of your vTiger CRM. You will see, that there are multiple sections, where you can put information about the new contact, namely: Basic Information, Customer Portal Details, Address Details, Description Details and Profile Picture, where you have the option to upload a file from your computer. Which sections you decide to fill in is totally up to you, but make sure you do have input in the Last Name and Assigned to rows, as they are mandatory to be filled in:
Finally, when you make sure that everything is filled in correctly, your only step needs to be to click on the green Save button, either at the top or at the very bottom of the page and the process of creating a new contact in vTiger CRM would be successfully complete:
