 Skip to content
In this tutorial we are going to show you how to install Elgg social networking platform manually. Before we start, you should prepare for the installation procedure. First, download the latest available Elgg package from their official website at:
https://elgg.org/download.php
Upload all of the archive files in the directory where you wish to install Elgg. You can upload the files via FTP. You can check our FTP tutorials at:
https://tmdhosting.com/tutorials/video/ftp.html
Once you have uploaded the script, create a folder outside your public_html folder. This folder will be used by Elgg to store its data. You can name it something “elggdata”.
The next thing you will need to do is create a MariaDB database and user for that database. This can be easily done via cPanel > Database Wizard.
Now you can start the installation process. In your browser navigate to:
https://yourdomain.com/install.php
If you have uploaded the Elgg script in a subfolder, for example, a folder called “elgg”, start the installation process by accessing:
https://yourdomain.com/elgg/install.php
This will bring the first step of the installation process:
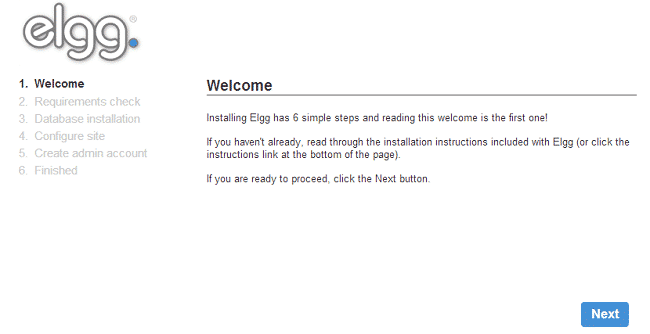
Click the “Next” button to proceed to the second step. Elgg will check if all server requirements are met to run the script:
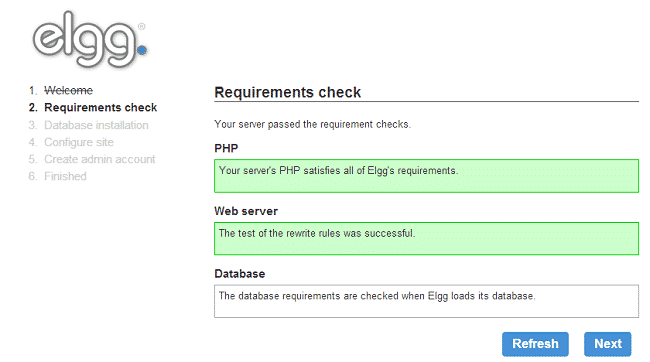
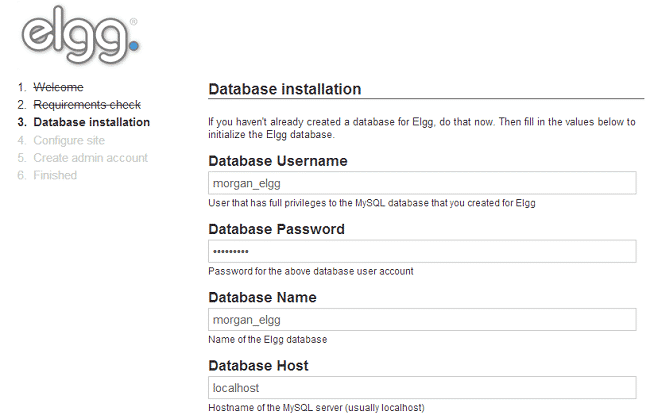
Click the “Next” button again. You will be taken to the third step where you will need to fill your database details. You have created those earlier, so simply input them in the corresponding fields:
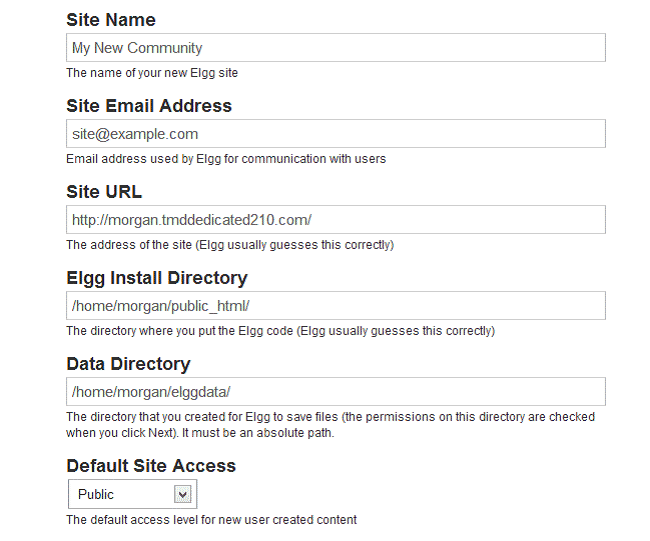
Proceed to the next page when you have filled in the information. On the forth step, you will need to enter some details about your site:
Site Name
Site Email Address – this is the email address that Elgg uses to communicate with your site users
Site URL – this will be auto filled by the script
Elgg Install Directory – this should also be filled automatically by the script. If it is not input the directory where you have uploaded the Elgg script
Data Directory – type the name of the folder you have setup earlier for elggdata
Default Site Access – choose the access level for content created by users
Proceed to the next page. On the fifth step enter your Elgg admin user details:
Display name
Email Address – make sure to use a valid email address as you might need that later
Username
Password
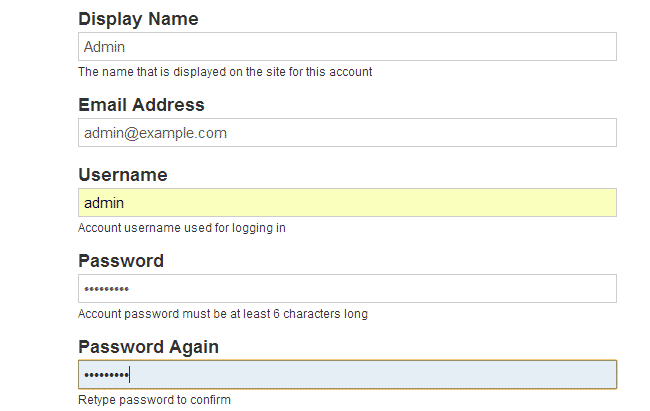
Proceed to the next page. Your Elgg installation has been successfully completed:
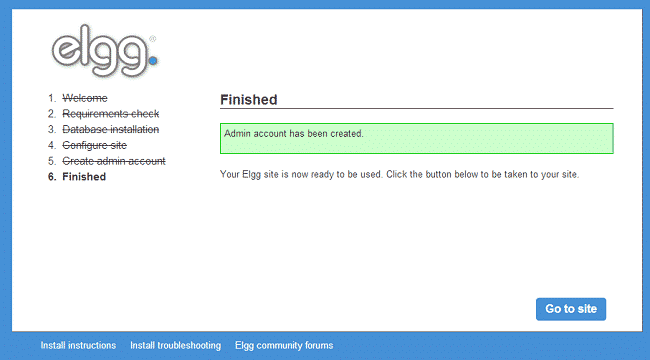
You can now login to your Elgg website.