 Skip to content
With this Claroline hosting package you will never be on your own. Our expert Claroline technical support team will make sure that you have a bug-free and secure Claroline installation in less than 10 minutes, complete free of charge.The Claroline installation can be requested from the client’s area -> Get Support section -> Submit Support Ticket.
1.Create MariaDB database and user for Claroline
Prior to install Claroline, you have to create a MariaDB database and add a user with all privileges to it. You can do this by following the simple steps below or our video tutorial available at: Create MariaDB data base.
Log into your cPanel (located at https://yoursite.com:2082 for your domain) Go to Database Wizard. Here your preferred database name should be entered. Then, click “Next Step.
This will create a database in the format of cpanelusername_databasename, where cpanelusername is your cPanel account login username with TMDhosting. Databasename is the name you have typed for your database – in this tutorial we’ve used claroline.
Now scroll down to Users. Enter a username and password, and then click Add User.
This will create a username in the format of cpanelusername_username, where cpanelusername is your cPanel account login username with TMDHosting, and username is the one you have just created for your new database.
Please, scroll back up to locate the two drop down boxes with a button that says [Add User to Db].
In the drop-down select box on the left, choose your newly created username, and in the box on the right, choose your newly created database. Click Add User to Db.
2.Claroline download and installation
The above steps cover all the required actions you have to take regarding your database creation process. When you are ready you can download the installation package of Claroline. You can download Claroline from here. You will need the Claroline 1.x.xx package for Unix, Linux, Mac OS X.
When you have your Claroline installation package downloaded on your local computer, please extract the content on your local computer. You can upload the content of the Claroline folder from your local computer to your public_html directory using your favorite FTP client by following the instructions in our tutorial here.
When all the steps above are completed you may access your Claroline installation under your account via your browser using https://yourdomain.com/claroline/install.
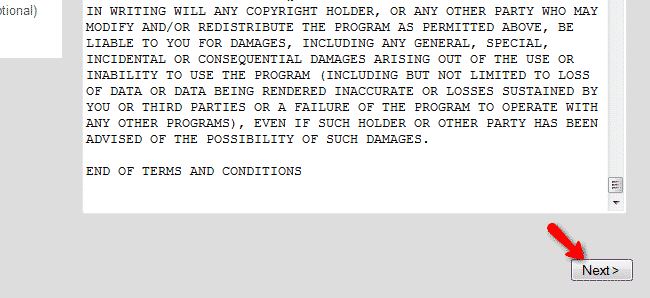
On the welcome page of your Claroline installation you will be provided with the general public license under which Claroline is licensed. Please review the license and proceed by clicking on the Next button.
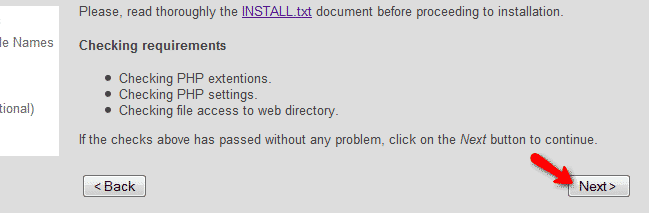
The second step performs a system configuration check. TMDHosting servers are fully compatible with Claroline and your checks should be passed without any difficulties. You may proceed with the installation by clicking on the Next button.
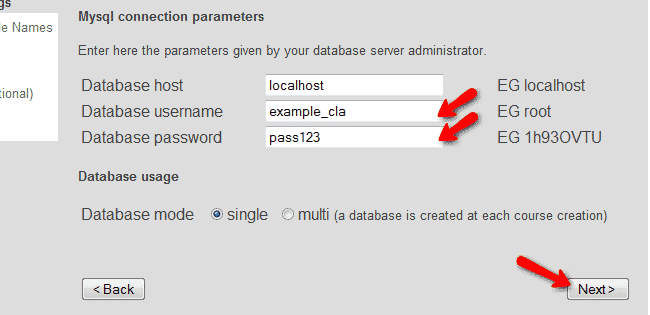
The MariaDB Database settings page requires the Claroline MariaDB database username and password to be input as well as the database host. Please use localhost for your database host and the username and password for your MariaDB database that you have created earlier.
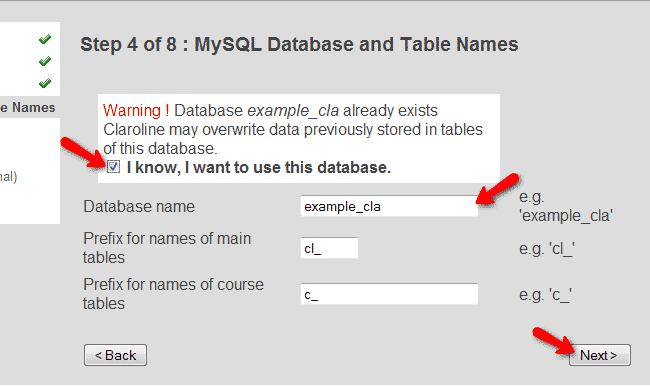
On the next step you should input your MariaDB database name and check the box that you are aware of the fact that this database exist and you would like to use it. You may proceed with the installation process and click on the Next button.
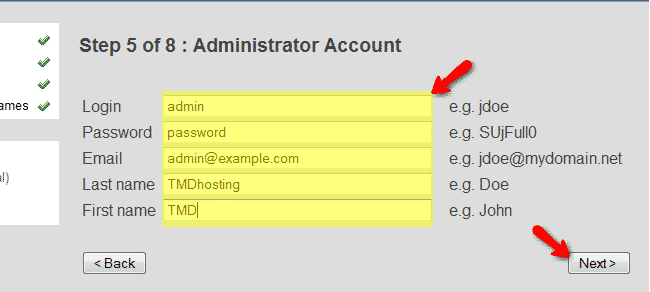
On the fifth step you can create your administrative account and set your personal information.
You can change your site name and main language settings via the platform settings page. Additionally, you can change your registration policy and password storage algorithm.

On the next page you can set related organization and campus contacts which are option steps and you can safely proceed by clicking on the next button.

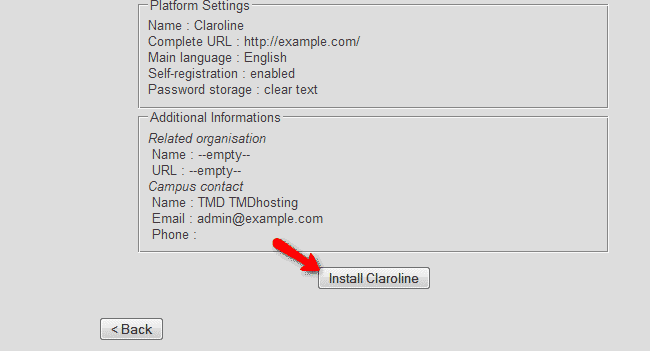
The last page of the installation provides you with a summary of all the applied settings. To complete the installation process, please click on the Install Claroline button on the bottom of the page.
If your installation is successfully completed you will be displayed with the following message:
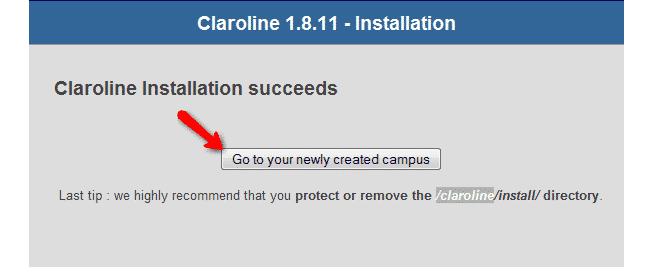
Be advised that you should remove the installation directory from your account for security reasons. You can perform this via your favorite FTP client. Simply access your account via FTP with your FTP client and navigate to the public_html/claroline/ directory where you should be able to locate the install/ directory. You can either rename or completely remove this folder.