 Skip to content
In this tutorial you are going to learn how to install aTutor manually. But before you start you should prepare a few things:
Create an empty MariaDB database using cPanel > Database Wizard.
Prepare the aTutor installation files. You can download the files from their official website at:
http://atutor.ca/atutor/download.php
You will have an archive of the folder containing all the required files to install aTutor. Upload the content of that folder in your account via FTP. If you want to access your site using https://yourdomain.com/ you should upload the files in the /public_html/ directory. If you prefer to access the site using https://yourdomain.com/lms/ upload the files in /public_html/lms/ . You can follow our FTP video tutorials at:
https://tmdhosting.com/tutorials/video/ftp.html
To start the installation process access the script using your browser. For the purpose of this tutorial we have uploaded our script in the public_html folder of our account. The installation process can be started using:
https://yourdomain.com/install/
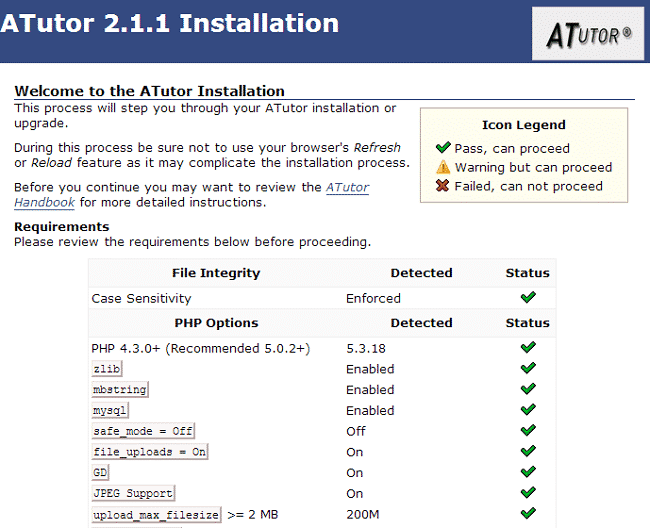
Now you should see the welcome screen of the ATutor installation:
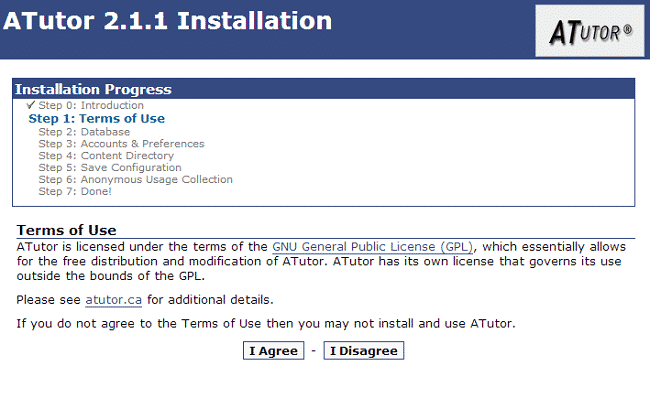
To proceed to the next step, scroll down to the bottom of the screen and click the “Install” button. On the next page you will see the terms of the user agreement. ATutor is licensed under the GNU general public license, which means that you can use the script for free and apply different types of modifications to it. Click the “I Agree” button to proceed to the next step:
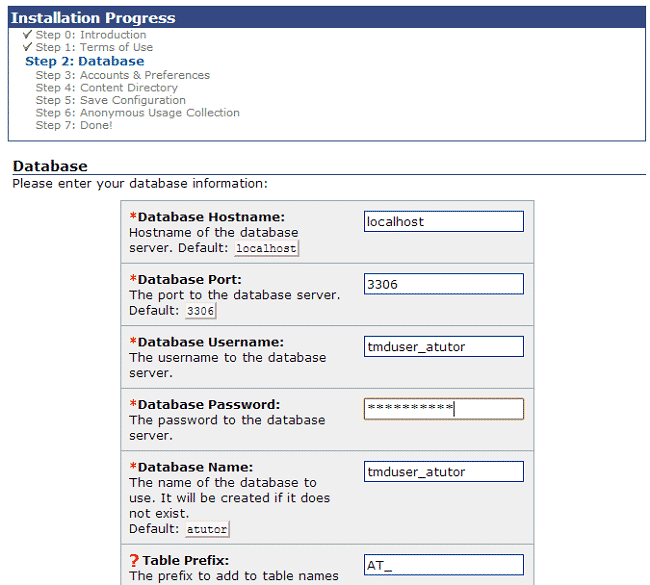
On the next page enter the MariaDB database details that you have created in the beginning of this tutorial:
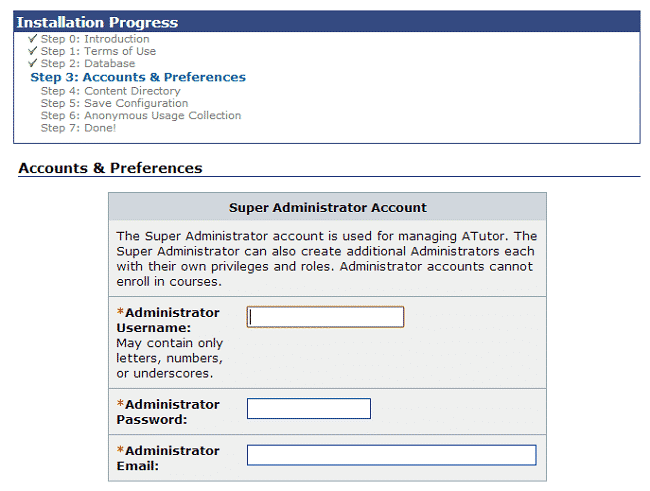
Proceed to the next step. The script will create the database tables. Wait for the process to finish and click the “Next” button. Now you will need to create your administrator’s account , system preferences and personal account. All the fields are self-explanatory, simply enter your preferences:
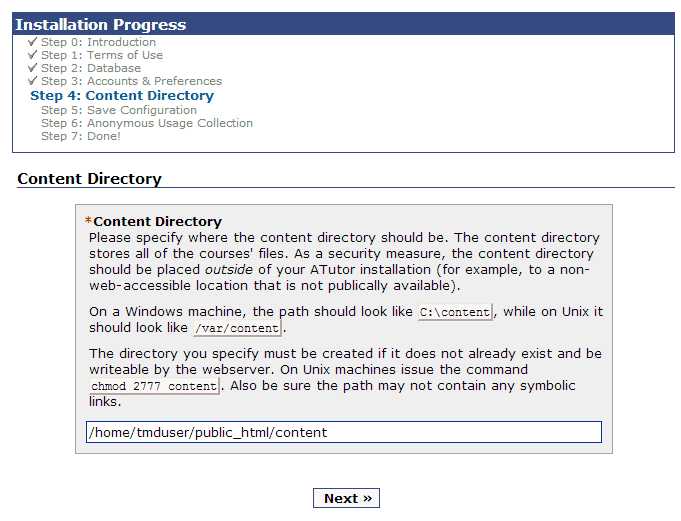
Click the “Next” button when you are done. ATutor will require you to set the path to your content directory. You will have to create new empty folder where you would like to store your ATutor data. You can easily create the file via FTP or cPanel > File Manager. Once you are done, fill in the path to that folder:
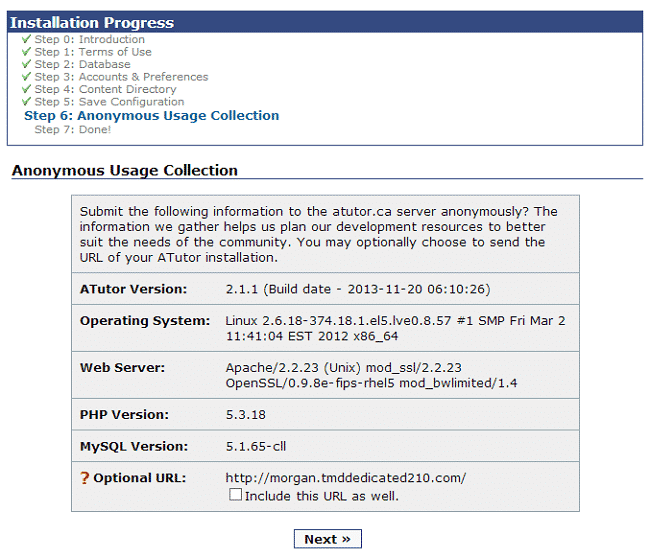
Again, click the “Next” button. The script will save the information you have set so far in its configuration file. Proceed to the next step. The script will submit the installation data to atutor.ca so that they can use the information to better suit the needs of their script users:
Click the “Next” button to finish the installation. Before you login to your website, make sure to remove the “Install” folder from your ATutor root directory and set read only permissions to the config.inc.php file. You can then safely login to your ATutor website:
