 Skip to content
With this Pligg hosting package you will never be on your own. Our expert Pligg technical support team will make sure that you have a bug-free and secure Pligg installation in less than 10 minutes, complete free of charge. The Pligg Installation can be requested from the client’s area -> Get Support section -> Submit Support Ticket.
Pligg CMS is a PHP/SQL application and as such you will need to download the installation files from the official Pligg CMS website first. After having your PliggCMSversion.zip (the version number is changing when a new release is available) file downloaded, please extract it to your local computer. The extracted files should be uploaded under your hosting account where you would like to have Pligg installed. This can be done via a FTP client by following the instructions in our great ftp video tutorial.
If you would like to have your Pligg website directly accessible from https://yourdomain.com you should upload the files under the public_html directory. Alternatively, if you would like to have it located under a subfolder you could create a subdirectory under your public_html folder where the files should be uploaded. If you upload your files under /public_html/pligg/ your Pligg installation will be accessible from https://yourdomain.com/pligg.
As soon as your files are uploaded to your account, you should proceed with the MariaDB database creation process. You can easily create a MariaDB database for your CMS by using the Database Wizard in cPanel to set up the database and assign a user with the necessary privileges.
Once you have completed the above explained steps you could initiate the installation process. The setup is pretty fast and will start when you access:
https://yourdomain.com/install/install.php
The initial installation page will load:
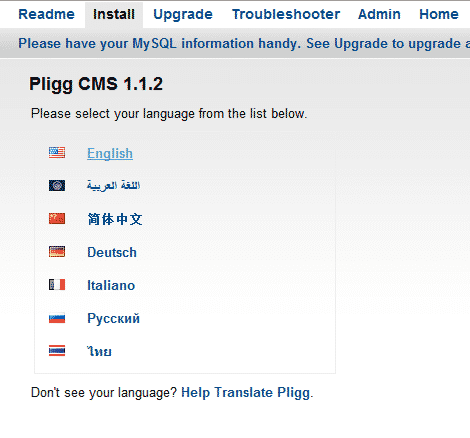
You will be asked to select a language for the CMS. We will select English as a language for this installation.
On this step as we are setting up a new installation we will just click on the “Next” button at the very bottom of the page.
Here you should type in the database details you have created at the beginning of this tutorial:
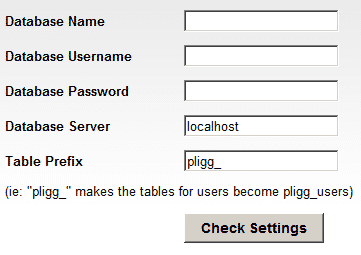
The host should be ‘localhost’ (without the quotes). Note that depending on the server configuration the host for the MariaDB access can be different. If you experience an error on this step contact your hosting provider and request the needed information. If you have an account with TMDHosting you could post a ticket and our Support Team will provide you with the requested details within minutes.
In the third step a check will be performed if the database access details were filled correctly. If there are no errors detected it will update the configuration file of the script.
After you click the next button all the required database tables will be created and at the very bottom you will be asked to set your administrator account:
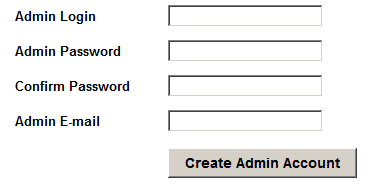
You should ensure that you have used a valid e-mail box for the administrator account setup. This e-mail box will be used for the delivery of various notifications and also in the cases when you need to reset your administrator password. When you click the creation button at the bottom of the form you will be provided with all the required information to access the CMS back-end and front-page:
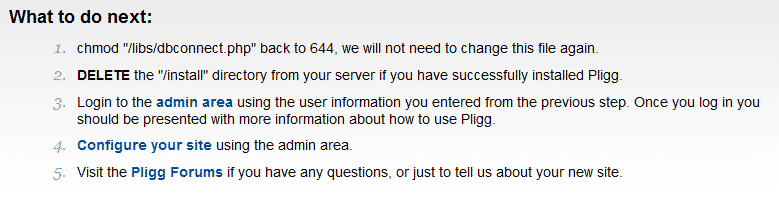
The first two steps from the list could be completed by using your FTP client. When the recommended actions are completed you could start building your website. The administrator back-end should be accessible via:
https://www.yourdomain.com/admin/admin_index.php