 Skip to content
In this tutorial you are going to learn how to install EGrupware manually. Before that you will need to prepare a few things. First, create a MariaDB database using your cPanel > Database Wizard. The wizard will guide you through the whole process. Second, you will need to download the latest version of Egroupware from their official website at:
https://www.egroupware.org/download
Once the files have been uploaded, start the installation process by accessing:
https://yourdomain.com/setup/
You will see the first step of the installation:
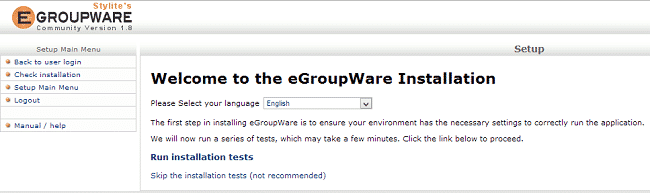
To make sure that the all requirements for running the application are met you can run the installation tests. If you want to you can skip directly to the installation. On that page configure the following details:
Server Root – path to your EGroupware files
Header username
Header Password
DB Name – enter the database name you created earlier
DB User – enter the database user you created earler
DB Password- the password you have set for the above database user
Configuration user
Configuration password
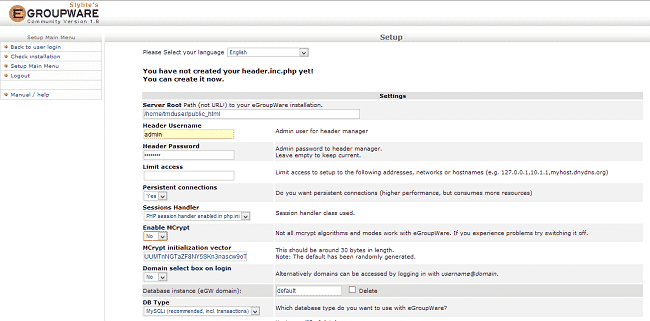
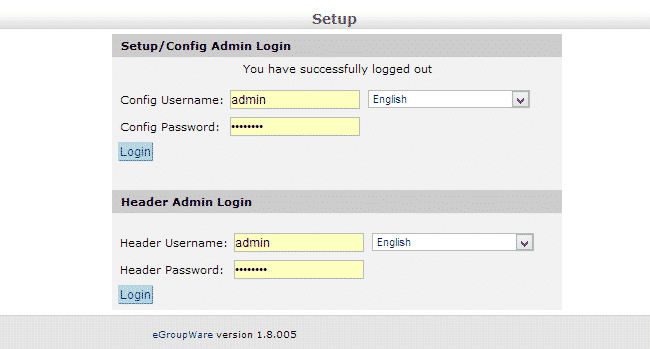
Click the “Write” button to create the configuration file of your installation. On the next screen you can login to the “Setup/Config” page to install your applications:
You can install all applications by clicking the “Install” button:

Now go back to step 2 to configure the script applications:
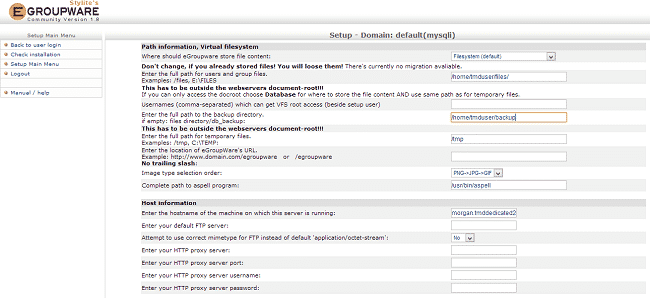
Where required, set the absolute path to the files and backups for your Egroupware installation. For example:
/home/tmduser/files
And
/home/tmduser/backups
To configure the SMTP settings for the application use:SMTP Server Hostname: mail.yourdomain.com
SMTP Server port: 25
User For SMTP authentication: [email protected]
Password for SMTP authentication: your account’s password
In the above example change yourdomain.com with your actual domain and the email account with the actual email address that you have created in your cPanel -> Email Accounts.
Click the “Save” button when you are done.
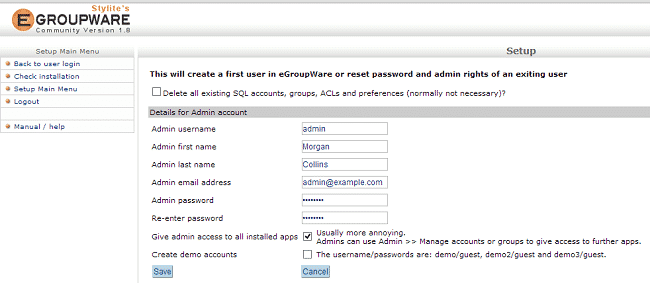
Now go to step 3 to configure your admin account:
Once you have created the admin account you are done with the installation. You can go to the main login screen to access your Egroupware installation.